Concrete Driveway Cost 2026
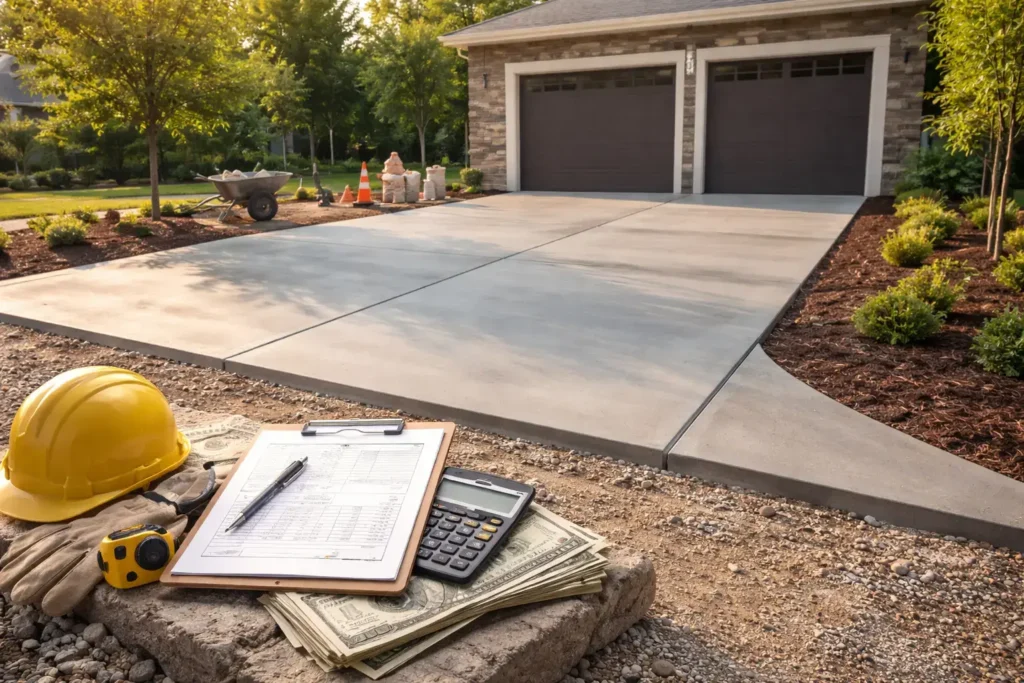
You need to know that how much will concrete driveway cost 2026 before you can plan a new one. The cost of your driveway can change depending on how big it is, what materials you use, and how much work needs to be done to get the ground ready. When you know these costs ahead of time, it is easier to keep your project on track and avoid delays.
A driveway is not just a place to park your car. It makes your home worth more and makes the outside of your property look better. That’s why it’s important to plan ahead and know where your money will go. You can make a strong, long-lasting driveway without spending too much money if you do it the right way.
Important Things That Affect the Final Price
There are a lot of things that can change how much you pay for a concrete driveway. The size of the area is one of the most important things. It costs more to make a bigger driveway because it needs more concrete and more work. Also, the thickness is important because a thicker slab uses more material and takes longer to put in place.
Another important thing to think about is how your land is doing. The price will go up if the ground is uneven or there is old concrete which needs to be taken out. The price can also be affected by the quality of the soil, the need for drainage, and the weather in the area. You can plan better and avoid costs that come up unexpectedly during the project if you know these things.
Average Price Expectations for 2026
The price of putting in a concrete driveway in 2026 will depend on where you live and the design you choose. A simple driveway is usually cheaper and looks cleaner and simpler. Adding the decorative features like stamped or colored concrete can raise the total cost.
It’s easy to figure out how much something will cost if you know how big your driveway is because prices are usually given per square foot. It is always a good idea to get quotes from more than one contractor. This lets you look at prices and pick a good one. It’s easier to make a realistic budget when you know what the average costs are.
Breakdown of costs for materials and labor
The main costs of a concrete driveway are the materials and the work. Cement, sand, gravel, and water are some of the things that go into making it. The price of these materials can change depending on supply and demand. Materials of higher quality may cost more, but they often last longer and work better.
Another big part of the cost is labor. Skilled workers charge more, but they do a better job. It’s important to install things correctly because mistakes can cause cracks or surfaces that aren’t even. If you pay for good work now, you won’t have to pay as much for repairs and maintenance later.
Ways to Cut Costs Smartly
Careful planning can help you save money on your driveway project. One easy way is to plan your project for a time when there isn’t as much demand. During slower times of the year, contractors may be able to give you better prices. Getting more than one quote also helps you get the best deal.
Another way to save money is to keep your design simple. Patterns and finishes that are fancy may look nice, but they cost more. Even if you pick a simple design, you can still have a strong and neat driveway. You can stay within your budget and still get good results by making smart choices.
Picking a contractor who is skilled and trustworthy
One of the most important things you can do for your project is hire the right contractor. A good contractor will help you understand the process and make smart choices. They will also give you clear estimates and finish the job on time.
Read reviews and ask for examples of past projects before hiring someone. A trustworthy contractor will have a good name and be able to talk to you well. If you hire the right professional, your driveway will be built correctly and last for many years without any major problems.
Planning for long-term value and maintenance
A concrete driveway is a good long-term investment that can last for many years. Concrete is a good choice because it lasts a long time and is very strong, even though the initial cost may seem high. Cleaning and sealing the surface on a regular basis helps protect it and make it last longer.
Taking care of your driveway also makes your home look better. A clean and well-kept driveway makes a good first impression. This can make your property worth more over time. Investing in the right care will help you get the most out of your driveway.
How location affects prices
Where you live has a big effect on how much your driveway will cost. Prices for materials and work can be different in different places. The overall cost goes up because transportation costs for materials may be higher in some areas.
The weather in your area can also have an effect on prices. Some places with very hot or very cold weather may need special concrete mixes. These mixes may cost more, but they last longer. Knowing how location affects prices can help you make a more accurate budget.
Read more: How to Find Reliable Construction Estimating Company in US 2026?
Why it’s important to prepare the ground correctly
Before pouring concrete, it’s very important to get the ground ready. This process could involve clearing the area, leveling the soil, and putting down a base layer. The concrete will stay stable and not crack over time if it is prepared correctly.
If you skip or rush this step, you could have problems later. The driveway can move or break if the ground is not level. Spending money on good planning may raise the initial cost, but it saves money in the long run by avoiding repairs.
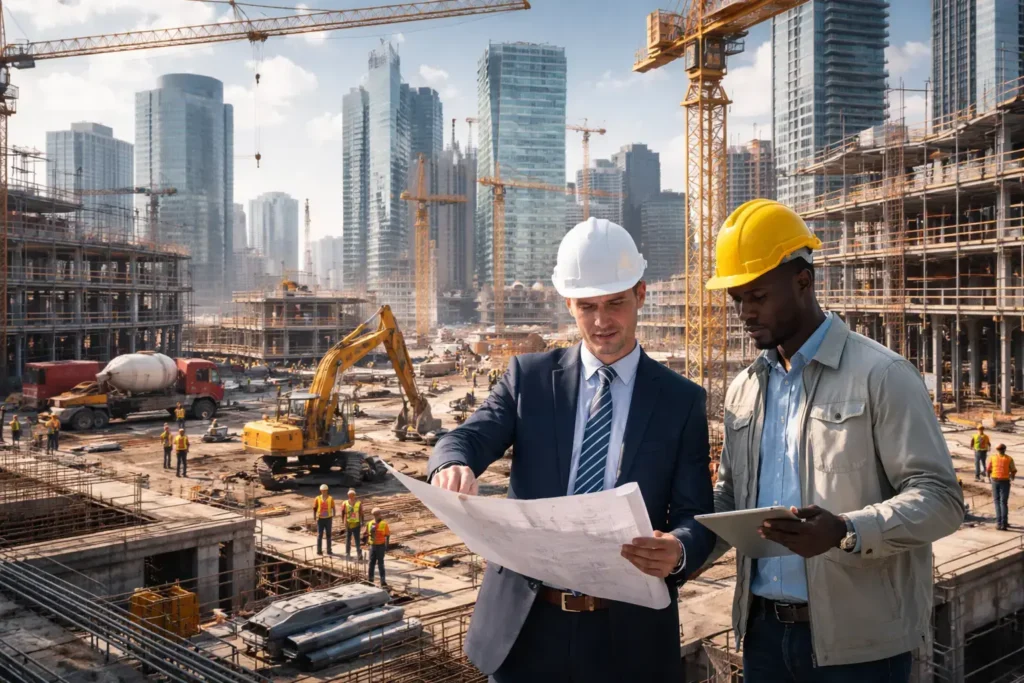
How to Find Reliable Construction Estimating Company in US 2026
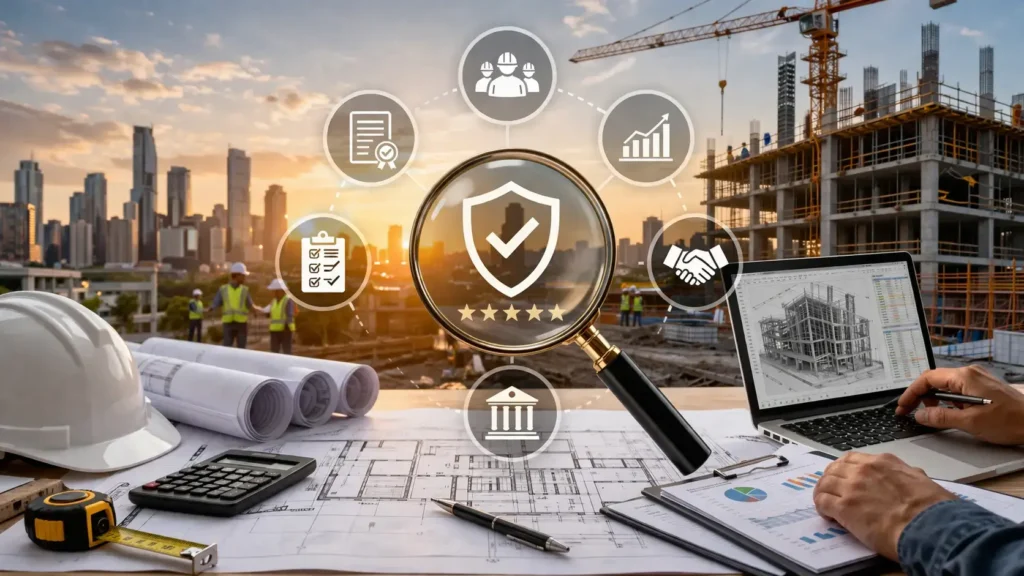
How to find reliable construction estimating company in US 2026 is one of the most important steps before starting any building project. A reliable company will let you know the total cost of your project ahead of time. This makes it easier to plan and lowers the risk of running out of money later. Good estimates also help you stay organized from the start and avoid delays.
There are a lot of estimating companies to choose from, which can make it hard for people to decide. It can be hard to tell which one will work best. If you take your time to look into and compare companies, you can make a smart choice. Choosing the right company makes your project easier to handle and less stressful.
Check Experience and Knowledge of the Industry
One of the most important things to look for in a construction estimating company is experience. A business that has been around for a long time knows how to handle different kinds of projects. They probably have worked on homes, offices, and other buildings, which helps them give more accurate cost estimates. They know how to handle both simple and complex projects because of their past work.
A company with a lot of experience can also handle problems that come up out of the blue. Prices for materials can change, and plans for a project may need to be updated. A skilled team knows how to change estimates without making things confusing. This helps your project go smoothly. Always ask about their past work and make sure they have worked on projects like yours before.
Look for good reviews from clients
Reading reviews from clients is a good way to find out how well a company does its job. If a lot of people say nice things about a company, it usually means they do good work. Reviews can show how good they are at talking to clients and how accurate their estimates are. This information can help you make a better choice.
You should look at reviews on different websites. Don’t only trust one source of information. Look for things that are the same in all the feedback, like honesty, being on time, and being professional. A company is more likely to be trustworthy if most of its reviews are good. This step gives you more confidence before you make your final choice.
Look at the tools and technology that were used
In the modern construction estimating, technology is very important. Businesses that use more advanced tools can get results that are more accurate and faster. These tools help you to figure out that how much materials, labor, and time will cost more accurately. This cuts down on mistakes and helps you understand your project budget better.
It’s also easy to change estimates when you use modern tools. The company can quickly change the numbers if the details of your project change. This saves time and keeps things clear. If you pick a company that uses up-to-date technology, it shows that they care about quality and accuracy. It also makes sure that you get accurate and current information.
Look at the prices and how open they are.
When picking an estimating company, it is very important to know that how much they charge. A trustworthy business will be clear about how they figure out prices. They will give you detailed estimates that show you where your money is going. This helps you avoid fees and costs that come up later without you knowing.
It’s also a good idea to look at prices from different companies. It helps you figure out what a fair price is in the market. But the lowest price isn’t always the best option. A business that offers very cheap services might not give you accurate quotes. When you make your choice, think about value, clarity, and trust.
Check for help and communication
Good communication is very important for any construction project. It should be easy to get in touch with a trustworthy estimating company, and they should respond quickly. They should be happy to answer your questions and explain things in a way that is easy to understand. This makes you feel more sure and helps you understand your project better.
Strong support also means that the company stays in touch with you while the project is going on. They should let you know about any changes or updates to the estimate. Clear communication makes things less confusing and stops mistakes from happening. When a business talks to you clearly, it makes things easier and less stressful for you.
Check the credentials and licenses
Before hiring a company, it’s important to check their license and credentials. A company that is licensed follows the rules and standards of its field. This shows that they are serious about their jobs and do what is expected of them. Certifications also show that their team has the right training and skills.
You should also find out if the business follows safety and legal rules. This keeps you safe from dangers while you work on your project. A company that has the right credentials is more likely to give you good service. Taking the time to check these facts can help you avoid problems in the future and give you peace of mind.
You may like to read: Concrete Cost Calculator 2026.
Find out how long it will take to turn around
Time is very important when building things. A good estimating company should be able to give you estimates in a reasonable amount of time. Quick service lets you get started on your project right away and keeps it from being late. But speed shouldn’t make things less accurate. It’s important to find a good balance between speed and quality.
Find out how long it usually takes the company to finish an estimate. This makes it easier for you to plan your project schedule. A trustworthy company will give you a clear timeline and stick to it. Being on time shows that you are professional and helps your project move forward without having to wait.
Concrete Cost Calculator 2026
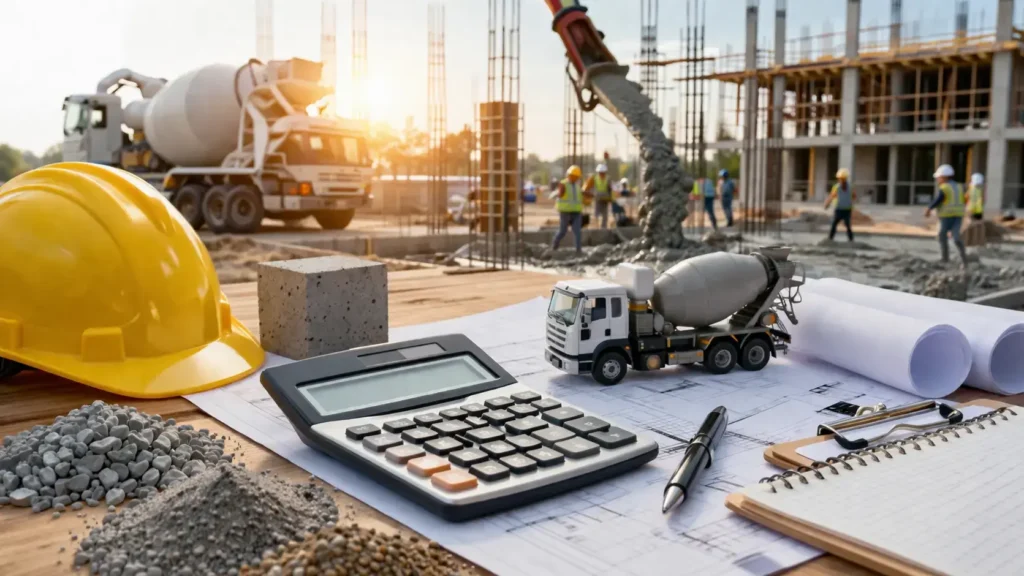
A concrete cost calculator 2026 can help you plan your building project so that there are no surprises. It tells you exactly how much concrete you need and how much it will cost. This tool is useful for homeowners, builders, and contractors who want to keep a close eye on their spending. This way, you won’t buy too much or too little concrete.
It can be hard to figure out how much concrete will cost by hand, especially for big jobs. Using a calculator makes things easier and saves time. If you know the cost ahead of time, it will be easier to plan other parts of your project and stay within your budget. Even small projects can save money and avoid waste by making sure the costs are right.
How to Understand Concrete Prices in 2026
Depending on where you live and the state of the market, concrete prices can change. Prices can change in 2026 because of things like higher material costs, shipping costs, and demand. Concrete is made up of cement, sand, gravel, and water. If the price of any of these things goes up or down, the price of your project will change as well. It’s important to look at more than one option because local suppliers often have prices that are a little different.
Knowing how concrete prices are changing can help you plan better. A concrete cost calculator can also tell you what the prices are right now, which can help you make a budget. Being aware of changes keeps you from spending too much and makes sure you can finish your project without any problems. You can get the best deal on concrete if you plan ahead and know when to buy it.
How to Get the Right Amount of Concrete for Your Project
The first step to getting an accurate concrete estimate is to measure the area of your project correctly. You need to know how long, wide, and deep the area you want to fill is. To find out how much concrete you need, multiply these measurements together. This is usually in cubic yards or cubic meters. Calculating correctly stops you from ordering too little or too much concrete.
This step is even easier with a concrete calculator. It automatically figures out the exact volume you need when you enter your measurements. This cuts down on mistakes and helps make sure your project is strong and long-lasting. Planning ahead also saves money because it keeps you from wasting money by ordering too much. To be safe, always add a little extra in case of spills or uneven surfaces.
Mistakes that happen often when estimating concrete
A lot of people get it wrong when they guess how much concrete they need. One common mistake is measuring the area wrong, which can cause shortages or extras. Another mistake is not taking into account spills, over-pours, or surfaces that aren’t even. These mistakes can make things more expensive and slow down projects.
A concrete cost calculator can help you avoid these mistakes. It makes sure that the right amount of concrete is ordered, which cuts down on waste and annoyance. It’s also a good idea to check your measurements again before you order. If you plan ahead and leave a little extra time, your project will go smoothly. Not making mistakes saves time and money, which makes the whole building process more efficient.
Picking the Right Concrete Mix
It’s very important to choose the right concrete mix for strength and durability. Different mixes work better for different types of projects, like driveways, foundations, patios, or decorative ones. Over time, a bad mix can cause cracks, weak structures, or damage to the surface. You can get help from suppliers or use online tools to compare different mixes.
The right mix lowers the cost of long-term maintenance and makes your project safer. Good concrete makes your building stronger, longer-lasting, and less likely to be damaged by the weather. Even for DIY projects, taking the time to pick the right mix will help you get professional results.
How technology is changing how we estimate concrete
Estimating the concrete is now faster and easier thanks to technology. You can get instant answers for cost, volume, and the mix type from the online concrete calculators. You don’t have to do the hard guess anymore. These tools also let you to know about changes in the prices of materials and mix options.
Using the technology cuts down on the mistakes, makes things more accurate, and saves time. It lets you change your plans quickly if the project’s measurements change. Builders can make sure that projects are finished on time and on budget by using technology. The accuracy that technology gives is helpful for even small home projects.
Planning Your Project with Confidence
A concrete project will only be successful if it is planned well. Knowing how much concrete you need and how much it will cost can help you avoid delays. A concrete calculator can help you plan every part of the job, from getting the concrete to the last details. If you plan ahead, you’ll have the right tools and resources on hand when you need them.
Planning ahead also helps you avoid stress and surprises. Knowing what to expect at each stage makes projects go more smoothly. If you plan well, you won’t have to worry about running out of materials and can focus on doing good work. Your project is more likely to be finished on time and on budget if you plan ahead.
Read more: What is Average Cost to Paint a House Exterior in 2026?
Things That Affect the Cost of Concrete
There are a number of things that affect the cost of concrete besides the material itself. One of the biggest costs is labor, especially for the big projects. Transportation costs also add to the total, especially if your site is far away from the suppliers.
Other things to think about are how complicated the project is, what kind of mix is needed, and any special additives that are needed for strength or looks. A concrete calculator shows you how the different factors affect your budget, which makes the planning better and the more predictable.
What is Average Cost to Paint a House Exterior in 2026?
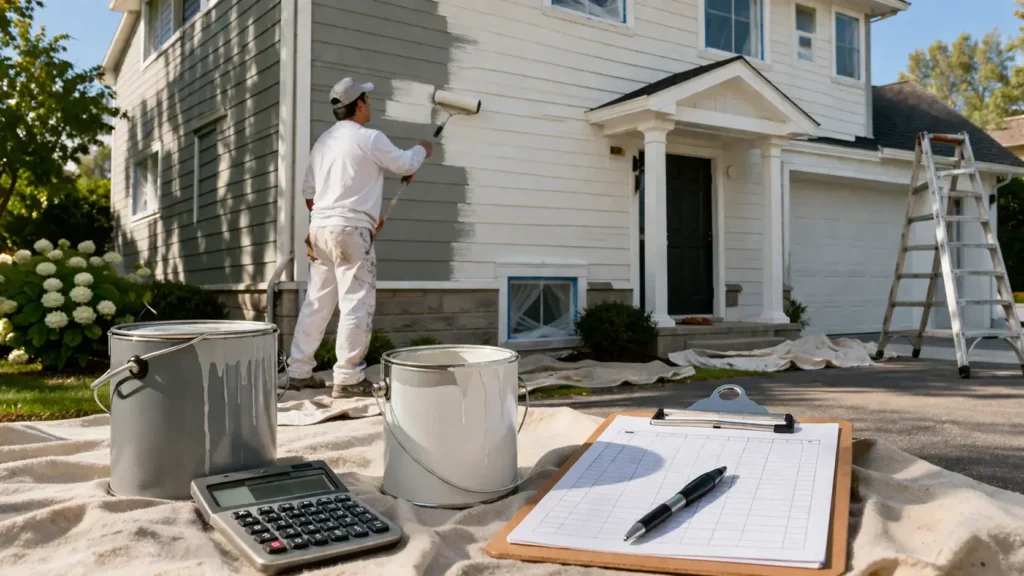
One of the best ways to make a house look better and keep it safe from the weather is to paint the outside. A lot of homeowners ask, “What is average cost to paint a house exterior in 2026?” because they want to know how much money they need to set aside before they start. The truth is that there isn’t a set price. The price can vary depending on the size of the house, the state of the walls, and the kind of paint used.
Most homeowners in the US are spending between $3,000 and $9,000 to paint the outside of their homes in 2026. Homes with simple designs and smaller sizes usually fall on the lower end of this range. Homes with more stories, detailed trims, or larger sizes can go well above this range. These numbers give a rough idea, but the final cost always depends on the specifics of the project.
How the size of your home affects the final cost
The size of the house is one of the most important things that affects the price. A small, one-story house costs less because it needs less paint and work. A big house with more walls, windows, and edges will take longer and more work to finish, though. A small house might cost $3,000 to $5,000, but a bigger house can easily cost $7,000 or more. The total cost will go up as the structure gets bigger and more complicated.
Why Labor Is Important
The cost of labor is often the biggest part of the total cost. It’s not just about putting paint on walls. Cleaning the surface, taking off old paint, fixing small cracks, and getting everything ready for a smooth finish are all part of it. It takes time and skill to do these things.
The cost of hiring a professional painter depends on how hard the job is and how long they’ve been doing it. Homes that are in good shape are easier to get ready, which lowers the price overall. It may cost more to hire painters with more experience, but the results are often better and last longer.
How the quality of paint affects prices
The quality of the paint can have a big effect on how much it costs and how long it lasts. Paint that is of higher quality costs more, but it lasts longer and covers better. It also keeps the house safe from rain, sun, and changes in temperature.
Paint that isn’t as good may cost less at first, but it might fade or peel faster. Many homeowners choose to buy better paint because it saves them money in the long run. The final cost also depends on how many coats are put on, since more coats need more materials and work.
Condition of the Surface and Work to Prepare It
The condition of the outside of house has a big effect on the final price. But if the paint is peeling, there is mold, or the surface is damaged, you need to do more work. Cleaning the surface, sanding it down, scraping off old paint, and fixing small cracks or holes are all things that might need to be done before painting.
These steps are important because they make sure the new paint sticks well. Not preparing can make the paint last less time and look worse. It usually costs more to paint homes that need a lot of work.
Things That Can Affect the Price
The total cost can also be affected with a number of smaller things. One of them is the kind of siding. Different materials and methods are needed for wood, brick, vinyl, and stucco. Some surfaces are easier to paint than others, which takes more time and care. The weather can also affect prices.
Painters may need to use stronger coatings or work in shorter amounts of time in places with bad weather. Shutters, trims, and doors are examples of decorative features that make things harder. These little things may not seem like much, however when you add them all up, they can add a lot to the total cost.
Price Differences by Region in the US
The price of painting isn’t the same all over the country. In general, big cities have higher labor costs than small towns. This means that the same project could cost more in one place than in another. Demand in the area is also a factor.
Prices may go up in busy areas where a lot of people are building or fixing up their homes because there aren’t enough painters. Because of these things, it’s always a good idea to get estimates from local experts.
Painting through the professional vs. doing it yourself
Some people who own homes think about painting their own homes to save money. This can help you save money, but it takes time, work, and the right tools. The professional painters have tools and the experience they require to get the job done faster and better. They also know how to properly prepare the surfaces and paint them evenly.
Read more about: Finding Reliable Commercial Construction Companies US in 2026.
Questions that people often ask
How much does it cost on average to paint the outside of a house in 2026?
Most homeowners spend between $3,000 and $9,000, depending on the size, condition, and location of the home.
How long does it take to paint the outside of a house?
Depending on the size of the house and the weather, a typical project could take a few days to a week.
Does better paint really make a difference?
Yes. Over time, high-quality paint can save you money as it lasts longer and protects better.
What part of the project costs the most?
Most of the time, the biggest part of the total cost is for labor and preparation work.
Should you hire professional painters?
Yes. Professionals do better work and make fewer mistakes, especially when it comes to big or complicated homes.
In 2026, painting the outside of your house will do more than just make it look better. It protects your home and makes it worth more. You can plan your project wisely and select the best option for your needs if you know what affects cost.
Finding Reliable Commercial Construction Companies US in 2026
One of the most important things you can do for any business project is pick the right builder. If you want to find trustworthy commercial construction companies in 2026, you need to do more than just a quick search. There are a lot of companies in the construction business that offer the same services. It can be hard to tell which one will really do good work on time and within budget.
Business owners and developers want contractors who are honest, experienced, and well-organized in 2026. You can find a construction partner that meets your needs and avoids making expensive mistakes if you know what to look for and how to compare options.
Look at their work on commercial projects.
When picking a construction company, one of the first things you should look at is their experience. Not all builders do commercial work the same way they do residential work. Different skills, planning, and resources are needed for offices, warehouses, and stores.
Check out the company’s past work to see if it meets your needs. A contractor who has worked on similar projects will know how long things will take, what permits are needed, and what building codes must be followed. This makes it less likely that things will go wrong or take longer. Strong experience also shows that the business has dealt with problems and finished projects on time.
Look over licenses and certifications very carefully.
Before they can do business in the US, construction companies must follow the law. When choosing a contractor, it’s important to check their licenses and certifications. These papers prove that the business follows safety rules and rules of the industry.
A licensed contractor is more likely to do a good job. Certifications can also show that you have specific skills, like being trained in safety or being good at managing projects. Always check to see if licenses are still valid and active. This easy step keeps you from hiring companies that aren’t qualified or trustworthy.
Check out the company’s reputation and what clients have to say about it.
You can learn a lot about how well a company does by looking at its reputation. Reading reviews and feedback from clients can help you get a better idea of how the contractor works in real life. Check for the feedback on the project’s quality, communication, and how long it took to finish.
You can also ask the business for references from people who have worked with them before. Talking to past customers directly gives you honest information. Companies that are trustworthy are usually happy to talk about their successes.
Look at prices without picking the lowest one.
Price is always a big deal, however, it shouldn’t be the only one. Some businesses make very low bids to get the projects, but this can lead to low quality work or costs that aren’t clear at the time. A trustworthy contractor offers you a clear and fair estimate. Look at what each company offers and compare their prices. You might get the better quality and fewer problems for a little bit more money. Picking value over the lowest price often gives you better results.
Check out communication and project management
A reliable construction company will be able to talk to you well. Pay attention to how the contractor answers your questions from the first meeting. Being professional and respectful means being clear and on time with your communication.
Managing projects is also important. A company that is well-organized will have a clear plan, schedule, and team structure. This helps the project stay on track. When communication and management are good, problems can be fixed quickly without too much trouble.
Check for the Use of New Tools and Technology
In 2026, construction companies are using high-tech tools to get more done. These could be tools for estimating, scheduling, and managing projects. Businesses that use new technology can better handle projects.
Technology helps keep track of progress, keep costs down, and make things more accurate. It also makes it easier for teams and clients to talk to each other. If you hire a contractor who uses modern tools, it shows that they are ready for the challenges of modern construction.
Problems that often come up when picking a contractor
When looking at more than one construction company, a lot of people get confused. It can be hard to choose when prices and promises are similar. Some contractors might also use words that are hard to understand.
To get past this, make sure you communicate clearly and be open. Ask simple questions and ask for detailed answers. A good company will explain everything in a way that makes sense. Taking your time to choose can help you avoid bigger problems down the road.
The Long-Term Benefits of Hiring the Right Company
Picking a trustworthy construction company has long-term benefits. Projects are finished on time and meet quality standards. This lowers the cost of upkeep and raises the value of the building. Strong contractors also make long-term connections with their clients. You already have a reliable partner if you plan future projects. Taking the time to pick the right company will give you better results and peace of mind.
You may like to read: The Uses of Drones for Accurate Construction Takeoff in 2026.
Questions that are often asked
How can I tell if a building company is trustworthy?
Look at their licenses, experience, past work, and reviews from clients. A trustworthy business will have a good track record and be able to communicate clearly.
Should I go with the lowest bid for my project?
Not all the time. The lowest bid might mean bad quality or extra costs down the road. Choose a company that has clear prices and offers good value.
What makes experience important in commercial construction?
Commercial projects need certain skills and planning. Experienced contractors know what you need and can deal with problems better.
How many businesses should I look at before making a choice?
You should compare at least three businesses. This helps you understand the prices, services, and quality in general.
Is it possible for technology to make construction projects better?
Yes. Planning, tracking, and communicating are easier with modern tools, which makes project management better and cuts down on mistakes.
The Uses of Drones for Accurate Construction Takeoff in 2026
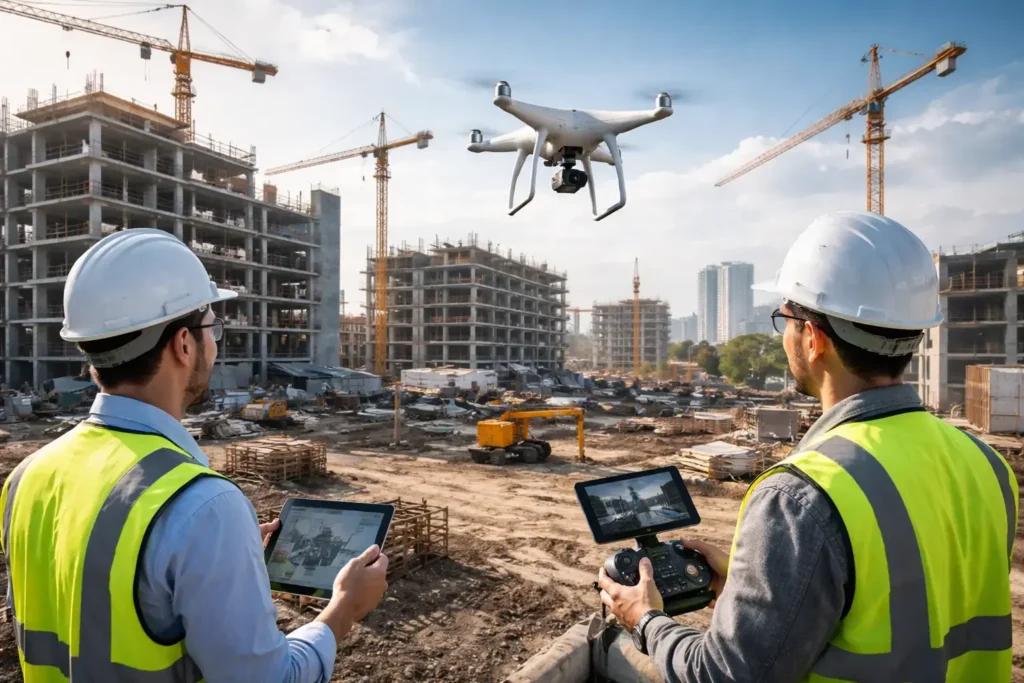
One of the biggest changes in construction work in the U.S. is the use of drones. These little flying machines are now making it much easier for builders to gather information about the site. People who ask about the uses of drones for accurate construction takeoff in 2026 really want to know how work has gotten faster, safer, and more accurate. Drones are now a normal part of planning, not just a special tool.
Contractors won’t have to rely on manual measuring methods alone in 2026. Drones can fly over a site, take clear pictures, and use that information to make precise measurements. This helps teams make better guesses and stay away from mistakes that cost a lot of money. Projects move forward with more confidence and less confusion when they have better information at the start.
Quick Site Checks That Don’t Take Up Time
Before drones were common, survey teams had to walk all over the site. This could take a long time, especially if the land is big or uneven. A drone can now cover the same area in a short amount of time. It flies above the ground and takes pictures of every part of the area.
This speeds up the early planning a lot. The teams can quickly look over the whole site layout and move on to the next step. When the deadlines are tight, faster site checks are also helpful. Contractors can start planning almost right away instead of waiting days for measurements.
Better Planning with More Accurate Measurements
In construction, it’s very important to have the right numbers. If the measurements are even a little bit off, you might order too much or too little material. Drones help with this problem by getting very detailed information from above.
Drones take pictures, and software uses those pictures to figure out distances, areas, and volumes. This makes it less likely that people will make mistakes. Contractors can plan better and avoid waste, when they trust their numbers. Better measurements make for better budgets and smoother project flow.
Collecting Data Safely in Dangerous Places
It’s not always easy to get around on construction sites. Some places might be steep, muddy, or dangerous for the workers. Workers used to have to go into these areas to take measurements. This made accidents more likely.
Drones solve this problem by doing the work from the sky. They can still get the information they need even if they fly over dangerous areas. The job gets done while workers stay safe. Drones are a good choice for projects that need to go over rough ground or into high-risk areas.
Updates in Real Time While the Project
As work on the construction projects goes on, things often change. To make good decisions, managers need to know what’s going on right now. You can use the drones at different points in the project to take new pictures and keep the track of how things are going.
These updates help teams see how the work they did compares to the plan. Changes can be made early if things don’t go as planned. This cuts down on delays and keeps the project on the schedule. The real-time data keeps everyone up to date and helps them to work together better.
Making the smarter choices will lower costs.
Using drones might seem like an extra cost at first. However they actually help you save money in a lot of ways. Less rework and less wasted materials are possible when you have accurate data.
Drones also make it less necessary to have big survey teams. One operator can do jobs that used to take a lot of people. This cuts down on labor costs and makes things run more smoothly. These savings can add up over time and have a big impact on project budgets.
Clear Pictures for Better Understanding
Drones take clear pictures and videos that show the whole construction site from above. Both the team and the client can use these pictures. Instead of using words to explain things, builders can show real pictures.
This makes it easier to talk to each other. Clients can see how things are going without going to the site, and managers can explain their plans more clearly. Good pictures help everyone understand the project better and make things less confusing.
Easy Steps to Use Drones for Building Takeoff
Step 1: Make a detailed plan for the drone flight.
The team looks at the site and decides how the drone will move before it flies. This makes sure that all of the important areas are covered.
Step 2: Get Clear Pictures From Above
The drone flies over the area and snaps a lot of pictures from different angles. These pictures are what all the measurements are based on.
Step 3: Make data out of pictures
The pictures are processed by special software that turns them into measurements. It does a good job of figuring out distance, area, and volume.
Step 4: Make sure the results are correct.
The team checks the data to make sure that everything is right. They can fly the drone again if they need to to get more information.
Step 5: Use the information to make plans and guesses
The last set of data is used to make lists of materials and cost estimates. This gives the project good and reliable information to start with.
Things to Think About When Facing Challenges
Drones are very useful, however they aren’t perfect. Weather can change flights, especially when it’s windy or rainy. People who run drones also need to be trained properly so they can use them safely and correctly.
In the United States, there are also rules and permissions to follow. Before using drones at work, companies need to make sure they follow the rules in their area. If you plan ahead, you can handle these problems without too much trouble.
Read more: 5 Mistakes to Avoid During Material Acquisition in 2026.
The Future of Drones
After 2026, drones will probably be used even more in construction. New features and better software will make it easier to collect and use data. Builders can make systems even smarter by using drones with other technologies.
This way of doing things will become normal in construction as more and more companies use it. People who start using drones early will be better ready for what comes next.
5 Mistakes to Avoid During Material Acquisition in 2026
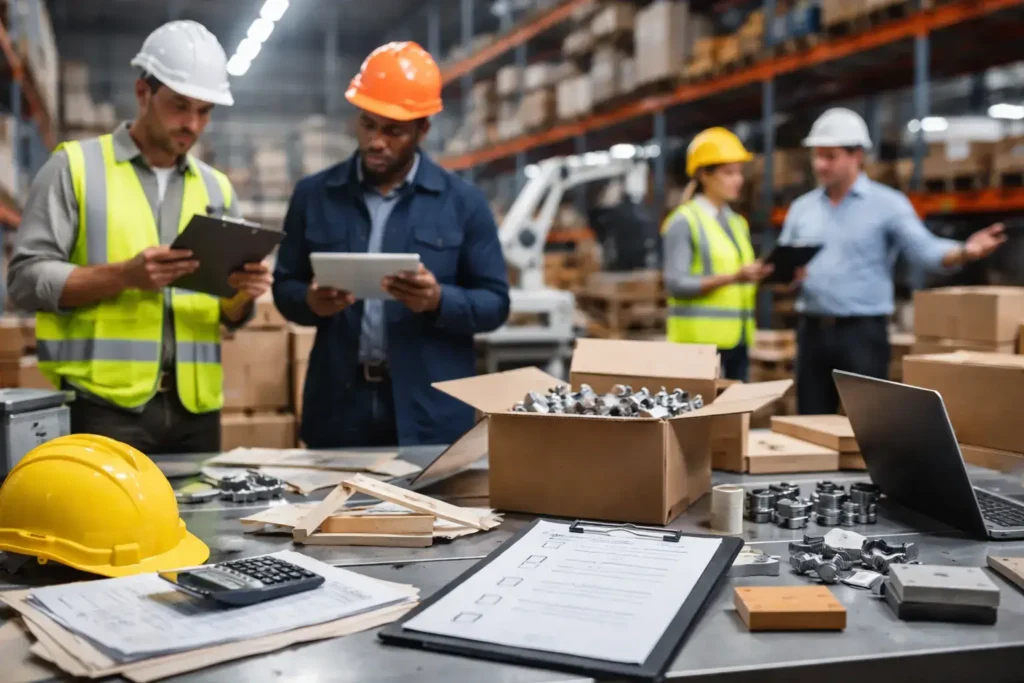
Getting the right materials is one of the most important parts of any building project. The quality, price, and delivery time of materials can all have an impact on how well a project goes. When contractors don’t plan ahead or rush the buying process, problems often come up later on the job site. Knowing the 5 mistakes to avoid during material acquisition in 2026 helps builders keep project quality high, costs low, and delays to a minimum.
Changes in the supply chain, price changes, and tighter project deadlines are making construction projects more complicated in 2026. When contractors buy materials, they need to plan ahead. Companies can protect their budgets and make sure that projects stay on track from start to finish by avoiding common mistakes.
Not planning well before buying materials
One of the most common mistakes people make when getting materials is not planning ahead before they start buying. Some contractors order materials too quickly without first going over all the project needs. This could cause you to order the wrong amounts or choose materials that don’t meet the project’s requirements.
These problems can be avoided with careful planning. Before placing orders, builders should look over the construction drawings, schedules, and project requirements. A well-thought-out list of materials makes sure that everything needed for the job is there. Good planning also stops the need to buy things in an emergency, which usually costs more and adds stress to the project team.
Not caring about the reliability and reputation of suppliers
Picking the wrong supplier can cause big delays in your project. Some contractors only look at price and don’t check to see if the supplier is reliable. If a supplier is late or sends bad materials, construction work may have to stop until the new ones come.
Construction companies need reliable suppliers as partners. Builders should look into a supplier’s past, how well they deliver, and what customers have to say about them. Long-term relationships with reliable suppliers usually make it easier to communicate and coordinate projects. A reliable supplier makes sure that the quality of the materials stays the same and that they are delivered on time.
Not keeping an eye on changes in material prices
The prices of building materials can change quickly because of how much demand there is in the market and how well the supply chain is working. If contractors don’t pay attention to price trends, they could end up paying a lot more than they thought. Changes in prices can have a big effect on the whole project budget.
Contractors can make better buying decisions when they keep an eye on the market. Some businesses lock in prices by making the deals with suppliers ahead of the time. Some people plan their purchases carefully to avoid times when prices are at their highest. By keeping an eye on price trends, builders can keep costs down and protect their profit margins.
Ordering Materials Too Soon or Too Late
While they wait for materials to arrive, workers may have to stop building. Contractors should plan when to order materials based on the project’s schedule. Proper timing makes sure that materials get to the site exactly when they are needed for installation.
Not Doing Quality Checks When Delivering
Another big mistake is not carefully checking the materials when they get to the job site. Some teams think that the materials they get are always right and ready to use. But sometimes damaged or wrong materials show up because of problems with shipping or mistakes made by the supplier.
Checking materials when they arrive can help avoid bigger problems down the road. Employees should check the number of items, the types of products, and any damage that is easy to see. If problems are found early, replacements can be requested right away. Quality checks keep the project from having structural problems and having to do extra work.
Questions That Are Common
Why is it important to get materials for construction projects?
Material acquisition makes sure that the right materials are available at the right time and for the right price. Buying things the right way keeps projects on track and on budget.
What do contractors do wrong the most when they buy materials?
One of the biggest mistakes is not planning well. If the project requirements aren’t clear, contractors might order the wrong amounts of materials or the wrong kinds of materials.
How can contractors cut down on the cost of materials in 2026?
Keeping an eye on price trends, making good relationships with suppliers, and planning purchases ahead of time can all help keep material costs down.
Why should you check materials after they are delivered?
Inspection makes sure that the materials are the right ones and are not broken. Early checks keep construction from being the late and having to be redone.
Can technology help you get materials?
Yes. Contractors use procurement software and inventory tracking systems to keep track of orders, prices, and accurate records of their materials.
Read more: How Lumber is Prepared before It reaches Construction Sites?
A step-by-step guide to avoiding mistakes when buying materials
Look over the project requirements Carefully
Start by looking at the plans, specs, and schedules for the construction. Make a clear list of all the materials you need for each step of the project.
Pick Reliable Suppliers
Before you place an order, do some research on the suppliers. Look for businesses that have a good track record of delivering on time, making high-quality products, and providing reliable customer service.
Keep an eye on prices and availability in the market.
Keep an eye on changes in the price of materials and the availability of supplies. This information helps you figure out when is the best time to buy things.
Set up orders based on the construction schedule.
Plan delivery dates carefully, so that materials get there when you need them. This helps with the storage and stops work from being delayed.
Inspect materials right after they arrive
Look over all the materials to ensure they are the right amount, in good shape, and not broken. Quickly report any problems, so that replacements can get there before installation starts.
Following these steps helps the contractors to keep the track of materials better and avoid problems that are not important for the project.
How Lumber is Prepared before It reaches Construction Sites?
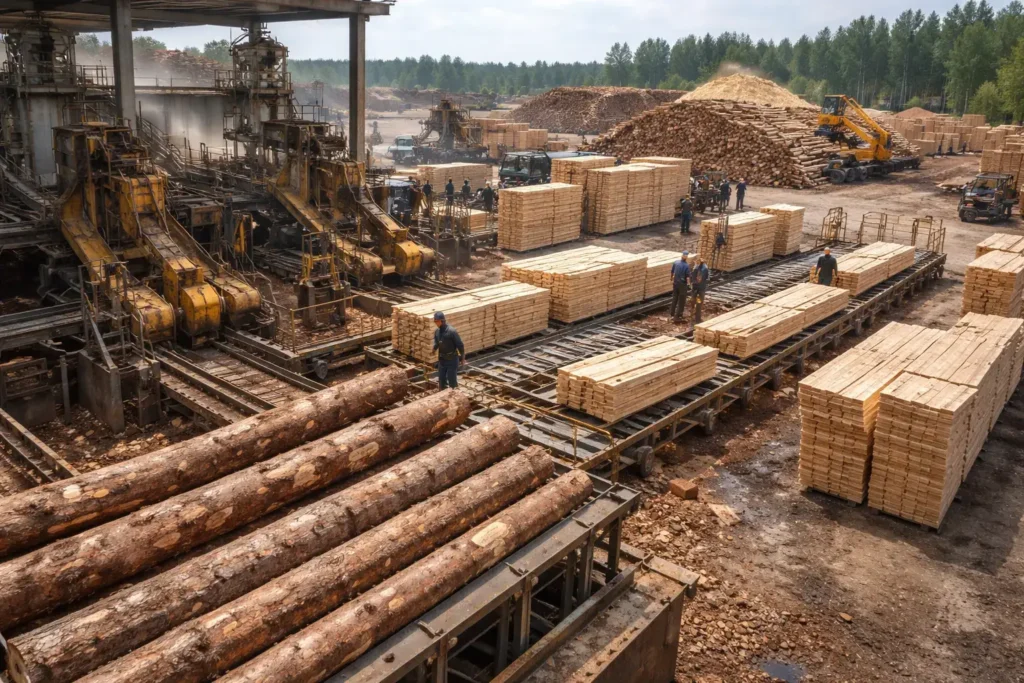
Wood is one of the most important things which goes into making homes and other buildings. Before lumber gets to construction site, it goes through a number of careful steps. These steps ensures the wood is ready for building work and is strong and safe.
People are often surprised with how much work goes into preparing lumber before it gets to construction sites when they ask, “How lumber is prepared before it reaches construction sites?” Preparing lumber takes a lot of steps. From cutting down trees in the woods to drying and shaping boards in mills. Every step makes wood stronger, better, and easier to use.
Taking trees out of managed forests
The first step in getting the wood ready is to grow trees in forests, where they will be cut down. Forestry teams carefully choose trees that are the right size and age. In the US, sustainable forest management is important because it protects the environment and helps the construction industry.
To cut down trees safely, workers use the special tools. The branches are taken off after cutting, and the trunks are ready to be moved. After that, these logs are put on trucks and sent to lumber mills. Proper harvesting ensures the wood is in good shape, when it starts its journey and before it is processed.
Bringing logs to sawmills
After cutting down trees, the big logs need to be taken to sawmills to be worked on. Logging trucks take these heavy materials from the woods to nearby mills. You need to be careful with this step of moving the logs so they don’t get damaged.
The logs are checked and sorted with size and type of wood at the sawmill. Different kinds of wood are used for the different building projects. Some are better for the framing, while others are better for flooring or finishing. Sorting logs helps mills work more quickly and make lumber products that are always the same.
Cutting logs into rough boards
Big machines inside the sawmill cut the logs into long boards. This is called sawing. The goal is to turn round logs into flat pieces that can be used to build things. The machines are made to cut accurately so that there isn’t a lot of waste.
The boards are still rough and may have edges that aren’t even after cutting. This is the stage where the wood is called rough lumber. The boards look like construction material now, but they aren’t ready to be used yet. The wood needs more work before it can be used safely.
Getting rid of moisture by drying wood
Wood that has just been cut has a lot of water in it. If you use wet wood, it may shrink, warp, or crack after it is put in place. To avoid these problems, the boards need to be dried very carefully. Lumber mills use two common ways to dry wood.
Some wood is left outside to dry on its own over time. Other boards are put in big drying rooms called kilns. Kiln drying gets rid of moisture faster with controlling heat and airflow. Proper drying makes the finished lumber stronger and the more stable.
Checking and grading the quality
Before wood leaves the mill, it is carefully checked. The lumber gets a grade based on these things that tells you how strong and good it looks. People normally use higher grade lumber for the visible or structural uses.
Less demanding parts of the construction may use the lower grades. Grading helps the builders pick the right kind of wood for each job. This system makes sure that building projects are safe and reliable.
Steps for getting wood ready for building use
Choose the right trees and cut them down
Forestry teams pick trees that are strong, healthy, and old. Cutting is done with care to keep plants nearby safe and the forest in balance.
Take off the branches and get the logs ready
After the harvest, the trunk is cleaned the branches are cut. Then, the log is cut into pieces that are easy to move.
Take logs to processing mills
Heavy trucks move logs from the woods to sawmills. Workers at the mill sort logs with size and the type of wood.
Cut the logs into boards
Powerful saw machines cut the logs into long boards of wood. This step turns logs into the rough lumber pieces.
Ensure that the wood is dry
You can dry boards with letting them sit in the air or in controlled kiln chambers. Taking out the moisture stops warping and the cracking in the future.
Make the boards smooth and shape them
Planing machines cut and smooth the surfaces of the wood. This step shapes and sizes boards to their final standard.
Check and rate the wood
Experts look at every board and provide it a grade based on its strength and the quality. Only lumber that has been approved is sent to construction suppliers.
These steps ensure the wood which gets to construction sites is safe and reliable for use in buildings.
Packaging and sending to the suppliers
After the wood has been checked, it is put in bundles and ready to be shipped. Mills stack the boards neatly and wrap them up tightly with strong materials. Labels are put on the wood, so that builders and suppliers can tell what type and grade it is.
After that, the packaged lumber is sent to the building supply stores or directly to big construction companies. Careful packing keeps the wood safe, while it is being moved and stored.
You may like to read: Why Rest Break Is Critical for Safety in Construction Work?
Why it’s important to prepare lumber correctly
For safe and strong building, it is very important to prepare lumber the right way. The wood gets stronger and more stable with each step of the process. If the lumber were used without drying, shaping, and grading, the buildings could have big problems with their structure.
The preparation process also makes it easier for the contractors to get the things done. Uniform boards fit together easily, that cuts down on the time it takes to adjust materials. When builders get good wood, they can concentrate on building safe and sturdy buildings.
Why Rest Break Is Critical for Safety in Construction Work?
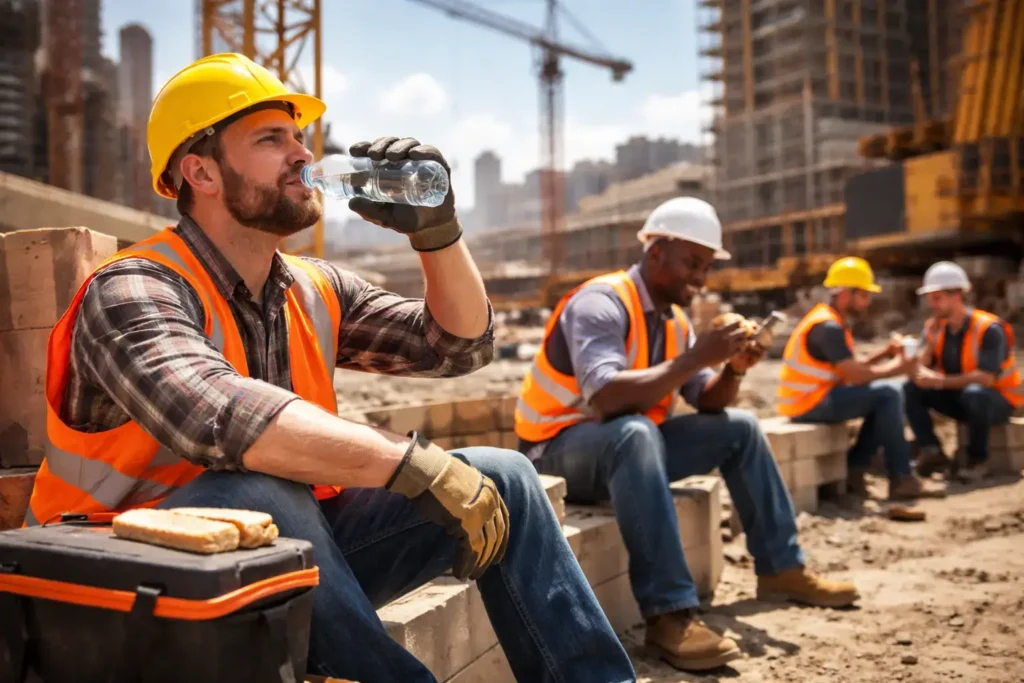
Construction work often requires a lot of physical strength, focus, and long hours on the job. Every day, a lot of workers use heavy tools, climb buildings, and run powerful machines. People make more mistakes and take longer to react when they are tired. This is why it’s important to know why rest break is critical for safety in construction work? is very important for both workers and their bosses.
In the US, safety rules say that you should take breaks often when doing hard work. Breaks give workers a chance to rest, get their energy back, and lower their physical stress. Not getting enough sleep can make you more likely to have accidents, get hurt, or make bad choices. Giving workers the right amount of time off makes job sites safer and more productive.
Making Workers Less Tired on Busy Job Sites
Building things is hard work. People who work often lift heavy things, stand for long periods of time, and do the same thing over and over again. Muscles lose strength and coordination when the body gets tired. Because of this tiredness, it’s harder to safely use tools and equipment.
Taking breaks often gives the body time to heal from physical stress. Taking short breaks can help your muscles relax and give you more energy. Workers are more focused and balanced when they go back to work after taking a break. This simple habit makes it less likely that accidents will happen because you’re tired.
Making your mind and focus better
You need to pay close attention and think quickly to work in construction. Workers need to be careful of moving equipment, changing weather, and other dangers in their area. When someone is mentally tired, they can’t focus as well. They might miss warning signs or forget to follow safety rules.
Taking breaks helps clear your mind. Workers can relax and clear their heads by stepping away from their work area. When they come back, they are more aware and can see risks more easily. Better focus helps you avoid making mistakes that could hurt you or break your equipment.
Avoiding heat stress and physical exhaustion
A lot of construction work happens outside. Workers are exposed to high temperatures and direct sunlight when it’s hot outside. Working out in these conditions for a long time can cause heat stress, dehydration, and other serious health problems.
Scheduled breaks give workers a chance to cool off and drink water. Rest areas with shade help the body cool down. These breaks keep workers from getting sick from the heat, like heat exhaustion or heat stroke. Keeping the workers hydrated and well-rested makes them healthier and safer.
Helping to make equipment safer to use
You need to have steady hands and clear thinking to run heavy machinery. If you don’t use cranes, loaders, and power tools correctly, they can be dangerous. When you’re tired, your reaction time slows down and your decision gets worse. This makes it more likely that mistakes will happen when using equipment.
Operators can regain focus and control during breaks. When workers are awake, they use machines more accurately. This keeps both the operator and the people working nearby safe. One of the most important reasons to never skip breaks is that they help keep equipment safe.
Lessening Long-Term Physical Injuries
Doing physical work all the time can hurt your body over time. Lifting, bending, and carrying things over and over again puts stress on your joints and muscles. If you don’t rest, these movements can hurt your back or muscles for a long time.
Taking short breaks lets the body relax and eases stress on the spine and joints. Workers can take a break to stretch and get better before going back to work. This practice helps keep construction workers healthy over the long term and prevents chronic injuries.
Making work more productive and of higher quality
Some bosses are worried that breaks will make work take longer. In real life, the opposite is often true. Workers who are tired work more slowly and make more mistakes. Mistakes need to be fixed, which takes time.
Workers who have had enough sleep do their jobs more accurately and quickly. They are more motivated and able to pay attention to quality. When everyone on the team is healthy and alert, projects go smoothly. Giving people the right amount of time off is good for both safety and productivity.
Some Problems That Construction Sites Have
Some job sites have trouble keeping up with their break schedules, even though they are helpful. Supervisors may cut break times short because of tight deadlines and the need to get things done quickly. Workers might also think that taking a break will make the team work slower.
These habits can be very dangerous. Companies need to create a culture of safety where taking breaks is seen as part of the job. Employees are more likely to follow healthy work habits when their bosses support safe working conditions.
Read more about: The Hidden Risks of Long Term Lumber Storage on Construction Sites.
Questions That Are Often Asked
How often should workers on a construction site take breaks?
There may be different break times, but a lot of safety rules say that you should take short breaks every few hours, especially when you’re doing something that requires a lot of physical effort.
Do breaks really cut down on accidents on construction sites?
Yes. Workers who get enough rest are less likely to make mistakes and get hurt.
Are safety rules in the US that say people have to take breaks?
Safety agencies strongly recommend taking breaks to avoid fatigue and heat stress, even though rules may differ from state to state and company to company.
What are some signs that a worker needs to take a break?
Some signs are feeling dizzy, sweating a lot, having a slow reaction time, feeling weak in your muscles, or having trouble focusing.
Can taking breaks help you get more done?
Yes. Workers who get enough sleep usually do their jobs faster and with fewer mistakes, which makes the whole project run more smoothly.
In construction work, breaks are not a luxury. They are a basic safety measure that keeps workers, equipment, and the project’s success safe. A team that is well-rested makes the workplace safer and stronger for everyone.
The Hidden Risks of Long Term Lumber Storage on Construction Sites
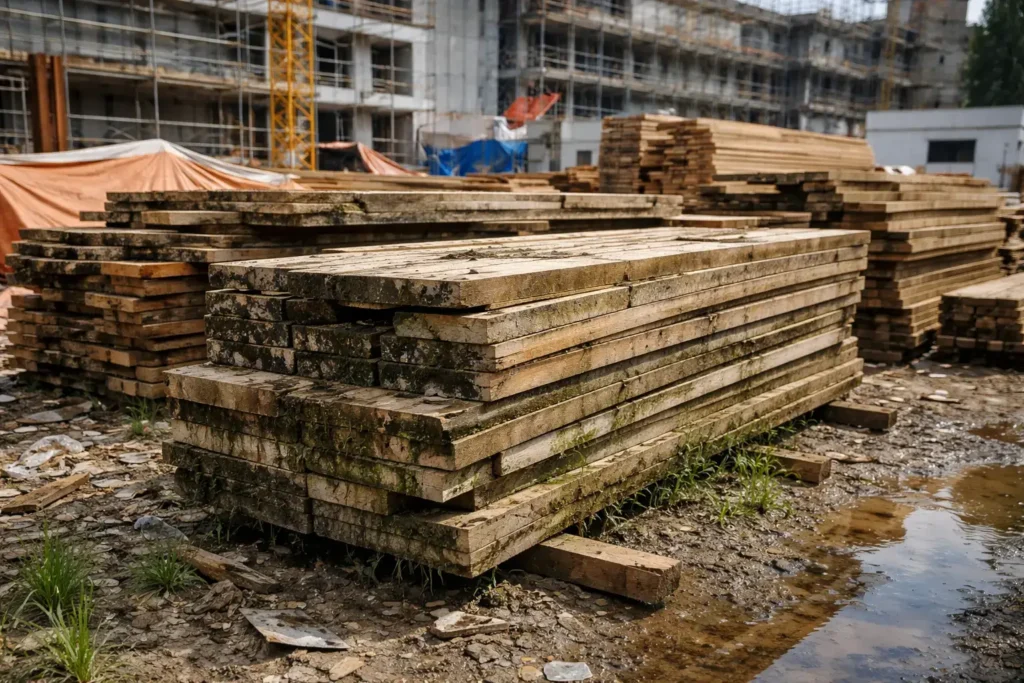
A lot of contractors focus on getting good lumber, but they forget what can happen when wood sits on a job site for too long. The hidden risks of long term lumber storage on constructionsites can cause problems with a project before it even starts. Even though lumber looks strong on the outside, bad weather, moisture, and rough handling can slowly break it down. These problems that aren’t obvious can make things unsafe, cost more, and take longer.
In busy construction sites all over the United States, materials are sometimes delivered early and kept for weeks or even months. Wood can warp, rot, attract bugs, or lose strength if it isn’t protected properly. Contractors can protect their materials, budgets, and project timelines by knowing about these risks. Every builder should know about these six important issues.
Problems with Warping and Damage from Moisture
Wood reacts to moisture in the air on its own. Wood that is left outside for a long time absorbs rainwater and humidity. When the humidity rises, boards can swell, bend, or twist. Installing warped wood can be hard, and it might not fit correctly in a building.
Repeated wet and dry cycles put stress on the wood fibers over time. This makes the material weaker and less strong. Even small changes in shape can make walls or floors uneven. Contractors may have to replace damaged boards, that costs more and takes longer to finish the project. Covering things properly and raising them off the ground can help keep them dry.
Health Risks and Mold Growth
Mold grows best in places, which are damp and stay that way for a long time. Dark spots or fuzzy patches on the wood surface are common signs of mold. Some surface mold can be cleaned, however mold that grows deeper may hurt the wood’s structure.
Mold doesn’t just hurt the wood. It can also be bad for the health of workers. Mold spores in the air can cause allergies or problems with breathing. If moldy materials are used in residential construction, they can cause big problems for people who live there later. To avoid mold problems, it’s important to keep wood dry and well-ventilated.
Damage to the structure and pests
Termites, carpenter ants, and beetles are some of the bugs, which can get into stored wood. The wood may already be weak by the time it is found. Rodents might also chew on stacked wood to make nests. Wood that has bugs in it should not be used in structural framing. Replacing materials that are damaged slows down work and costs more. Regular checks and storing things properly, so they don’t touch the ground can help lower the risk of pests.
Cracks in the surface and sun exposure
Lumber can dry out very quickly in direct sunlight. Wood can crack along the grain if it dries out too quickly. These cracks weaken the boards and make them less reliable for holding up weight. UV rays also change the color and feel of wood.
However, the color fading may not seem like big deal, it can hurt finishes and coatings later. Keeping wood in the shade or under protective covers helps keep it in good shape. To keep things from getting too dry or too wet, it’s important to have balanced airflow.
Over time, the structure gets weaker.
Wood is a strong and reliable material for building, but it gets weaker when it is exposed to bad weather for a long time. It can hold less weight if it is constantly wet, the temperature changes, or it is stacked on top of other things.
Framing with weakened lumber may not work as well as expected. This makes the whole building less safe. Engineers and inspectors may not accept materials that are not up to code. Keeping lumber from being exposed to the weather for a long time will keep it strong and reliable.
Delays in the project and effects on finances
Damaged wood can often cost more than you think. Contractors may have to order more materials, pay for disposal, and change their schedules. Delays don’t just affect the current project; they also affect future commitments.
Claims for damage to property can raise premiums. If the quality of the work suffers, clients may lose faith. Planning when to deliver and how to store materials carefully can help keep both the materials and the business’s good name safe. It costs less to stop damage than to buy new materials.
Safe Ways to Store Lumber
Instead of putting lumber directly on the ground, put it on raised platforms to lower the risk. Use covers that keep water out but let air flow through. Don’t seal wood in plastic without letting air in, because moisture can get trapped and cause mold.
Bring materials closer to the time they will be needed. This cuts down on how long things are stored and how much they are exposed to. Check your wood regularly for early signs of damage. To keep stacked boards from getting too much stress, teach workers how to handle materials carefully. Storing things properly keeps them safe, high quality, and profitable.
Read more: How AI Is Changing Modern Construction in 2026?
Questions that are asked a lot
How long can wood safely stay on a construction site?
It depends on the weather and how you store it. Lumber can last for weeks in dry, safe places. Without proper covering, damage can start within days in wet climates.
Can warped wood be fixed?
In some cases, minor warping can be fixed, but boards that are severely twisted usually need to be replaced to keep the structure safe.
Does pressure-treated wood hold up to damage while in storage?
Even though pressure-treated wood is better at keeping insects and rot at bay, it can still warp or crack if it is not stored properly.
What is the biggest danger of storing lumber for a long time?
The biggest threat is often moisture damage, which causes warping, mold growth, and loss of strength.
Is it less expensive to buy lumber in bulk or in stages?
Ordering in stages often lowers risk because the materials are only exposed to the weather for a shorter amount of time.
Keeping wood dry is only one part of proper lumber storage. It’s about keeping the structure strong, the workers safe, and the whole project on track. Making smart storage choices today will save you money tomorrow.
