How to Attach Metal Roofing?
For many building projects, metal roofing is a strong and long-lasting option. A lot of builders and homeowners want to know how to attach metal roofing? the right way so that the roof will be safe for a long time. Metal panels are light but strong, and they keep buildings safe from rain, wind, and heat. They can last a lot longer than many other types of roofing if they are put up correctly.
Metal roofing is used on homes, warehouses, barns, and commercial buildings that are being built. It is important to do things in the right order from beginning to end. Planning ahead, using the right tools, and doing the job carefully will help keep the roof from leaking or coming loose over time. A metal roof that is well attached makes any building more valuable and safer.
Getting the Roof Surface Ready for Installation
Before putting on metal roofing, the roof surface must be ready. The base of the roof should be smooth, dry, and clean. You should get rid of any old roofing nails, dirt, or broken wood. You need to fix the roof deck first if it is weak or rotting. The metal panels stay in place better with a strong base.
The next step is to put a roof underlayment on top of the surface. This layer helps keep moisture out and adds extra protection. This step is very important in construction because it helps stop leaks. There shouldn’t be any wrinkles in the underlayment when you roll it out. It is much easier and safer to do the rest of the roofing job if you take the time to prepare the surface.
Picking the Right Metal Panels and Screws
There are many different shapes and sizes of metal roofing panels. Some panels are long sheets, while others are smaller pieces. The size of the building and the slope of the roof help builders choose panels. Steel, aluminum, and copper are all common building materials. Each type has a different cost and strength.
The panels and the fasteners are both very important. Instead of nails, screws made for metal roofing are used. The rubber washers on these screws help seal the holes. Using the right fasteners can help keep water out. The roof will be strong and last a long time if you pick the right panels and screws.
How to Lay Out Panels the Right Way
When putting on metal roofing, it’s important to have a good layout. You should start putting panels on the roof from one edge. Most of the time, builders start in the bottom corner and work their way across. This helps keep the panels straight and even. To keep water out, each panel should slightly cover the one next to it.
Taking the time to measure carefully before putting up panels saves time later. If panels aren’t straight, they can leave gaps and leaks. Small mistakes can lead to big problems in construction work. Taking the time to line up the panels correctly will make the roof look nice and last for many years.
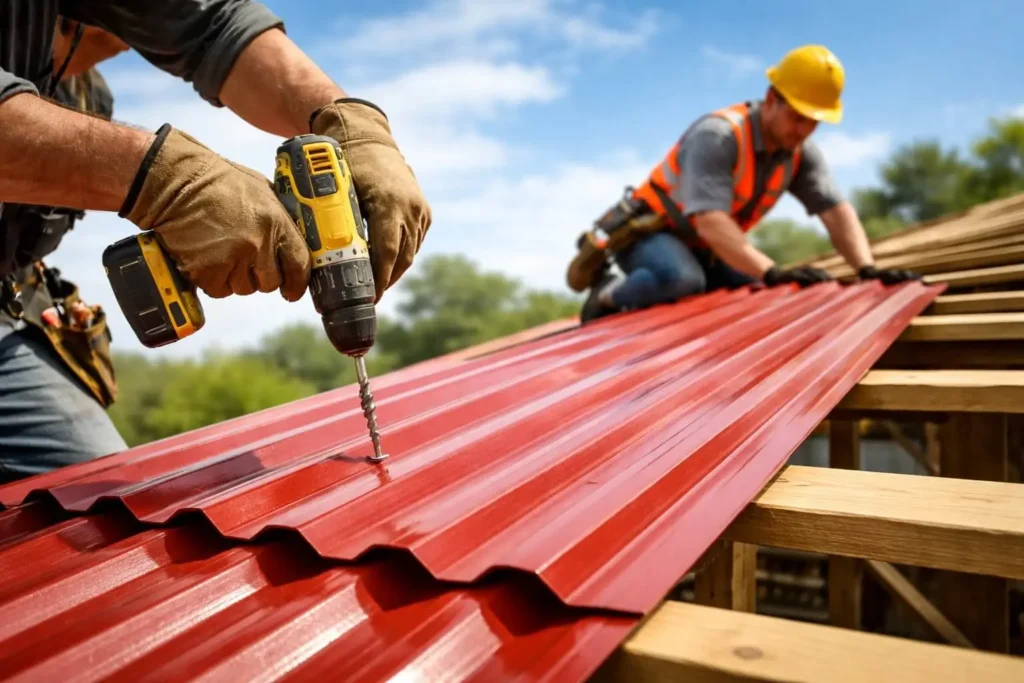
How to Securely Attach Metal Panels
When it’s time to attach the panels, screws are put through the metal and into the roof deck. Screws should be tight, but not too tight. Too much tightening can hurt the washer or metal. If you do not tighten it enough, so water can get in. It’s very important to find the right balance.
Depending on the type of the panel, screws are usually put along the ribs or flat parts. To hold the panel firmly, they should be spaced out evenly. This step in the construction needs to be done with carefully and with the patience. Panels that are properly attached can handle strong winds, rain, and changes in temperature.
Important Tools and Supplies You Will Need
Using the right tools makes it easier and safer to put on metal roofing. A drill, a measuring tape, and safety gloves are some of the most important tools. To get to the top safely, you also need a ladder or scaffolding. Wearing safety gear while working on a construction site can help keep you from getting hurt.
Here’s a useful list of tools and materials that are often used when putting on metal roofing:
- Panels for metal roofing
- Screws for roofs with rubber washers
- Underlayment for the roof
- A drill or screw gun
- A tape measure
- Line of chalk
- Glasses and gloves for safety
- A ladder or scaffolding
Getting everything ready before you start makes the job go more smoothly. Preparation saves time and work.
Sealing the roof and finishing the edges
The edges of the roof need to be fixed after all the panels are in place. Along the sides and top of the roof, trim pieces are added. These parts help keep the roof sealed and make it look nice. In construction, trim also keeps edges safe from wind and water.
People often use sealant around chimneys, vents, and edges. This gives you even more protection against leaks. The last step is to check all the seams and screws. A careful final check helps find small problems before they get worse. A well-done metal roof looks good and works well.
Read more: What Does a Construction Home Estimator Do?
Common Mistakes to Stay Away From When Installing
Not doing the preparation steps is a common mistake. Putting metal roofing on a surface that isn’t strong or clean can cause problems later. Using the wrong screws or putting them in the wrong place is another mistake. This can cause leaks and panels to come loose.
Another problem in construction is rushing the job. When putting on metal roofing, you need to be very careful and pay attention to every little thing. Following each step carefully will help you avoid expensive repairs. Builders can learn from these mistakes how to properly attach metal roofing and build roofs that last.
