How to Use Drywall Anchors
If you’ve ever tried to hang something heavy on drywall and watched it slowly pull away from the wall, you’re not alone. Drywall isn’t designed to hold much weight by itself. Screws alone often tear through the soft material over time. Therefore it’s important to learn how to use drywall anchors. These small devices give strength and grip to screws in drywall, letting you safely hang shelves, mirrors, curtain rods, or anything else that needs reliable support.
Why Drywall Anchors Are Needed
Drywall, also called wallboard or plasterboard, is soft and crumbly inside. While it is best for covering walls quickly and creating smooth surfaces, it doesn’t offer much strength. When you put a screw directly into drywall without an anchor, it has almost nothing to grip onto. As time passes, even a small amount of weight can pull the screw out and damage the wall.
The Problem With Just Screws
It might seem fine at first when you use a screw alone. But as the item hangs on the wall and shifts or vibrates, the pressure starts to wear down the drywall around the screw. Finally, the screw becomes loose or breaks through completely. This not just damages the wall but can also cause whatever you hung to fall and break.
How Anchors Fix the Issue
Anchors solve this problem by gripping the inside of the wall in a way screws alone can’t. They each expand, twist, or lock behind the drywall to create a stronger base. After installed, they hold the screw strongly and spread the weight across a larger area, keeping it stable even under stress.
Getting Ready for Installation
Before learning steps for how to use drywall anchors, it is important to select the right anchor for your project. Not all anchors are made the same, and picking the wrong one can make your wall repair harder later.
Picking the Right Anchor
There are different kinds of anchors for different needs. Plastic expansion anchors are good for light weight items. Threaded anchors screw directly into the drywall and are good for mid-weight things. Toggle bolts are metal anchors made for heavier loads. Always check the weight rating printed on the packaging and choose one that holds more than your item weighs.
Tools You’ll Need
For most installations, you’ll need a screwdriver or drill, a pencil for marking the wall, and possibly a hammer or drill bit depending on your anchor type. Some anchors need pre-drilled hole but others drill in by themselves. Inspect the instructions for your anchor before you begin.
Preparing the Wall
Start by marking the exact spot where you want to place the anchor. If you’re hanging more than one item like a shelf with two brackets—use a level to make sure your marks are straight. You should also inspect the wall for studs, pipes, or wires behind it. A simple stud finder can help you avoid damaging anything hidden.
Step-by-Step Anchor Installation
When you’re ready, follow these steps to install your anchor and screw completely. Doing this right ensures your item stays in place and your wall remains undamaged.
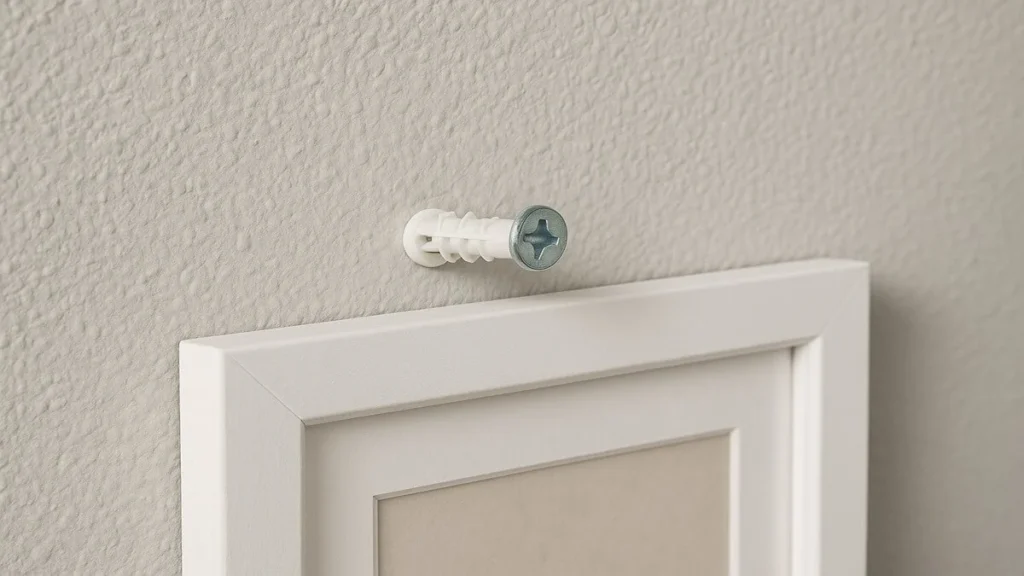
Inserting the Anchor
Start by either drilling a pilot hole or pressing the anchor directly into the wall, depending on its type. For push-in anchors, smoothly tap them into the wall with a hammer until they are flush. For threaded anchors, insert them into the wall and gently turn with drill until the anchor is tight and flat against the surface.
Installing the Screw
Put screw into the center of the anchor and slowly turn it clockwise. As the screw goes in, it will expand or grip the anchor from inside. This step may also cause the anchor to lock into place behind the drywall. Stop turning when the screw feels firm. Do not overtighten, in that case you might crack the drywall or damage the anchor.
Testing for Strength
After the screw is installed, give it a gentle pull to make sure it’s solid. If the anchor moves or feels loose, remove it and start over with a better-fitting anchor or in a new location. Once it feels tight, your anchor is ready to support the item you’re hanging.
Mistakes to Watch Out For
Even a simple job can go wrong without careful attention. Many anchor failures happen because of rushed work or using the wrong tools. Avoiding these common issues will help make sure your anchor holds properly.
Using the Wrong Size
A small anchor won’t hold a heavy item, and an oversized anchor might break the wall or leave too large a hole. Match the anchor’s weight rating and screw size to your project. Don’t guess—check the box before starting.
Drilling at an Angle
Always insert anchors straight into the wall. A tilted anchor or screw can shift over time and weaken the hold. If you are not drilling straight, use a guide or level to help.
Overtightening the Screw
Too much turning screw can strip the anchor or spin it loose inside the drywall. Turn screw until it feels snug. If the screw keeps spinning or doesn’t stay tight, remove the anchor and try again.
Removing and Replacing Anchors
Knowing how to use drywall anchors also means to knowing how to remove them completely. Maybe you’re moving furniture, changing decor, or fixing a bad install. Removing anchors the right way keeps wall damage minimal.
Taking Out the Screw
Unscrew the screw carefully by turning it counterclockwise. Don’t pull or yank—it should come out smoothly. Once the screw is out, decide whether to remove the anchor or push it into the wall.
Dealing With the Anchor
Some anchors can be pulled out with needle-nose pliers. Others, especially toggle bolts, should be pushed into the wall cavity behind the drywall. If you try to yank them out and they resist, you may damage the wall.
Fixing the Hole
After removal, fill the hole with lightweight spackle. Let it dry, sand it smooth, and repaint. A well-patched wall can look as good as new in less than an hour.
Learn more about: How to Install Hardwood Floors?
Hang with Confidence Every Time
Now that you know how to use drywall anchors, you don’t have to worry about falling shelves or loose wall fixtures. Anchors give drywall the strength it was never meant to have on its own. With the right anchor, careful steps, and with steady hand, you can hang everything from artwork to storage safely and confidently. It is simple skill, but one that makes every home project a little easier and a lot stronger.
