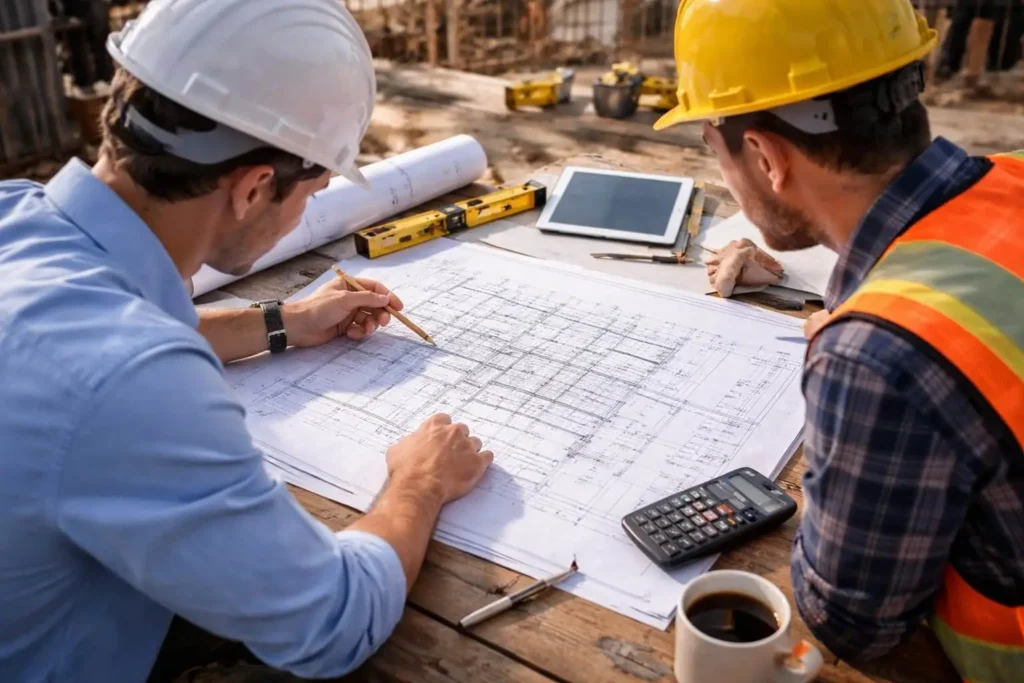
What Does a Construction Home Estimator Do?

A construction home estimator is a person who helps figure out how much it will cost to build a house. A lot of people want to know what does a construction home estimator do? This job is very important before any building work can begin. The estimator looks at plans, drawings, and other project details to figure out how much the house will cost. This includes time, tools, labor, and materials.
The estimator works closely with builders and clients to keep the budget on track. They help keep the project’s costs from going over what was planned. They help homeowners make smart choices by planning costs ahead of time. Building a home can get confusing and costly very quickly without an estimator.
Knowing the Main Job of a Home Estimator
The main job of a home estimator is to give as clear an estimate as possible of how much it will cost to build. They look at the plans for the house and make a list of everything that needs to be done. This includes paint, wood, concrete, wiring, and more. Each item is priced carefully to give you a full picture of the costs. Estimators also think about how long the job will take. Time has an effect on the cost of labor and renting equipment.
They help builders stay on schedule by planning ahead. This planning helps keep things on time and avoid unexpected costs. Every day, a good estimator uses math and experience. They take ideas written down and make them into real numbers. This makes the process of building easier for everyone.
How Estimators Figure Out How Much a Building Will Cost
Estimators work by breaking a construction project into many small and manageable pieces. Instead of guessing one large number, they price each part of the job on its own. This includes everything from the foundation to the final finishes. They research the current prices for the materials and labor in the local place so their numbers reflect real market conditions. By doing this careful research, estimators can give builders and clients a cost they can trust.
They also plan for things that do not always go perfectly on a job site. Some materials are wasted, damaged, or cut incorrectly, so extra supplies are usually needed. Estimators account for this so work does not stop due to shortages. In addition, they include costs for permits, inspections, and site cleanup. These details help to avoid the surprise expenses later and keep project moving the smoothly.
When creating a full cost estimate, the professionals often include the items that are below:
- Building materials like concrete, steel, wood, and drywall
- Labor costs for skilled workers, subcontractors, and supervisors
- Equipment and tool rentals needed for different phases of the job
- Permit fees and inspection costs required by local authorities
- Waste removal and disposal of unused or damaged materials
By following this step by step process, estimators help protect the project budget. Their work gives builders a clear financial plan and helps owners understand what they are paying for before construction even begins.
Collaborating with Builders and Homeowners
Estimators for construction homes work closely with builders. They clearly explain costs and answer questions. Estimators help the builders to set the prices and make bids. A clear estimate helps builders get jobs and plan better. Estimators also help people who own homes. They help explain where the money goes. This helps homeowners feel safe and builds trust.
Estimators change costs and explain how they will affect the project when they need to. In this job, it’s very important to be able to talk to people. Estimators need to pay close attention and use simple language to explain things. This teamwork keeps everyone on the same page from beginning to end.
What Home Estimators Use to Get the Job Done
To do their job well, home estimators need both skills and tools. You need to be good at math. Every day, estimators have to work with numbers. Being careful with details helps you not make mistakes. They also use software to make estimates. These tools help you keep track of costs and see how prices compare.
Another important skill is being able to read blueprints and plans. Estimators need to be able to read drawings well. Managing your time is important too. Estimators often have to work on more than one project at a time. They can meet deadlines better when they stay organized. When you put all of these skills together, estimators are reliable and accurate.
Why Home Estimators Are Important for Building
Home estimators help keep money problems from happening during construction. Costs can go up quickly if there isn’t a clear estimate. Estimators help keep costs in check from the very beginning. This keeps both builders and homeowners safe. They also make sure that projects go well. Work goes better when costs are planned ahead of time. There are fewer fights and delays.
This makes building less stressful. Estimators also help make projects better. When builders know how much money they have, they can make better choices about materials. This balance between cost and quality is very important when building a home.
Read more to know: What Is LVT Flooring?
The career path and daily work of an estimator
Being a home estimator can be a stable and rewarding job. A lot of people start with learning the basics of construction. Estimators who have built things know how much things really cost. Some people also go to training classes. Checking prices, reviewing plans, and updating estimates are all part of my daily work. Estimators might go to the job sites to see that how things are going.
This helps them to stay accurate and up to date. Estimators may be able to work on bigger projects as they get more experience. Some people become managers. People who like planning and solving problems can move up in this career.
What Is LVT Flooring?
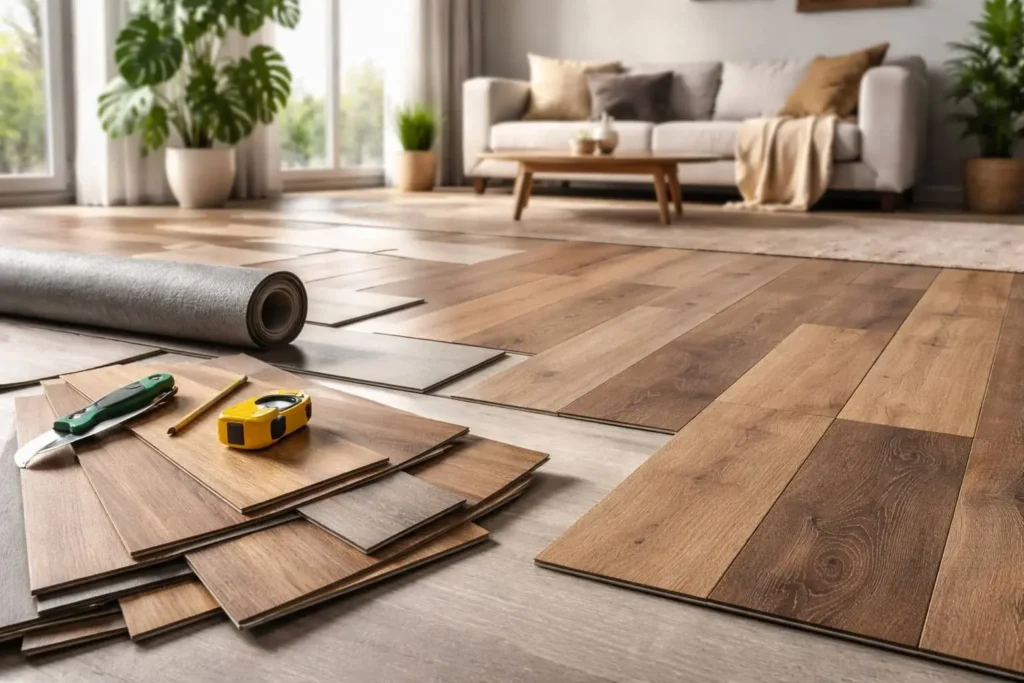
LVT flooring is a new kind of floor that looks like real wood or stone but is much easier to live with. A lot of people who own homes want to know what is LVT flooring? because it is now very common in homes, schools, and offices. Luxury vinyl tile, or LVT, is a type of flooring that is strong, comfortable, and stylish. It comes in a lot of colors and patterns, so it will fit in with almost any room.
The layers in this flooring make it last a long time. It feels soft underfoot and is warmer than real tile. LVT flooring is also water-resistant, which is great for homes that are busy. It doesn’t need special care and is easy to clean.
What Sets LVT Flooring Apart from Other Types of Flooring
LVT flooring is unique because it looks good and feels good to walk on every day. It is made to look like wood or stone, but it is softer and quieter to walk on. It does not crack or warp as easily as real wood. This makes it a good choice for rooms that get a lot of use.
Another big difference is that LVT flooring can bend. You can use it in kitchens, bathrooms, and living rooms without worrying. In wet areas, a lot of other types of flooring have problems. LVT is good at the handling spills and keeps its shape. This balance of beauty and strength is what makes it special.
Also, it’s easier to put down LVT flooring than other types of flooring. It often clicks together or sticks down without any problems. This makes the setting up faster and easier. People like it because it looks good without making them feel bad.
How LVT Flooring Is Made and Planned
There are several layers that make up LVT flooring. Every layer has a job to do. The top layer keeps the floor from getting scratched and stained. There is a design layer underneath that makes the floor look like wood or stone. The details in this design are very clear.
The base layer makes the floor strong and stable. It keeps the tiles or planks from warping over time. LVT flooring lasts longer than regular vinyl because it is made up of layers. It can handle people walking on it, including kids, pets, and guests.
There are a lot of design options for LVT flooring. You can find looks that are light, dark, smooth, or rough. Some styles even feel like real wood. This gives homeowners a lot of options without having to pay a lot for natural materials.
Where LVT flooring works best in a home
LVT flooring is good for almost every room in a house. It is very helpful in kitchens where spills happen a lot. Cleaning is easy because water doesn’t hurt it easily. A lot of people also use it in their bathrooms for the same reason.
LVT flooring is also good for living rooms and bedrooms. It feels softer and warmer underfoot than tile. This makes rooms more comfortable for everyday use. It also helps cut down on noise, which is great for homes with a lot of people.
Another good place for LVT flooring is in the basement. These places usually have problems with moisture. LVT works better than wood in wet conditions. It is strong and flexible, so it works well in many different rooms.
The main reasons to choose LVT flooring
Many people choose LVT flooring because it has so many benefits. One big plus is that it lasts a long time. It is better at keeping scratches, dents, and stains off than many other floors. This is great for homes with kids or pets.
Another good thing is that it’s easy to take care of. You don’t need any special tools or cleaners. It looks new with just a little sweeping and mopping. It also keeps its color well, so it doesn’t fade quickly.
People love LVT flooring for these main reasons:
- Safe for wet areas and resistant to water
- Easy to walk on and soft
- A lot of styles, colors, and patterns
- Simple to keep clean and in good shape
- Tough enough for busy areas
LVT flooring is a smart and useful choice for many homes because of these benefits.
Read more: What Is a Bollard in Construction?
How to Install LVT Flooring in Steps
LVT flooring is easier to put down than many other types of flooring. Before you start, the surface needs to be clean, dry, and level. This makes the floor more stable and helps it last longer. Once everything is ready, the tiles or planks are laid out to see that how they will look.
A lot of LVT floors have a click system that snaps pieces together. Some people use glue to keep them in place. Compared to putting down heavy tile or hardwood, both methods are easy. This means that less work and faster results.
What Is a Bollard in Construction?
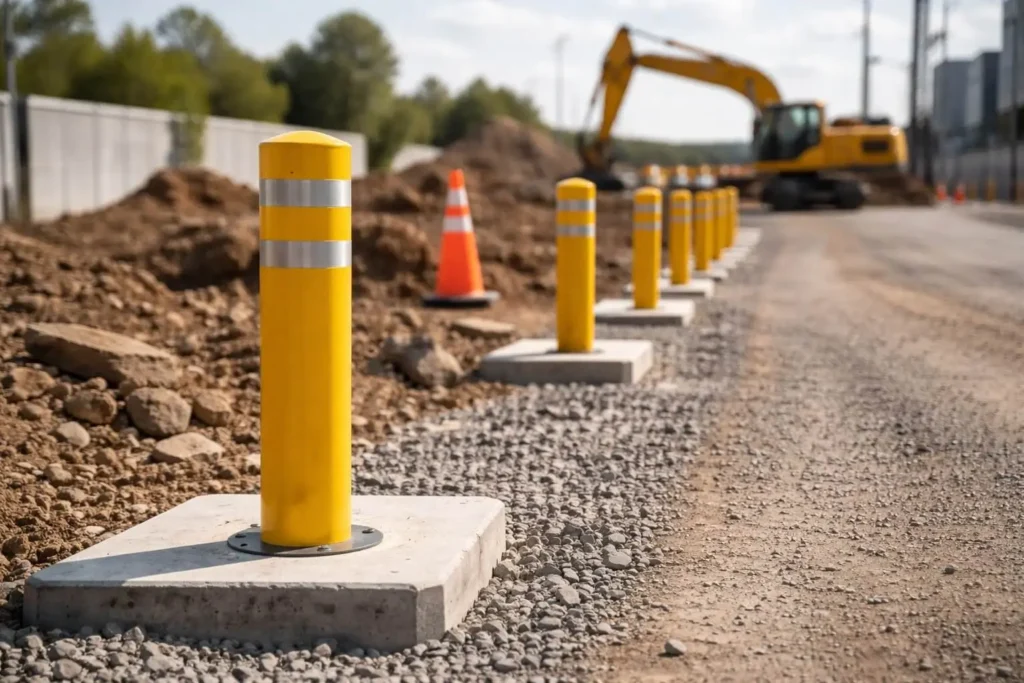
A bollard is a short, strong post that is put in the ground to keep people, buildings, and work areas safe. A lot of people want to knowwhat is a bollard in construction? because they see these posts a lot near roads, sidewalks, and work sites. Bollards are meant to keep cars, trucks, and machines out of places where they could hurt people. They are made to stay strong even when they are hit.
Bollards are put up on construction sites to keep people from moving around and make things safer. They protect workers’ tools, doors, and walls from accidents. Some bollards are always there, but others can be taken down when they’re not needed. Bollards may not seem like much, but they are very important for keeping construction sites safe and neat.
Why Construction Sites Need Bollards
There is a lot of activity at construction sites all day, with people, cars, and heavy tools moving around. Bollards help keep this movement under control and make it safer. They keep cars from getting into dangerous areas by blocking them. This protects workers and visitors from accidents that happen without warning.
Bollards also help keep traffic moving in the right direction. They tell drivers when to slow down or stop. This makes the site safer to work on and easier to understand. Workers can concentrate better on their work when they feel safe. That is why people think of bollards as a simple but effective way to keep people safe on construction sites.
Key Points About What a Bollard Is in Construction
- A bollard is a short strong post placed into the ground for safety
- It is used to block cars trucks or machines from entering unsafe areas
- Bollards help protect workers buildings doors and equipment
- They are commonly seen on construction sites near walkways and entrances
- Bollards can be made from steel concrete plastic rubber or wood
- Steel and concrete bollards are used for heavy impact protection
- Plastic or rubber bollards are used where light control is needed
- Some bollards stay fixed in one place for long term safety
- Other bollards can be removed to allow temporary access
- Bollards help guide traffic and control vehicle movement
Different materials are used to make bollards
Depending on how strong they need to be, bollards can be made from a variety of materials. Steel is a very strong material, so it is one of the most common choices. People often use steel bollards in places where there are a lot of big vehicles and tools. They can take a lot of force without breaking.
Another common material for bollards is concrete. Concrete bollards are tough and last a long time outside. Plastic and rubber bollards are used in places where there is less risk of impact. These are easier to move and lighter. The safety needs of the project are taken into account when choosing each material.
Bollards that can’t be moved vs. bollards that can be moved
Fixed bollards are put in the ground and stay there forever. These are used in places that always need protection, like busy walkways and entrances to buildings. Fixed bollards are very strong and keep people safe for a long time. They don’t need much care once they’re in place.
You can take out removable bollards when you need to get through. These are helpful in places that change a lot. For example, a road might be closed while work is being done and then opened again later. Bollards that can be taken down give you options while still keeping safety at the top of your list. Based on how the space will be used, builders choose between fixed and removable.
Every day, how bollards keep workers safe
One of the main reasons construction workers use bollards is to keep people safe. People who work often work near moving trucks and machines. Bollards make it easy to see the line between people and danger. This lowers the risk of injuries caused by cars driving into work zones.
Bollards also keep tools, equipment, and materials safe from harm. When tools are safe, projects go faster and cost less. People who work feel safer when they know there is protection around them. A safe workplace makes it easier for everyone to do their job and less stressful.
Common Places Where Bollards Are Put Up
There are a lot of places, both inside and outside of construction sites, where bollards are used. You can often see them near sidewalks, parking lots, and building entrances. They are put near gates, paths, and work areas on construction sites. They help people and cars get where they need to go safely.
You can also find bollards close to stores, schools, and factories. Bollards are used in these places to keep people safe from traffic. Bollards are easy to see from a long way away because they are bright colors. Bollards serve the same purpose no matter where they are: safety and control.
Read more: What Is a Purlin in Construction?
How to Pick the Right Bollard for a Job
The first step in picking the right bollard is to know what the project needs. Builders think about how much damage the bollard needs to stop. They also think about how long the bollard will be useful. A stronger bollard is needed for a busy area with a lot of traffic.
In some projects, how things look can also be important. Some bollards are made to look nice and fit in with the style of the building. Some are painted bright colors so that they stand out. Choosing the right bollard makes the site safer and keeps things in order. Good planning makes sure that bollards do their job well and correctly.
What Is a Purlin in Construction?
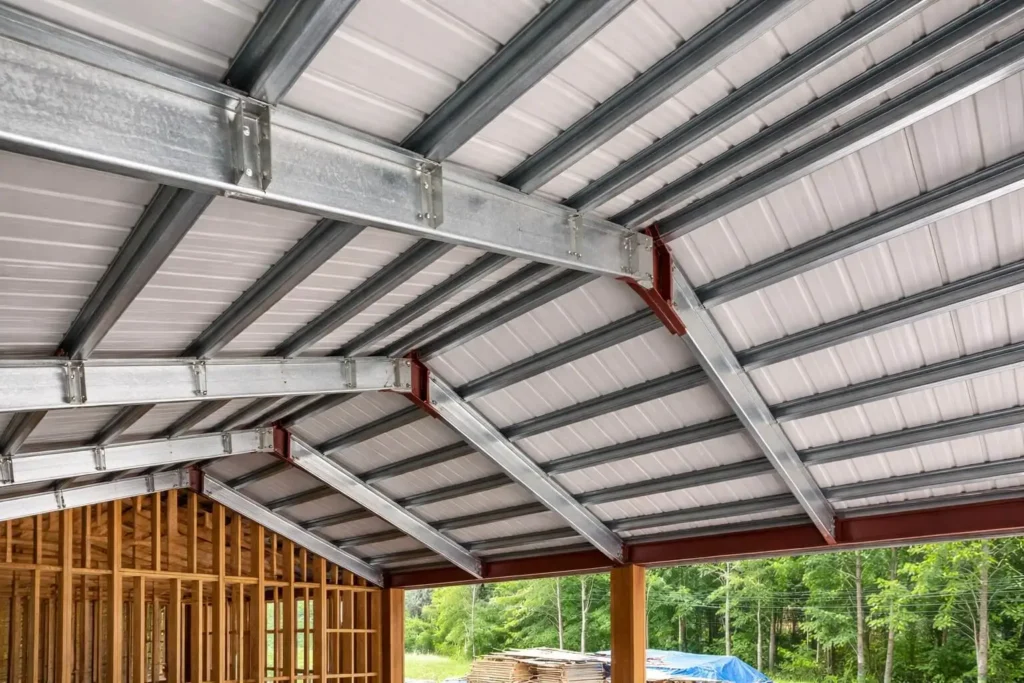
A purlin is a simple beam that helps hold up a roof. People often ask, “What is a purlin in construction?” Which means the long, flat piece that goes under the roof panels. Purlins hold up the roof covering and send the weight back to bigger supports, that are walls, rafters, or trusses. They aren’t as long as the main beams, but they are very important for keeping things stable and strong.
You can make purlins out of the different materials and shapes. People use them in their homes, barns, warehouses, and the factories. You can’t always see them from the ground, while they help keep the roof straight and strong. Putting purlins in the right place helps the roof last longer and keeps the roofing sheets from bending.
How Purlins Keep the Roof Up
The layer of purlins is between the roof covering and the main frame. Roof panels or boards go across the roof from purlin to purlin. This means that each purlin needs to be strong enough to hold the weight. The weight of the roof and the wind, rain, or snow are what make up the load. Purlins carry these loads to rafters, trusses, or walls that can safely hold them.
Engineers decide how big and how far apart the purlins should be. If there is enough space, builders can use lighter roof panels, which can save them money. If the purlins are too weak or too far apart, the roof might sag or leak. A roof that is well-designed will stay safe and clean for a long time.
Common Shapes and Materials
Purlins are made of steel, wood, or sometimes aluminum. Because they are strong and light, steel purlins are often used in factories and other industrial buildings. Steel is often shaped like a C or a Z. C-shaped purlins are easy to attach, and Z-shaped purlins can be stacked on top of each other to make a long line for roofs.
People use wood purlins in their homes and in buildings that are older. Wood looks warm and works well for shorter spans. You have to keep each material safe. You can paint or galvanize steel to stop it from rusting, and you can treat wood to stop it from rotting and getting bugs. The best option depends on the price range and how the building will be used.
Role of Purlins in Load Transfer
Purlins act as a middle link in the load path of a roof. Loads from rain snow and wind press down on the roof covering. That force is transferred to the purlins. From there it moves to rafters or trusses and finally down to columns and foundations.
This step-by-step load transfer is needed for the structural safety. Each member is designed to handle its share of the load. If purlins are missing or undersized other members may become overloaded. Proper purlin design ensures the entire structure works together as intended.
How Engineers Measure and Space Purlins
To figure out how big purlins should be, you need to know how far they need to go and how much weight they need to hold. Engineers use tables and simple math to decide how deep, thick, and far apart things should be. For longer spans, purlins need to be deeper or closer together. In places with a lot of snow or heavy roof coverings, purlins also need to be stronger.
Designers also look at deflection, which is how much a purlin bends when it has weight on it. Too much bend can break roof panels or make pools of water. Limits on bending keep the roof flat and safe. Checks and balances in the design make sure that problems don’t happen before building starts.
How to Install in Common
The purlins are held to the main frames by bolts, clips, or welds. Installers need to check that the roof sheets are level and that the fasteners are tight. You can splice purlins in the middle of long roofs with pieces that overlap to keep them strong. Adding bracing will keep purlins from twisting when they are under load.
Part of fastening is also making sure that holes aren’t too big and that coatings aren’t scratched. If you are careful when you put things together, you can stop leaks and rust from happening later. When the roof is properly aligned and the connections are tight, it works the way the designer planned.
Common Issues and How to Fix Them
You don’t have to do much work on most purlins, but checking them often can help you find problems early. Look for rust around the fasteners on steel purlins and rot on wooden ones. Purlins can move and roof panels can break if the bolts are loose or the clips are missing. Fixing small things is easier and less expensive than fixing big ones.
Also, quickly cleaning gutters and fixing leaks, keeps purlins safe. Water that pools on roofs or near seams can speed up the process of rusting or rotting. If a purlin is badly damaged, an engineer should check the roof to see if any of the other parts nearby were affected. Taking action right away keeps the whole building safe.
Explore to know: What Is Construction Change Directive?
Why Purlins Are Important for the Building’s Life
Purlins may not be the first thing that comes to mind when you think of a roof, but they are very important. They help the roof stay flat and neat and make sure it can hold heavy things safely. If you take care of and design the purlins well, the roof will last longer and cost less to fix over time.
The right material, the right amount of space between the pieces, and careful installation are all things that make a roof last. Knowing what purlins are helps builders, homeowners, and owners make better choices and spot problems early. A roof that is well supported makes you feel safe and keeps the things inside the building safe.
What Is Construction Change Directive?
Not every step of a construction project goes according to plan. What is construction change directive? This article explains. In a way that is easy for most people to understand. A construction change directive is a written order that tells a contractor to go ahead with a change in the work even if the cost or time effect isn’t fully known yet. It lets the project keep going while the details are worked out later.
People often use change directives when they need to make quick decisions. They help keep things moving and keep costs down by stopping delays. Owners use them to deal with problems that come up out of the blue, changes to the design, or urgent needs on the site. Learning how change directives work helps contractors, owners, and students understand how projects can be flexible while still following the rules of the contract.
What is the point of a Change Directive?
The main goal of a change directive is to keep work going. There are problems that need to be fixed right away on a lot of projects. If everyone doesn’t agree on the price or schedule right away, work could stop and delays could happen. The owner can approve the change right away with a change directive, which lets crews keep working without stopping.
Another important goal is to keep track of things and control them. The directive makes it clear what needs to change and who is in charge of making it happen. This makes a formal record that keeps everyone safe. It shows that the contractor didn’t do it on their own and that the owner agreed to be in charge of the change. This makes things less confusing later on.
Change directives also help projects run more smoothly. They keep things running while conversations are going on in the background. They help keep deadlines by letting work go ahead and keeping people from being idle.
When to Use Change Directives
When something unexpected happens on site, people often use change directives. These could be utility lines that are hidden, soil problems, or structural problems that weren’t there before. When these problems need to be fixed right away, the directive lets work start before the final costs are agreed upon.
They are also used when there are safety issues. A change directive gives clear permission to deal with the problem right away. This helps keep the project on track while also protecting lives and property.
Changes to the design can also cause change directives. Sometimes drawings need to be changed because of mistakes or new needs. If waiting would cause delays, the owner may give an order so that changes can be made right away. This flexibility lets projects change while still moving forward.
What Makes It Different from Change Orders
A change order and a change directive have different uses. Before the work starts, the owner and contractor agree on the cost and time changes. This is when a change order is issued. Everything is agreed upon ahead of time and added to the contract.
There is no need for agreement at the start of a change directive. It tells the contractor to do the work first and then deal with changes in cost and time later. This difference is important when time is of the essence and waiting to negotiate would slow down the project.
Knowing this difference can help you avoid conflict. Contractors should know that a directive does not take away their right to fair pay. Owners should know that the costs will be looked at again later. These tools work together to make changes go smoothly when both sides follow the rules.
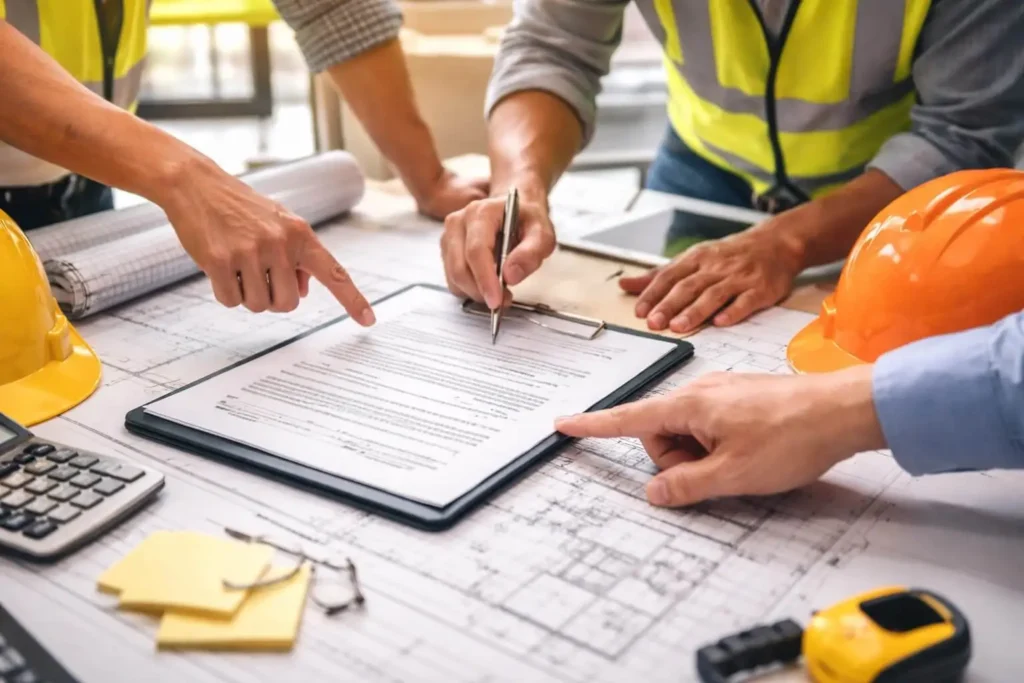
What each person does and what they are responsible for
The owner is a key person in giving a change order. The owner agrees to take responsibility for ordering the change by doing this. To avoid arguments, this authority needs to be clear. The directive should be clear and detailed enough to say what needs to be done.
The contractor is in charge of doing the work which was asked of them. At the same time, the contractor should keep a close eye on the time, materials, and labor costs related to the change. You will need this information later.
Architects or engineers often help with this. They might help figure out what the change will mean and how it will affect things. To make sure that everyone is treated fairly and to avoid misunderstandings later on, everyone should know what their role is and be able to talk to each other.
Changes to Time and Cost
After the work that was directed is done, the focus shifts to how it will affect costs and schedules. The contractor sends in records that show how the change affected the cost of materials and labor as well as the length of the project. For a fair evaluation, these records need to be correct and complete.
After that, the owner looks over the submission and talks about changes. This process changes the contract in a formal way. Both sides need paperwork to come to an agreement. Having clear records at this point can help avoid fights and delays.
There is also a lot of thought given to the effects of time. Some changes may take longer than planned, while others may not change the schedule at all. Being honest about these effects helps keep your expectations in check. If done correctly, this process closes the loop and makes the project clearer again.
Read more about: What Is Industrial Construction?
Risks and Best Ways to Do Things
One danger of change directives is that they don’t always make it clear what they mean. If the directive isn’t clear, people may disagree about what work needs to be done. Written confirmation and clear descriptions help lower this risk. Everyone should know exactly what is expected of them.
Another risk is not keeping good records. It’s hard to agree on how much time and money will be lost if there isn’t proper tracking. Contractors should keep daily reports, photos, and logs about the change. Owners should quickly look over information to avoid problems. Open communication and timely follow-up are two best practices. Talking about problems on a regular basis helps solve them early.
What Is Industrial Construction

Industrial building is all about making big buildings that can handle heavy operations and manufacturing energy. This article gives a simple and clear explanation of what is industrial construction for people who don’t know much about it. These buildings are not homes or offices; they have specific uses. They are made to work with machines and be used all the time. From the begin to the last check, planning and accuracy are important.
There are many ways which industrial sites help people live their daily lives that you can’t see. They help to make the products which people use every day, store goods, and make power. To make sure safety and quality needs are met, workers follow strict rules and plans. Students, workers, and business owners can learn about this field to better understand how these big projects come together and why they need special skills, teamwork, and careful management at every step.
What Industrial Building Projects Are For
Industrial projects are built to meet the needs of production and storage. These buildings are home to factories, plants, and the processing centers. Each building is made to be used a lot and for long periods of time. Strong materials are used to deal with weight, heat, and movement. The layout makes it possible for people, machines, and cars to all work together. This planning makes sure that things go smoothly every day. Without good design, work would take longer and risks would go up. Building for a purpose helps with both safety and efficiency.
These projects also help the economies of the areas where they are built. They help businesses in the area and create jobs. When a plant opens, suppliers and services come along. This growth will help communities in the long run. Industrial areas also help meet national needs, such as food and energy. Their purpose is more than just walls and roofs. They are the backbone of modern life because they make it possible to do big jobs that smaller buildings can’t handle.
Different kinds of industrial buildings
There are many different kinds of factories. Factories make things like cars, tools, and electronics. Cities and towns get their electricity from power plants. Before delivery, warehouses keep things safe. Oil and gas are turned into usable fuels at refineries. Each type has its own needs and layouts. Designers make sure that spaces are big enough for equipment and work flows. This variety makes the field hard to understand and fun.
There are strict rules that each facility must follow. Different uses have different safety systems, ventilation, and access paths. Food plants need to be clean and have strict rules. Chemical plants need strong monitoring and containment. Teams can build correctly, if they know about these differences. Good planning makes sure that each site works as it should. This focus on type and use keeps operations safe, efficient, and reliable for many years.
The process of planning and designing
Planning starts a long time before building starts. Teams look into the size of the land, how to get to it, and the utilities. Engineers make buildings that can hold a lot of weight. Designers make plans for layouts that make it easy to move around. Every little thing is checked and given the go-ahead. This careful start stops changes that would cost a lot of money later. Good planning saves time and money on the whole project.
Key points about industrial construction:
- Builds facilities for manufacturing energy and storage
- Uses strong materials and heavy equipment
- Requires detailed planning and design
- Follows strict safety rules and standards
- Involves skilled and trained workers
- Supports large scale industrial operations
Design also looks ahead to what will be needed. Buildings can add on or update their equipment later. Layouts which can change let businesses grow without having to rebuild them. Workers can follow the steps correctly, if they have clear plans. The design work goes faster when everyone knows what’s going on. Planning well from the beginning to the end is the key to success.
Tools and Materials Used
Strong materials are used in industrial projects. Steel, concrete, and reinforced frames are common. These materials can handle weight, heat, and vibration. Coatings that are made for this purpose keep surfaces safe from chemicals and wear. Picking the right material makes things safer and lasts longer. Good materials cut down on repairs and downtime.
Heavy machinery is very important. Cranes, lifts, and mixers are useful for moving big parts. Operators need to be careful and trained. Using tools correctly keeps workers safe and on schedule. People check tools often to make sure they don’t break. The right combination of tools and materials helps to get strong and long-lasting results.
Rules and Standards for Safety
Safety comes first on industrial sites. Every day, workers have to follow strict rules. You must always wear protective gear. Signs and barriers that are easy to see help people move. Regular checks help find risks before they happen. These steps keep people and equipment safe.
Local and national groups set standards. They tell people how to build and check things. You have to follow these rules. Following rules keeps you the safe and out of problem. Building trust is easier in a place with a strong safety culture. It also keeps the projects going without delays caused by the injuries or rule breaks.
You may like to read: What Are The Responsibilities Of Construction Workers?
The Role of Skilled Workers
Plans come to life with skilled workers. They set up systems and run machines. Training helps them do their jobs right. They can solve problems quickly because they have been doing it for a long time. Teamwork is how each role helps the others.
Workers also talk to their bosses and inspectors. They clearly report on the problems and progress. Working together like this keeps the quality high. Skilled workers ensure that projects meet standards. Their hard work and knowledge turn designs into working buildings that serve industries for years.
What Are The Responsibilities Of Construction Workers

Construction sites rely on the skilled people who turn plans into real buildings. This guide explains what are the responsibilities of construction workers in a clear and simple way for readers who want to understand the job. These workers help shape homes roads and workplaces through daily effort teamwork and care. Their role supports safety quality and progress on every project they join.
Construction work is more than lifting tools or using machines. It requires focus respect for rules and steady learning each day. From early planning to final checks, workers stay active and alert. They follow the guidance, share tasks, and solve problems together. Understanding these duties helps future workers employers and students see why this job matters so much. It builds trust pride and long term skills across the industry.
Site Safety and Personal Care
Safety is a daily focus on every site. Workers wear proper gear and check tools before use. They watch their steps and keep the areas clean to prevent the falls. Clear signs and barriers help to guide movement and protect others. When risks appear workers report them fast. This steady attention lowers injuries and keeps projects moving. Safe habits also protect equipment and nearby people. By following rules and training lessons workers create a secure place where everyone can work with confidence. Regular meetings and reminders support the awareness and encourage smart choices during busy tasks for all crew members on site daily now.
Personal care also matters for long shifts. Workers manage rest water and posture to avoid the strain. Lifting is done with care and help when loads feel heavy. Breaks allow muscles to recover and minds to stay sharp. Clean hands and safe storage reduce the illness. Workers look out for every other and speak up when someone seems tired. This shared care builds trust. Over time healthy habits support the long careers and better results for the whole team. Simple routines practiced daily keep energy steady and help prevent common job injuries which slow progress and raise costs for everyone involved on site.
Reading Plans and Following Instructions
Workers often begin by reviewing the drawings and notes. These guides show sizes, materials, and steps required for the every task. Careful reading helps to avoid mistakes and saves time later. When plans change, workers listen closely and adjust their work. Asking questions is encouraged to clear the confusion early. This attention to detail helps match the final result with the original idea. Accurate work also supports inspectors and managers during checks. By respecting plans workers help the project to stay on track and meet expected standards set at the start.
Clear instructions from leaders guide daily tasks. Workers follow the schedules and step by step directions. This order keeps the teams moving together without any conflict. When tools or supplies are missing workers report issues quickly. They also share updates about the progress or delays. Good communication stops rework and waste. It builds respect between teams and leaders. Over time this habit improves the speed and quality. Projects finish smoother when everyone understands their role and follows clear guidance with care.
Using Tools and Materials Correctly
Construction work involves many tools and materials. Workers learn the proper use through training and practice. They choose the right tool for every task to avoid the damage. Clean and stored tools last longer and work better. Workers inspect cords blades and handles before use. This care reduces the breakdowns and keeps work flowing. Materials like wood concrete and steel are handled with respect. Proper use helps control costs and limits waste on site. Skilled handling also improves look and strength of the finished work.
Materials must be measured and placed with care. Workers follow mixing and setting times closely. Rushing can weaken results and cause delays later. By staying patient workers make sure strong bonds and smooth surfaces. They protect materials from weather and dirt. Teamwork helps move heavy items safely. This shared effort speeds up the tasks without harm. Over time careful handling builds pride in craftsmanship and earns trust from leaders and clients alike.
Teamwork and Communication
Construction sites rely on teamwork every day. Workers support each other by sharing tasks and space. Clear talk helps avoid collisions and confusion. Simple signals and calls guide lifts and movements. The respectful behavior keeps the stress low during busy hours. When problems arise teams discuss the solutions together. This open approach builds the trust and keeps morale high. Strong teamwork allows the crews to handle the tough tasks safely and on time.
Good communication also links workers with leaders. Updates about progress help plan next steps. Workers report issues before they grow into delays. Listening is as important as speaking on site. By paying attention workers catch details others miss. This shared awareness improves the safety and quality. Over time, strong communication creates a smooth rhythm. Projects benefit when everyone stays informed and connected throughout the day.
Maintaining Quality Standards
Quality work requires focus and patience. Workers inspect the measurements and alignment often. Small errors fixed early prevent big problems later. Clean finishes show care and the skill. Workers follow the guidelines to meet building codes. These standards protect users and ensure long lasting results. Pride in work pushes the teams to do their best. Quality checks also help projects pass reviews without delays.
Consistency matters across all tasks. Workers repeat good habits each day. They compare work with plans and samples. When results fall short they correct them quickly. This honesty saves the time and builds trust. Over time, this focus leads to the strong reputations. High standards bring more opportunities and steady work for skilled teams.
Read more: How to Read Construction Plans?
Adapting to Changing the Conditions
Construction sites change often. Workers stay flexible and adjust the tasks as required. They move to safe the indoor work during the storms. This ability keeps the progress moving despite challenges. Learning to adapt reduces stress and keeps teams productive.
New tools and methods also appear over time. Workers learn and improve through training. They accept feedback and try better ways. This growth supports safer and faster work. Adapting helps workers stay valuable in the field. It also supports long term careers. Projects succeed when crews respond well to change and keep a positive mindset.
How to Read Construction Plans
When people first look at building drawings with a lot of lines, symbols, and notes, they often feel confused. Learning how to read construction plans helps homeowners, students, and beginners understand what is being built and how the work should go. These plans are like a clear map for a project. They show the sizes, materials, and basic instructions for each room so that everyone knows what to do from start to finish.
Knowing how to read these drawings makes building less stressful and more predictable. You don’t have to be a pro builder to learn the basics. You can ask better questions when you can read plans. Talk clearly with contractors and spot problems early on. This saves you time, money, and effort. It also helps you feel more sure of yourself when you look back on your progress or plan changes during a project.
Knowing what building drawings are for
Before construction starts, building drawings show what a structure should look like. They tell you where to put the doors, windows, walls, and rooms. These drawings help workers put things together in the right place and size. Workers would have to guess without them, which could lead to mistakes. Each line, symbol, and note helps guide the work.
These drawings also help keep the project on track from start to finish. Builders use them to plan their daily work and order supplies. Inspectors use them to make sure the work is done according to the rules for building. Designers use them to make their ideas clear. The project goes more smoothly when everyone uses the same drawings. Knowing what these drawings are for will help you understand why details are important and why changes need to be made carefully. Learning Common Signs and Symbols
To keep plans neat and easy to read, construction drawings use symbols. A simple shape could mean a light, a sink, a door, or a window. Using symbols saves space and keeps notes short. Most plans have a key that tells you what each symbol means. If you look at legend first, you’ll be able to understand the rest of the drawing more quickly. These symbols might look confusing at first. You will notice that many symbols show up on different plans after you practice. Thick lines normally show walls, while thin lines show things like cabinets or fixtures. Arrows show you where to go, and circles with numbers show you where to find more information on another page. Learning these symbols can help you feel less stressed and make reading plans feel more natural over time.
How to Read Measurements and Scales Right
Measurements tell you how big or small each part of a building should be. They show the length, width, and height of doors, windows, and walls. The scale shows how big the drawing is compared to how big things are in real life. For instance, one inch on paper could stand for several feet in the actual building. This helps drawings fit on a page while still showing the right sizes.
Before you decide how big something is by looking at the drawing, always check the scale. It’s better to write down the numbers on the plan than to guess. Reading carefully can help you avoid making mistakes like making a room too small or a wall too short. Knowing how to measure things also helps you picture how much space you’ll have when the project is done.
The Main Reasons to Understand Building Drawings
- Gives you a clear picture of the final project
Understanding building drawings helps you see what the finished structure will look like before work begins. You can understand room sizes layout and placement of doors and windows. This makes it easier to know if the design meets your needs and expectations.
- Makes communication with builders much easier
When you understand the drawings you can talk more clearly with builders workers and contractors. You can point to specific areas on the plan instead of guessing. This reduces misunderstandings and helps everyone stay on the same page.
- Reduces mistakes and costly changes
Many construction errors happen because plans are misunderstood. Knowing how to read drawings helps you spot problems early. Fixing the issues early costs less than making changes after work has started or finished.
- Builds confidence when reviewing plans and progress
Being able to read the plans helps you to feel more confident, when checking work on site. You can compare the drawings with what is being built and notice if something looks wrong. This confidence helps you to stay involved and informed.
Understanding the Different Types of Plan Views
Different views of the plans show the whole design. When you look at a top view, you see the layout as if you were looking down from above. This view helps you figure out where to put doors and hallways in a room. Because it shows the whole layout clearly, it’s often the first view people learn to read.
Side views show how tall and wide walls, roofs, and floors are. These views show how tall things are and how they fit together. Detail views let you see small areas up close, like the corners or joints of stairs. They show how the pieces fit together. You can learn more about the whole project by reading different points of view together instead of just one.
You may like to read: What Is Shoring in Building Construction?
Following Notes and Written Directions
Notes add information that drawings alone can’t give. They list the materials, how to build things, and any special rules. Some notes are about the whole project, while others are only about one part of it. Most of the time, these notes are put close to the area they talk about so that people can find them more easily.
It is very important to read notes carefully. If you don’t do them, you might make mistakes, take longer, or have to pay more. Notes tell you things like what kind of material to use or how to put something together. When you use both drawings and notes, you get clear, complete instructions. This helps everyone do their job right and keeps things from getting mixed up during construction.
What Is Shoring in Building Construction?
To keep workers safe and buildings stable, a lot of construction projects need temporary support. When people see braces holding walls or trenches in place, they often ask what is shoring in building construction. This method uses extra supports to keep things from falling apart while repairs or new work are being done. It keeps nearby property safe and gives crews the confidence to work on active sites of all sizes in busy areas.
This subject is important for builders, homeowners, and inspectors who want to know what they are doing. Knowing what these supports are for, how to plan for them, and what their limits are can help cut down on risks and delays. It also makes it easier for teams on site to talk to each other. The sections below explain how to use methods, materials, and safety in simple terms for people who want to know how to make practical decisions during the early planning stages and while working on small and large projects.
Why you need temporary structural support
Temporary support systems are used to keep parts of a building still while work is being done. They help move heavy things that walls, floors, or soil can’t handle on their own during changes. These supports keep everything in balance when sections are opened or changed. This lets workers do their jobs without worrying about things moving suddenly. Good planning ensure each job has the right amount of strength and is in the right place.
These systems also protect buildings, streets, and facilities that are nearby. If they don’t get the extra support, so vibrations or shifting the soil could hurt the places outside of the work location. Using the right support makes repairs and legal fees affordable. It also keeps projects on track. When the things are stable, crews can get their work done faster. The main goal is to keep people safe and make sure everything works during temporary conditions on the job site.
Situations That Often Need More Help
Because the ground can shift without warning, excavation work often needs extra support. When the sides are left open, deep trenches for pipes or foundations are dangerous. Support systems stop the soil from falling in. This keeps trench shape and protects the workers who are working below ground. Because there isn’t much space, cities with buildings close by need extra care.
When walls or floors are taken out, repair and remodeling work also needs help. Some parts of older buildings may not be able to stand on their own. When work is being done on a bridge or road, supports hold parts in place while they are being replaced. Temporary systems are also helpful for fixing storm damage. In each case, the goal is to keep things from falling apart while changes are being made.
The Main Benefits of Using Temporary Support
1. Prevents sudden collapse during work
Temporary support systems help hold walls soil and structures in place while work is going on. This reduces the risk of sudden failure that could cause serious injuries. Workers can focus on their tasks without fear of unexpected movement or collapse.
2. Protects workers equipment and nearby property
These supports create a safer space for tools machines and materials. They also protect the nearby homes roads and buildings from damage caused by shifting soil or structural movement. This lowers repair costs and avoids unnecessary disputes.
3. Makes excavation and repair work safer
Digging trenches or fixing the damaged structures can be dangerous without added support. Temporary systems keep open areas stable and reduce hazards. This allows crews to complete tasks with better control and fewer accidents.
4. Holds structures until permanent elements are installed
During construction, some parts of a building are not strong enough on their own. Temporary support keeps everything stable until permanent walls beams or foundations are finished and secured.
5. Improves project planning control and confidence
When a site is properly supported teams work with greater confidence. This improves the coordination reduces the delays and helps projects stay on schedule while meeting safety standards.
Things Used to Make Temporary Support Systems
Wood is a popular option as it is easy to shape and change on the job site. It works great for the small loads and short-term jobs. When strength and durability are important, steel is used. It can handle a lot of pressure and be used again and again. Aluminum is lighter and easier to move, which is helpful in small spaces.
You can also make quick changes with hydraulic tools. These tools help the crews apply force evenly and make changes quickly. Before using any materials, they must all meet safety standards and be inspected. The choice relies on how big the load is, the site conditions, and how long the project will take. Using the right materials makes work safer and more efficient.
Steps to Take When Setting Up and Taking Down
Trained staff begin by looking over the site. They look at the load points of different kinds of soil and the buildings that are nearby. There is a clear plan in place before any equipment arrives. To avoid sudden changes, supports are put in place in stages. Workers carefully follow drawings and measurements to make sure everything is correct.
Slowly take things away after the permanent parts are safe. Loads are moved back in a safe way. Crews keep an eye out for movement and make changes as needed. Hurrying this step can hurt things. Removing things the right way keeps the site safe until the project is done and ready for regular use.
Read more: What Is Glazing In Construction?
Best Practices and Safety Rules for the Site
Everyone needs to get safety training. Workers need to know how to find risks and tell someone about them. You should always wear protective gear. Daily checks help find parts that are loose or worn out. Signs and barriers that are easy to see keep people out of danger zones.
Supervision makes sure that rules are followed the right way. Only approved materials and designs are used. We keep an eye on the weather because rain or heat can make things less stable. Good communication keeps teams on their toes. Following best practices makes work go more smoothly and cuts down on accidents.
What Is Glazing In Construction?
Glazing is the part of a building that uses glass or similar clear panels in windows, doors, and walls. If you have ever asked, “what is glazing in construction?” it is basically the work of choosing the right glass and installing it so it looks good and keeps the weather out. It matters for comfort, safety, noise, and energy use. Good glass work can make rooms brighter and reduce glare.
Glazing can be simple, like a small bathroom window, or complex, like a tall curtain wall on a tower. The same idea applies in both cases: the panel must fit, stay supported, and seal tight. In this guide, you will learn where it is used, what materials are common, and how teams check quality on site from start to finish.
Where Glass Work Appears On A Jobsite
You will see glass work in more places than just house windows. Storefronts often use large panels to show products and bring in daylight. Office buildings may use full height glass walls, lobby doors, and interior partitions. Skylights and roof lanterns bring light into deep rooms. On a jobsite, each location has its own demands. A shower enclosure needs water tight seals and smooth edges. A stair guard needs strong supports and safe corners.
A storefront needs careful alignment so doors swing right and frames stay square. In tall buildings, teams plan for wind and movement, so the panel can flex without cracking. Knowing the exact use helps you pick thickness, frame type, and sealant. It also guides storage and handling, since glass can chip if edges touch concrete or tools. Mark each opening, check the rough size twice, and keep a clear path for delivery. Use racks, corner guards, and soft pads. Coordinate with framing and paint crews so panels are set after messy work is done.
Glass Options And What Makes Them Different
Not all glass is the same. Clear annealed glass is basic and can break into sharp pieces, so it is not used where people could fall into it. The Tempered glass is heat treated so it is stronger and breaks into small cubes. Coatings and tints change how glass performs. Some panes include a solar control layer to reduce glare and fading from sunlight. Frosted or patterned glass gives privacy in bathrooms and offices.
You may also see acoustic glass, which uses special layers to cut traffic noise. When choosing materials, match the glass to the risk and the climate. Think about wind load, impact risk, and how close people will be to the opening. Ask for the exact safety rating and thickness. Review the spacer, sealant, and edge finish, because weak edges can lead to leaks and fogging inside the unit after cold, wet long seasons.
How Panels Are Set, Supported, And Sealed
Before a panel goes in, crews measure the opening and check the frame. The sill must be level, and the sides must be plumb, or the panel can bind and crack. Installers also clean dust, oil, and old sealant so new materials stick. They set small setting blocks at the bottom to carry the weight. For big panels, they use suction cups and lifts to avoid twisting the glass. After the panel is placed, crews add gaskets or apply sealant in a smooth bead. They tool the seal so it presses into the joint and sheds water.
They leave the right gap so that the glass can expand and contract with temperature changes. Then they add stops or caps that hold the panel tight without pinching it. If the unit is insulated, crews also check weep holes so any water can drain out. Good sealing is not only about stopping rain and drafts. It also blocks air leaks, cuts noise, and protects frames from rot. Allow proper cure time before washing. Check seals again after a hot day and after a cold night so joints stay fully tight.
Safety And Energy Rules You Should Know
Building rules focus on people safety first. Glass near doors, floors, tubs, and stairs often must be safety rated. That usually means tempered or laminated material, or both. The goal is to lower the chance of serious cuts if it breaks. Thickness and support also matter. A thin pane in a large opening can flex too much in wind, so engineers set limits for each project. Energy rules look at heat loss and comfort. Insulated units help slow heat flow, which can lower heating and cooling costs.
In some places, codes also set limits for how much sun heat can enter on big west facing walls. Proper framing and seal details help prevent drafts and water leaks. If water gets inside, it can rot wood, rust steel, and cause mold in walls. Teams also confirm fire rated units match the approved listing. If a unit requires impact resistance, so inspect the stamp on the pane. If a unit has a special coating, confirm the label faces the correct side. Take photos of labels before trims cover them. Review these details early, not after walls are closed and walls are painted.
Explore more: How To Monitor Construction Site Quality?
Cleaning, Inspections, And Long Term Care
After installation, care keeps glass looking clear and seals working. Start with gentle cleaning. Use the mild soap and water, then rinse well. Avoid rough pads that can scratch coatings. Keep metal tools away from edges and corners, since small chips can grow into cracks. In busy areas, add simple protection like corner guards on frames and door stiles. Inspection is just as important. Walk the building after heavy rain and look for wet spots near sills and corners. Check for gaps in sealant, loose stops, or torn gaskets.
If you see fog inside an insulated unit, the edge seal may have failed. Record the location, the room, and the panel size so replacements are easy to order. Also check hardware on glass doors, like closers and hinges, because loose hardware can twist the panel. Plan small fixes early, before water reaches wall cavities. When you schedule routine checks, set them at season changes. Heat and cold can reveal movement problems. Keep spare gaskets and sealant on hand. Touch up joints where needed. With the simple care, panels stay safe, clear, and quiet for years.
