Estimating Cost to Build a Bowling Alley

For many entrepreneurs, opening a bowling alley is a business idea and a chance to bring people together for fun and social connection as well. Before breaking ground, however, one of the biggest questions is estimating cost to build a bowling alley. Without knowing the numbers, it is almost impossible to decide if the project makes sense financially.
A clear cost estimate does more than guide construction. It gives lenders and investors confidence, reduces guesswork for contractors, and sets expectations for owners from day one. With a detailed breakdown of labour, materials, permits, site work, fixtures, equipment, and contingencies, the team can lock scope, compare bids fairly, and avoid costly change orders. Accurate pricing also feeds the schedule. When you know lead times and cash flow needs, you can phase the work, order long lead items early, and sequence trades so the site stays productive.
Understanding the Basics of Bowling Alley Construction
When people begin estimating cost to build a bowling alley, they often start with the physical structure. A bowling alley is far more complex than an ordinary commercial building. The lanes must follow precise measurements, the flooring has to be specially designed for performance, and the roof should be high enough for proper lighting and ventilation. These details quickly get incorporated into the budget.
On top of that, there are building codes, zoning requirements, and permits. In many cities, entertainment venues face stricter regulations than regular shops or offices. Location is equally important. Land in a busy urban area might cost more, but it usually guarantees stronger customer traffic. From restrooms and snack bars to locker areas and seating, the construction basics set the stage for the entire investment.
Key Factors That Influence Overall Cost
Many factors form the final figure when estimating cost to build a bowling alley. Land purchase is often the largest. A plot in a prime commercial area may eat up a big portion of the budget, however land in a quieter suburb might be cheaper but draw fewer customers. The number of lanes is another key driver. A facility with 24 lanes will naturally require more materials, machinery, and staff than one with just eight.
Utilities also affect costs. Bowling alleys demand strong electrical systems, proper plumbing, and reliable heating and cooling. Customers expect comfort, so features that are food courts, clean restrooms, and spacious waiting areas cannot be skipped. Even parking spaces, signage, and exterior design carry expenses. Hidden costs, including insurance, inspections, and legal approvals, often surprise new owners. Pointing these parts early makes sure a budget which is both realistic and dependable.
Breaking Down Equipment and Technology Expenses
Perhaps the most critical part of estimating cost to build a bowling alley is the equipment. Lanes, pinsetters, ball return systems, and scoring machines form the backbone of the business. These items are not cheap, and skimping now often cause breakdowns and repairs later. Quality equipment may cost more upfront, however it saves money and headaches over time.
Technology has also transformed the bowling experience. Customers now expect the digital scoring, touch-screen interfaces, and vibrant sound and lighting systems. While these upgrades raise initial investment. They also make the facility more attractive and competitive. For many bowling alleys, these features turn first-time visitors into loyal clients. Regular maintenance is also necessary, because machines operate daily. Choosing trusted suppliers and setting aside funds for upkeep makes sure smooth operations long after the grand opening.
Comparing New Construction with Renovation
One of the biggest decisions for investors is whether to build from scratch or renovate an existing space. New construction allows complete freedom over layout, design, and technology. Everything can be customized to modern standards, from the placement of lanes to the addition of food courts and arcades. The downside, of course, is cost. Building from the ground up requires more money and more time before the business can open its doors.
Renovation, on the other hand, may look more affordable at first. Buying an existing building, especially one already used for recreation, can shorten the process. However older structures often hide problems that are outdated wiring, weak plumbing, or poor insulation that lead to surprise expenses. Deciding between these two options requires a careful look at budget, location, and long-term plans. For some, renovation is the faster path; for others, new construction is the smarter investment.
Budgeting for Staffing and Operational Needs
Construction and equipment are only half the battle. After the alley is ready, the day-to-day operation starts, and this comes with its own set of costs. Staffing is a major expense. Managers, lane attendants, cashiers, and cleaning crews are all necessary to keep the facility running smoothly. Well-trained employees improve the customer satisfaction. Therefore training and benefits should be included in the budget.
Operational costs go beyond salaries. Utilities that are electricity, water, and heating must be paid monthly. Machines need regular servicing to stay reliable. Marketing campaigns, from social media ads to community events, help to attract customers but add to expenses. Food and beverage services need supplies, licenses, and dedicated staff. A detailed operational budget makes sure that the alley is built and it also sustainable, balancing income and expenses in the long run.
Read more about: Cost of Procore Construction Software.
Measuring Long Term Return on Investment
At the end of day, success is measured by return on investment. A bowling alley makes the money in more ways than lane rentals. Since food and drink sales, arcade games, birthday parties, and league memberships all create income therefore the challenge is to compare these earnings with the large upfront costs of construction, equipment, and staffing. A solid financial model can show how quickly the investment will be recovered.
To strengthen returns, marketing strategies are essential. Hosting tournaments, offering loyalty programs, and creating family packages attract more customers. A bowling alley can become a community hub, which builds loyalty and steady income. Long-term profitability comes from balancing smart cost estimation with creative revenue streams. With careful planning, the business not only pays back the initial investment but grows steadily year after year.
Cost of Procore Construction Software
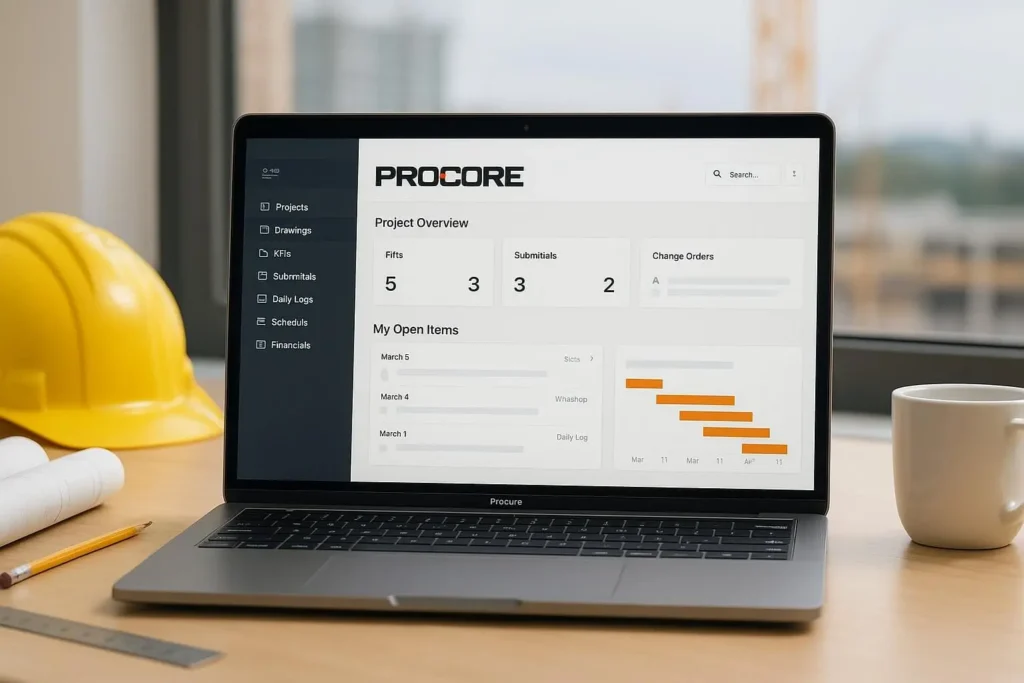
The cost of Procore construction software is important to builders, project managers, and owners who want clear budgets. Procore brings many tools into one place for tasks, documents, and budgets. Knowing how pricing works helps teams to plan better and avoid surprises. It also helps you compare plans with other tools in the market.
Price is only one part of the choice. Think about work you do, team size, and support essentials. The right setup can save time, reduce errors, and improve handovers. With a clear plan you just pay for what you use and grow with confidence over months and years.
Pricing Factors that You Should Know
Pricing depends on company size, number of projects, and the modules you select. Core tools cover the tasks, documents, and drawings. Advanced features includes financials, bidding, and quality and safety. Your seat count, vendor access, and training requirements also shape the quote. If you bring many field teams or partners, expect onboarding time. Ask how pricing handles archived projects and data storage, since long jobs create many files. Request clarity on update schedules, support hours, and response times. These items do not look like price, but they change value because they affect speed, risk, and the effort your staff spends.
Contract terms also matter. Annual agreements may include better rates, while monthly plans can give flexibility for short projects. Consider implementation services, data migration, and custom integrations. These can be billed once or bundled. Ask for a sample invoice that shows every line. That helps you map each feature to a result on site. Use a pilot on one job to measure savings in time and rework. When the numbers are clear, the cost of Procore construction software becomes easier to judge because you can compare the total with delays avoided, safer installs, and faster closeout on the next bid.
How It Compares With Alternatives
Many teams also review Buildertrend, CoConstruct, and Autodesk Construction Cloud. Some tools feel lighter and may work well for small firms that want simple scheduling and messaging. Others focus on field reports or cost control and need extra add ons to cover all steps. When you compare, list the top jobs your team repeats each week. Then match the steps to the features that speed them up. A clear workflow view makes price talk simple because you can see what you will actually use, and what would sit idle. Check app stores and support forums to learn about common issues.
Price is only fair when it matches value. Tally the hours saved in document control, change tracking, and site meetings. Put a number on fewer rework days and faster approvals. Add the risk avoided when all teams see the same plan set. When you combine these gains, the cost of Procore construction software can make sense for complex jobs, while a simpler tool may fit very small teams that only need a shared checklist and a calendar. Ask vendors for a pilot so you can measure results on one live project. Use that data to guide your final choice well.
Value and Return for Contractors
Strong results come from clear data, steady updates, and easy sharing. When crews see the latest drawings and tasks, they work faster with fewer errors. Managers get quick status views and can remove blockers before they grow. Owners get cleaner reports that support faster pay apps. These gains turn into real money. Track field hours, wait time, and rework days for your last few jobs. Then set targets for the next job so you can see if the software helps you beat those goals. Share the wins with teams so they keep using the same process on every future job.
Now link dollars to tasks. Count how many RFIs close faster, how many change orders are caught early, and how many materials arrive on time. Add the hours saved in meetings and file searches. When these numbers rise, the cost of Procore construction software is easier to accept because it supports safer work, cleaner handovers, and better client trust. Over several projects, the payback can be strong, since trained teams move with less guesswork and keep a single source of truth. Keep tracking the same figures on later jobs so you can prove real gains to your finance team clearly.
Fast Overview For Busy Readers
This overview sums up the key ideas so you can move quickly. Pricing depends on your company size, the number of projects, and the modules you choose. Seats, partner access, and onboarding add to the quote. Extra needs like data migration and custom links to other systems can change the total. Ask vendors to show clear invoices with every line item and to explain how support works. If your jobs are long, confirm how archived projects are handled and how much storage is included for drawings, models, and photos from the field. Check update timing so features do not disrupt live work.
Next, test value on a single project before a wide launch. Track time saved in meetings, reports, and plan reviews. Note quicker answers to field questions and fewer late changes. Compare these gains with the subscription and service totals. If the gains beat the spend, move ahead. If not, adjust modules or seat counts. Always match features to the tasks your crew repeats every week. Keep the playbook simple and share it with teams. When people know the steps, they use the tool well and deliver steady results. Review results monthly and refine your setup for the next bid carefully.
Read more: Construction Industry Business Plan.
The Real Value Behind Procore Costs
The cost for Procore construction software is shaped by company size, project count, and the features selected. Every element changes the total and describes how ably it fits your workflow.
Comparing Procore with other platforms shows why many firms choose it. However the price may be higher, the time saved and errors reduced often balance the spend. Clear reporting and live updates add the lasting value.
For the buyers, the smartest step is testing Procore on one project. Measuring savings against the cost helps prove its worth and ensures the software becomes a reliable long term tool.
Construction Industry Business Plan
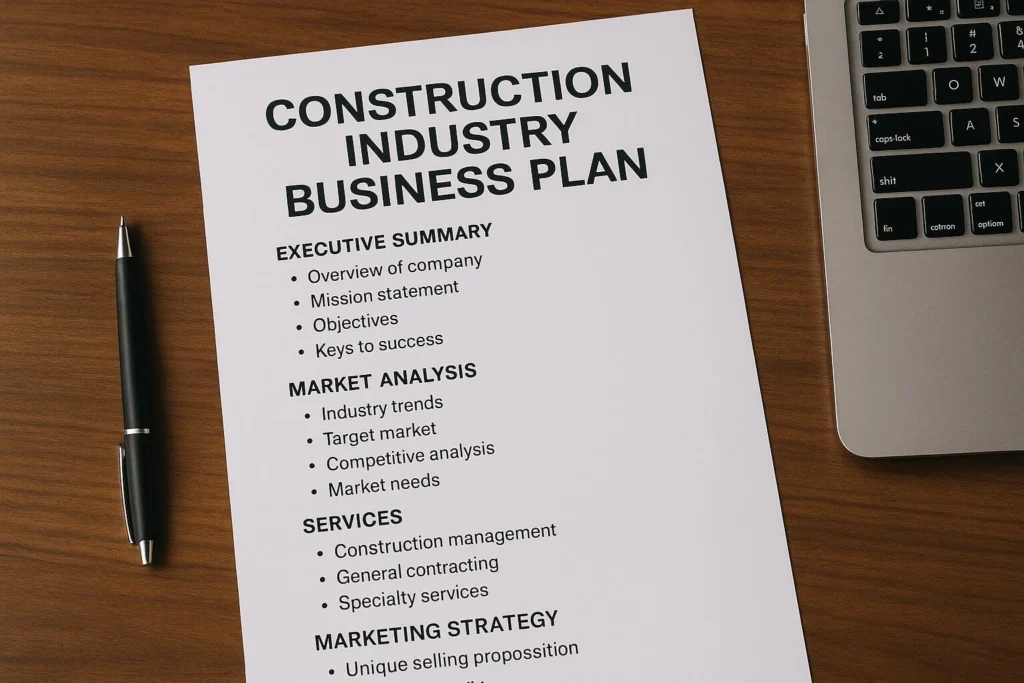
Every construction business needs more than tools, trucks, and a skilled crew. It needs a clear map that shows where to go, how to compete, and how to last. A construction industry business plan gives that clarity. It turns ideas into steps, helps you speak to banks, and makes your team pull in one direction. With costs rising and deadlines tight, guessing is risky. Planning reduces surprises, sets goals, and guides daily choices on site and in the office.
It also helps you choose a niche, price work correctly, and prepare for safety and legal duties. Clients want reliable partners, not promises. A plan proves your methods, timelines, and budgets in simple terms. It captures what you build, where you operate, and how you win bids. Most of all, it protects cash by matching work to resources. That means starting projects you can finish well, and walking away from bad fits. The process is overall practical: write your mission, study market, creative services, plan marketing, and budget. Update the document often, and use it to train new people. When market shifts, a living plan helps you respond fast and stay steady. It keeps your business honest and focused.
Why a Plan Matters
Planning matters because construction is complex, capital heavy, and time bound. Without a written guide, owners bounce between bids, scramble for crews, and fight cash gaps. A good plan sets direction, trims waste, and keeps promises realistic. It helps you say no to bad jobs, and yes to profitable ones. Write down your goals, core services, target clients, and regions. Then match capacity to demand so schedules hold and crews stay safe. Use simple measures like win rate, average project size, and margin by job type. Review them monthly, and adjust before small problems grow.
The construction industry business plan also builds trust. Lenders want to see numbers and controls. Clients want to see process and proof. Vendors want to see that they will get paid on time. Documenting estimating steps, procurement rules, and change-order flow reduces disputes later. It also clarifies who decides, who checks, and who reports. That structure turns chaos into routine. In short, planning is not paperwork; it is risk control. By preparing for delays, weather, and supply shocks, you protect margins and morale. You also free leaders to focus on quality, safety, and relationships, which sustain growth. Clear plans turn effort into steady, repeatable results.
Key Points
- Define clear services, target clients, and regions early consistently.
- Match capacity to demand; protect schedules, cash flow always.
- Use metrics and dashboards to spot issues, act quickly.
- Combine web, referrals, partnerships to build deal flow reliably.
- Review results quarterly; update processes, training, and tools regularly.
What to Include
Include sections that cover identity, market, delivery, marketing, and money. Start with a crisp summary of who you serve and why you win. Describe the company form, leadership, licenses, and insurance. Define services, such as general contracting, renovations, design-build, or specialty trades. Explain your delivery model: estimating, scheduling, site control, safety, quality checks, and closeout. Show the tools you use for takeoffs, project management, and cost tracking. Then map the market. List segments, competitors, and trends you can realistically pursue. Back claims with simple data from past jobs or public sources.
The marketing plan should combine web presence, referrals, and local partnerships. Publish case studies, photographs, and client quotes that prove value. Spell out your sales pipeline, from lead to signed contract. Finally, present budgets, revenue forecasts, cash flow, and break-even timing. Note triggers for hiring and equipment purchases, so growth does not outrun cash. Tie all these parts together in a practical schedule for reviews and updates. When stakeholders read a construction industry business planbuilt this way, they see order, discipline, and transparency. They also see a builder who can manage risk, make decisions, and finish well. That inspires confidence and speeds approvals, bids, and lasting partnerships forward.
Money, Risks, and Scheduling
Cash makes or breaks builders. List start-up costs, monthly overhead, and job-level expenses in plain terms. Price work with realistic productivity and waste expectations. Track change orders, retainage, and warranty exposure so profit is not leaked later. Protect cash by aligning contract terms with schedule and procurement. Use deposits, progress billing, and lien waivers where allowed. Create a rolling thirteen-week cash forecast, and review it every Friday. Plan for risks: weather, permits, utility delays, and supply shortages. Assign owners, triggers, and responses for every risk. Schedule with buffers around crucial tasks, and lock long-lead items early.
Field teams should update the progress daily; office teams should reconcile costs weekly. Simple dashboards help everyone to see status at a glance. With this discipline, a construction industry business plan moves from paper to practice. It guides choices on which jobs to pursue, when to hire, and how to pace growth. Your goal is not just winning bids; it is finishing safely, on time, and with healthy margins. Numbers, dates, and responsibilities keep the company steady when surprises arrive, and they always do. Train leaders to read reports, question variances, and act early; that habit preserves cash, protects crews, and strengthens reputation daily.
Read more: Marketing for construction firms.
Keeping It Working
A plan only helps if people use it. Turn the document into weekly habits that guide bids, purchasing, staffing, and execution. Hold short review meetings with clear agendas: wins, risks, schedules, and cash. Compare results to targets, and note lessons to apply on the next job. Update scopes, checklists, and templates when you find a better way. Teach new hires how projects flow, from preconstruction to closeout, so quality is repeatable. Capture photos, punch lists, and client feedback in organized folders. Keep records simple and consistent so nothing important is lost. Share progress with the team so everyone sees how their work supports the mission. Celebrate safe days, clean inspections, and on-time handovers; these build pride and culture.
Stay curious about tools that raise productivity, like drones for surveys or sensors for moisture. Adopt only what truly adds value, and retire tools that slow you down. Finally, revisit strategy each quarter. If your pipeline shifts, adjust capacity early. If pricing moves, tune estimates. By treating planning as an everyday practice, you build a company that learns faster, responds sooner, and delivers steady results. That steady rhythm turns volatility into manageable work and keeps customers returning with larger opportunities over time.
Marketing for construction firms

The construction business has always been highly competitive, but in recent years the landscape has shifted even more. Clients no longer depend solely on word-of-mouth or personal recommendations. Instead, they use online search engines, review platforms, and social media to select the company they want to work with. For a builder, this shift is both a challenge and an opportunity. It means the best skills alone are not enough you also need visibility, reputation, and consistent communication with your audience. This is why marketing for construction firms is now a vital foundation of long-term success.
Why Marketing Goes Beyond Basic Advertising
Many people confuse marketing with selling, but the two are very different. Selling is about closing a deal as quickly as possible. Marketing, however, is about planting seeds for future growth, building trust, and making sure your company is remembered when a client needs a contractor. In today’s world, clients often form their first opinion of your firm online, long before stepping into your office. A polished website, consistent branding, and positive client reviews create a sense of credibility and trust. By investing in your digital presence, you reassure potential clients and influence their decision-making before the first conversation even happens.
Good marketing is not about short-term campaigns. It is about creating a repeatable system which produces steady leads in good seasons and bad. Firms that invest in long-term marketing stay ahead, even when competition increases.
Your website is your digital office
A professional website should act like a welcoming office lobby. It should load quickly, be easy to navigate, and contain useful details. Add project galleries, service descriptions, and clear contact options. Including blog articles with simple advice like maintenance tips or common construction mistakes shows expertise and improves search rankings.
SEO for local impact
Search engine optimization ensures that when people search “home builder near me” or “office renovation in [city],” your firm appears on the first page. SEO involves using strong titles, location keywords, and clean structure. This method is cost-effective because it connects you with people already searching for services like yours.
Social media for visibility
Construction is a field where visuals matter. Posting before-and-after photos, time-lapse videos, and safety practices shows professionalism and transparency. Facebook and Instagram connect with homeowners, however LinkedIn is effective for commercial clients. Sharing consistent content also signals that your company is active and reliable.
Offline Marketing Methods That Still Work
Power of Referrals
Happy clients can become your strongest source of new business. With encouraging referrals, you turn satisfied customers into loyal brand advocates. Simple gestures that are thank-you notes, small discounts, or personalized appreciation go a long way. Not only do they strengthen relationships, but they also create a steady flow of trust-driven leads that fuel long-term growth.
Networking and community ties
Attending local business meetings, real estate events, or trade fairs creates face-to-face connections. These interactions often turn into lasting partnerships. Local networking also helps keep your firm top of mind within your community.
Branded site presence
Every construction site is an advertisement. Use branded helmets, uniforms, and company vehicles so neighbors and passersby recognize your company. Even a well-placed banner at a project site can bring in new inquiries.
Building a Brand That Stands Out
Define your unique promise
Ask yourself: what sets your firm apart? Maybe it’s sustainable materials, high-end finishes, or fast turnaround times. This unique promise should be the center of all communication. Strong positioning like this lies at the core of marketing for construction firms because it tells clients why they should choose you.
Professional and Consistent Visuals
Visual identity plays a crucial role in shaping trust. Elements such as logos, colors, and overall design signal professionalism and reliability. Strong, consistent branding shows clients that you take your work seriously and pay attention to the detail. On the other hand, weak or inconsistent design can create uncertainty and raise doubts about your credibility and commitment.
Consistency across every channel
From websites to brochures, your message and visuals should look and sound the same. Consistency creates recognition. Recognition leads to trust. Trust leads to projects.
Measuring Efforts and Adjusting
Always ask the new clients how they found you. Did they come from a Google search, social media, or a referral? Keeping track of this information allows you to spend time and money on the most effective strategies. Not every channel provides equal returns. If you are spending heavily on digital ads with little outcome, consider shifting focus to SEO or referral programs. Evaluating costs versus returns helps you to stay efficient.
Client feedback is both a marketing tool and a guide for improvement. Testimonials and reviews can be showcased online, however constructive feedback helps refine your services.
Read more: Concrete Slab Foundation Cost.
Future Trends
Video has become one of the most powerful tools for building trust. Short project walkthroughs, client interviews, or drone footage of a completed site give potential clients a close look at your work. Sustainability is no longer optional. Many clients are now ask for the eco-friendly options, sustainable solutions, and reusable materials. Firms that highlight green practices in their marketing appeal to a growing audience.
Modern software allows firms to track visitor behavior, manage email campaigns, and even automate follow-ups. Using these tools, saves the time and creates a more personalized experience for clients. These shifts are shaping how marketing for construction firms develops in the modern age.
For builders who want steady growth, strong marketing is not optional it is necessary. A well-designed website, local SEO, and social media create digital visibility, while referrals, community networking, and branded presence keep you strong offline. Building a clear identity and measuring success ensures that your company adapts and thrives. The firms that invest consistently will continue to grow, even in competitive markets. In the end, long-term success depends on one option: committing to marketing for construction firms as the foundation for visibility, trust, and stability.
Concrete Slab Foundation Cost
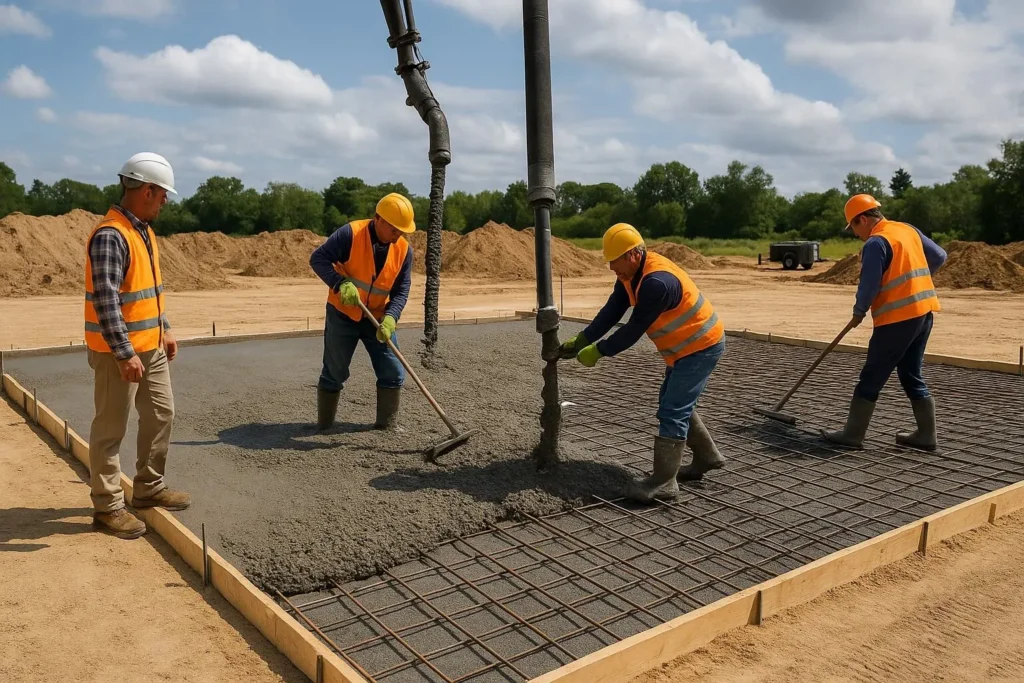
In building home or adding an extension, the first ideal question is how much the foundation will cost. In the United States, a concrete slab foundation is one of the most famous and money-saving options. It is durable, strong, and can be poured quickly, however the price differs widely depending on location, slab type, and construction needs. Understanding the true concrete slab foundation cost will help you budget wisely and avoid unpleasant surprises later.
What is the Standard Concrete Slab Foundation Cost in US?
Across the US, homeowners pay most between $6 and $14 per square foot for a concrete slab. That means a small 1,000-square-foot slab could cost between $6,000 and $14,000, while larger homes may see totals ranging from $12,000 to $28,000. On average, many projects fall near the $5,400 to $21,000 range.
The cost differs because not all slabs are the same. A monolithic slab, for example, is cheaper and faster to install, while a stem wall foundation involves more labor and concrete, making it more expensive. If soil conditions are difficult or reinforcement is required, the price can rise further.
Key Factors That Affect Cost of Slab Foundation
Several elements play into how much you’ll pay for a concrete slab foundation. Breaking them down helps to explain that why two homes of similar size might have very different foundation costs.
Materials and Labor
The biggest cost drivers are materials and labor. Materials normally cost $3 to $7 per square foot, while labor adds another $3 to $5 per square foot. Together, that means the basic slab alone will average $6 to $12 per square foot. If concrete prices rise or if labor in your area is expensive, expect higher totals.
Site Preparation
Before any concrete can be poured, the site must be cleared and leveled. Grading typically costs between $0.40 and $2 per square foot, while minor yard prep might run $500 to $1,000. If the ground has drainage problems or requires significant excavation, the price goes up quickly.
Reinforcement
Concrete slabs need reinforcement for strength. Rebar usually adds $2 to $3 per square foot, while wire mesh may add $0.20 to $0.30 per square foot. Reinforcement checks cracks and ensures the slab holds up for decades, making it a necessary cost.
Finishes and Extras
A plain gray slab is cheapest, but some homeowners choose polished or decorative concrete, especially for visible areas like garages or basements. Decorative finishes can cost $8 to $20 per square foot, while polishing typically ranges from $3 to $15 per square foot. While not usually necessary for structural foundations, these options may matter if the slab will remain exposed.
Repairs or Rebuilds
Repairing or replacing a slab foundation is far more expensive than installing one from scratch. Repairs can cost $16 to $19 per square foot, and complete rebuilds often fall between $23,000 and $48,000. This is why proper reinforcement and site prep are so important early on.
Important Types of Concrete Slab Foundations
Not all slabs are created equal. Here are the most common types and their typical costs.
Monolithic Slab
A monolithic slab is poured all at once in a single layer. It’s faster and simpler, making it less expensive. Expect costs between $5,200 and $13,000. Many homeowners choose this option for smaller homes, additions, and garages.
Stem Wall Foundation
A stem wall involves a deeper footing around the perimeter of the home with a thinner slab in the middle. This design gives extra stability, especially on sloped land, but it costs more. A stem wall slab typically ranges from $7,000 to $21,000.
Pier and Beam Foundation
While not always considered a slab, some homes use concrete piers with wooden or steel beams. This setup raises the home off the ground. It generally costs $6 to $12 per square foot or $8,000 to $15,000 total, depending on design and soil conditions.
To Explore more, click for Concrete Estimating Services.
Frequently Asked Questions About Slab Costs
Many homeowners ask the same questions when planning a new foundation. Here are the most common concerns:
Why do prices vary so much?
Because every site and design is different. Soil type, slab thickness, local labor rates, and reinforcement requirements all impact cost.
Which is cheaper: monolithic or stem wall?
Monolithic slabs are cheaper. Stem walls require more materials and time, so they naturally cost more.
Is $6 per square foot realistic?
Yes. Many builders use $6 per square foot as a baseline estimate, however actual costs may be higher with reinforcement or site prep.
Should I budget for reinforcement and grading?
Absolutely. Skipping reinforcement or grading is risky. It may save money upfront but can lead to cracks, drainage errors, and costly repairs.
Are decorative finishes worth it?
Not just for hidden foundations. They make more sense for visible locations like patios or driveways.
Read more: Construction Business Cards.
Ways to Save Money on a Concrete Slab Foundation
A slab foundation is one of the most affordable options, but you can still save money without cutting corners. There are a few practical tips:
- Straight sides and square corners are cheaper than curves, custom shapes.
- If you need grading, trenching, or utility prep, do them together to save on equipment costs.
- Regional labor costs matter. Local builders may charge less than large national companies.
- Prices vary widely, so compare at least three bids before deciding.
- For a hidden foundation, skip decorative touches that don’t improve durability.
A concrete slab foundation is one of the most affordable and reliable choices for homes in the US. Most homeowners pay between $12,000 and $28,000, or $6 to $14 per square foot, depending on size, design, and soil conditions. Instead reinforcement, grading, and site prep add to the cost, they are essential for a long-lasting foundation.
If you’re building a new home or addition, start with a solid budget for your slab foundation. Get multiple quotes, ask for a detailed cost breakdown, and ensure reinforcement is included. Spending wisely upfront will save you thousands in future repairs.
Construction Business Cards

In today’s digital world, a construction business card remains one of the most powerful tools for making a lasting impression. When you meet potential clients, contractors, or suppliers, handing over a card shows professionalism and confidence. It makes it easy for people to remember you and contact you when they need help with their next project. A strong card acts as a portable advertisement that fits right in someone’s pocket.
Networking is vital in the construction industry, and a business card can open doors that emails or phone calls cannot. Whether you run a small operation or manage a large firm, your card is often the first step toward building trust. In fact, many contractors close deals faster because they leave behind a reminder that speaks for their work long after the meeting is over.
Elements of an Effective Construction Business Card
Keep the Information Clear
A construction company business card should include your name, role, phone number, email, and website. Avoid clutter by focusing on contact details that truly matter. You can also add your office address if it helps clients know where to find you. Keeping the design clear ensures your card is easy to read at a glance.
Showcase Your Brand
Your brand identity sets you apart from competitors. Adding a company logo, consistent colors, and fonts helps people to link your card with your trucks, site boards, or uniforms. A building construction business card which reflects your brand also reinforces professionalism and makes you instantly recognizable.
Add Proof of Credibility
Clients want reassurance that they are working with skilled professionals. If you hold licenses, certifications, or industry memberships, place them on the card. These small details make a big difference in showing authority and trustworthiness.
Use Modern Touches
Technology can enhance also a traditional card. Adding a QR code allows clients to scan and quickly access to your portfolio, service details, or social media. Some business construction cards even link directly to project galleries, helping customers see past work before calling you.
Creative Design Ideas for Construction Business Cards
Unique Materials
Paper is standard, however other options like metal, plastic, or even wood can make your card memorable. A metal card with etched designs may double as a mini tool, while a wood card shows eco-friendly values. These materials help your card stand out from a stack of paper ones.
Visual Storytelling
Including a small image of your completed project or using background textures like bricks, steel, or blueprints creates instant recognition. This design method makes your card both attractive and relevant to your work.
Industry Icons
Adding icons like hard hats, cranes, or hammers communicates your trade without words. It helps people to quickly associate your card with construction services. Icons can be subtle, such as in the corners or next to contact details, with still being powerful branding tools.
Functional Cards
Some construction business card designs include practical features, such as a mini ruler or fold-out space for notes. This creative approach makes sure people keep the card longer because it is both the useful and memorable.
Design and Layout Best Practices
A well-built card is easy to read and visually appealing. Stick to three or four colors that match your branding, and leave enough white space for a clean look. Bold, clear fonts improve the readability. Avoid stuffing very much information into a small area, as clutter can impress potential clients.
In the United States, the standard business card size is 3.5 by 2 inches. This size fits wallets and cardholders, making it practical for everyday use. Always review your layout before printing to ensure nothing gets cut off at the edges.
Printing Options for Construction Business Cards
Getting your cards expertly printed gives them a polished look. Several trusted providers in the US make this process easy.
- Vistaprint offers ready-made templates for construction and lets you customize them with your branding. They give multiple finishes, from glossy to matte.
- Moo is popular for creative designs and even offers NFC cards that store your digital contact details.
- Staples gives same-day pickup, perfect for when you need cards quickly before a meeting.
- GotPrint and Zazzle specialize in templates made specifically for construction company business cards, saving time on design.
Frequently Asked Questions
What should I put on a construction business card?
Add your name, title, phone, email, website, and logo. If you have licenses or awards, they add credibility. A QR code or small project image makes the card more engaging.
Should i add images or icons?
Yes. Icons like tools or blueprints make your card instantly recognizable. A project photo can also show the quality of your work and spark client interest.
What size is standard for business cards in the US?
The very common size is 3.5 by 2 inches. It’s compact and easy to carry in wallets or card cases.
How can I make my card stand out?
Using special materials like metal or wood, adding engaging elements, or incorporating creative shapes makes your card more memorable than plain designs.
Where is the best place to print cards?
Vistaprint, Moo, and Staples are top choices. Vistaprint provides affordability and customization, Moo is ideal for high-quality finishes, and Staples is perfect for quick orders.
Read more: Best Construction Estimating Software.
Final Thoughts
The construction business card is not only contact information. It is a reflection of your brand, your expertise, and your commitment to quality. With keeping the design simple yet creative, adding branding elements, and selecting reliable printing services, you can make a card that clients will remember.
Even you prefer a traditional paper card or a unique material, the goal is the same: to leave a strong impression that brings you more calls, more clients, and more projects. The right business construction cards will help you stand out in a crowded market and build long-term trust with everyone you meet.
Best Construction Estimating Software

In construction, rightness is everything. From offering on projects to managing budgets, the ability to calculate costs quickly and precisely can make or break a business. This is where the best construction estimating software comes in. These tools take the guesswork out of numbers, speed up calculations, and help contractors to win more bids with avoiding costly mistakes. If you are still depending on spreadsheets or manual methods, it might be time to explore modern estimating solutions that save time and improve results.
Why You Need the Best Software for Construction Estimating
Estimating costs in construction is a difficult process. You need to justify labor, materials, equipment, and unexpected changes. Doing this manually often leads to errors, and even a small mistake can result in large losses. The best software for construction estimating automates these calculations, making the procedure faster and more reliable. By built-in cost libraries and smart takeoff features, the right tool can help contractors reduce waste, improve efficiency, and make better decisions.
Key Features of the Best Estimating Software for Construction
The best estimating software for construction is not just about crunching numbers. It must be exact, simple to use, and able to adjust in real time. Some of the most valuable features include:
- Accuracy and speed matter: Reliable software provides quick and precise estimates.
- Automatic takeoff tools: Let you measure directly from digital plans and quickly turn them into material lists.
- Cost libraries and databases: Preloaded data makes sure estimates match real-world prices.
- Collaboration tools: Make it easy for teams to work together and share updates in real time.
- Integration: The best construction estimator software links smoothly with project management, accounting, and scheduling tools.
- Cloud access: Contractors can work from anywhere, whether on a job site, office, or at home.
Popular Options for the Best Construction Estimator Software
Some tools are often recognized as the best construction estimator software depending on the size and type of projects. STACK is often rated as one of the top overall choices, giving strong takeoff features and a free version. Procore is popular among large contractors for its integration and reporting tools. Buildxact is praised for its ease of use and affordability, specially for small to mid-sized builders. For heavy civil projects, B2W Estimate stands out, however McCormick Pro is designed with electrical contractors in mind. Every software has unique strengths, so the right choice depends on your project needs.
Benefits of Using the Best Software for Construction Estimating
The benefits of adopting the best software for construction estimating are simple. Contractors experience faster bid preparation, reduced human error, and better cost control. Estimators can adjust line items in real time, making sure budgets stay accurate as projects evolve. Cloud-based access allows data sharing across teams, boosting collaboration. More importantly, exact estimates increase the chances of winning bids while protecting profits. In an industry where margins can be thin, these benefits are needed for long-term success.
How to Choose the Best Estimating Software for Construction
Searching the best estimating software for construction starts with understanding the specific needs of your business. Every contractor, even if a small or large, faces different challenges when it is about to bidding and cost control. Small contractors usually focus on affordability and ease of use, as they may not have full-time estimators on staff. In contrast, larger construction firms usually need advanced systems that connect with BIM models, scheduling software, and accounting platforms. Defining these requires upfront helps narrow down the options and prevents wasted investment in tools that do not fit your workflow.
Ease of Use
Another critical factor is ease of use. The best construction estimator software should not require months of training or expensive onboarding sessions. A nice platform is intuitive, with clean navigation and step-by-step workflows that even new users can adopt quickly. When reviewing software, check platforms that offer video tutorials, built-in help guides, or even live chat support. Remember, the easier it is to use, the faster your team can give exact estimates without delays.
Overall Customer Reviews
Clients reviews and references also play an important role in the decision process. Real feedback from contractors who are already using software can reveal strengths and weaknesses that marketing brochures never mention. Reviews usually highlight issues like hidden costs, poor customer support, or limitations in scalability. Sites such as Capterra, G2, and Software Advice are great resources for unbiased feedback. Paying attention to these experiences ensures you make a more informed decision.
One of the most practical steps in choosing the best software for construction estimating is to take advantage of free trials and demo versions. Almost all leading platforms provide either a trial period or a guided demo that allows contractors to test real-world scenarios. During this period, you should inspect how the software handles tasks like digital takeoffs, real-time cost adjustments, or material database integration. You can also involve your team in testing to see whether the tool fits their day-to-day operations.
Price Matters a Lot
Pricing and scalability are equally important. However some software solutions may look attractive with a low entry cost, they often require expensive add-ons to unlock essential features. Others may have tiered pricing that grows as your projects increase in size. Contractors should always compare the cost of ownership against the long-term benefits. For small contractors, affordable cloud-based tools are often the best option, however big firms may justify investing in more expensive enterprise-level solutions that offer deep integration across departments.
Integration and Compatibility
Another factor is integration and compatibility. The best estimating software for construction should not work in isolation. Instead of, it should connect seamlessly with project management platforms, accounting systems, and scheduling software. This avoids double entry of data and ensures that all departments have access to updated information. For firms working with BIM, integration with modeling tools can significantly improve perfectness by pulling quantities directly from digital models.
Read more: A Frame Floor Plans.
Customer Support
Consider customer support and training resources. Even the best estimating software for construction will have a learning curve, and access to timely support can make all the difference. Look for the providers that give 24/7 support, active user communities, or dedicated account managers for larger firms. Strong training programs, webinars, and online knowledge bases also help your team stay productive while adopting new features.
The best construction estimating software is more than just a calculator. It is digital partner that ensures accuracy, saves time, and improves your chances of success. Even if you select STACK for its takeoff abilities, Buildxact for its simplicity, or Procore for its robust project integration, the key is to find solution that fits your workflow. By investing in the right tool, contractors can protect margins, impress clients, and secure more projects.
A Frame Floor Plans

There’s something magical about A-frame homes. Their steeply pitched roofs, triangular profiles, and cozy interiors have charmed architects and homeowners for decades. But beyond their iconic appearance, the real power lies in a frame floor plans the layouts that transform these cabins or residences into functional, inviting spaces. Whether nestled in the woods, perched on a lakeside, or standing tall in a mountain range, A-frame homes offer more than just visual appeal. Their structure encourages smart space use, natural light, and connection with the outdoors. If you’re considering one, understanding the layout options is the first step toward bringing your vision to life.
Framing the Foundation
The A-frame home has a shape you can’t miss. But what lies inside that shape is where clever design happens.
A Structural Form That Shapes the Layout
The A-frame is named for its resemblance to the letter “A.” Its roof extends all the way to the ground, which means the walls are sloped on both sides. That slant affects everything inside from ceiling height to window placement and how furniture fits into the space. Unlike boxy modern homes, this frame creates natural zones and unique layout challenges. A well-designed floor plan works with the slope, not against it. On the main level, you’ll usually find open-concept living with few full-height walls. This makes it perfect for cozy living areas, kitchens, and even multifunctional spaces.
Making the Most of Limited Wall Space
Since the walls angle inward, traditional shelving, tall furniture, or even wall art becomes tricky. Instead, smart storage and custom pieces are key. Many a frame floor plans rely on built-in cabinetry and under-stair storage to reduce clutter. Some even include recessed loft beds or convertible dining areas to maximize usable square footage. The goal isn’t to mimic standard homes. it’s to embrace the geometry and get creative.
The Role of Natural Light and Glass
Floor plans often feature large windows or even full glass facades on the front or rear of the home. This not only brightens up the interior but connects you to nature outside. Because of the structure’s slope, skylights and triangular gables are common design elements. They don’t just look good they make the whole home feel bigger.
Popular Layouts for A-Frame Homes
A-frame houses come in a variety of sizes, from 400-square-foot weekend cabins to 2,000-square-foot primary residences. But certain patterns show up again and again in their floor plans.
Ground Floor Living with Open Concepts
The first level typically includes the core living spaces: a living room, kitchen, small dining nook, and bathroom. In larger builds, you might find a main-floor bedroom tucked toward the back. Most plans aim to keep this level open and airy since ceiling height is generous only in the center of the home. With the use of natural materials like exposed wood, stone fireplaces, and timber beams, many homeowners opt for a rustic or modern Scandinavian vibe. Designers love combining functionality with warmth and that’s exactly what the open lower level delivers.
Lofted Sleeping Areas
One of the signature features in a frame floor plan is the loft. Positioned above the kitchen or living room, this half-floor or mezzanine space usually holds the primary bedroom. While standing room may be limited around the edges, the center provides just enough height for sleeping and dressing comfortably. Lofts also create beautiful sightlines. With open railing instead of solid walls, you get views of both the floor below and outside through large picture windows. The result is cozy but not cramped.
Expanding the Footprint with Smart Additions
To create more functional living space, some floor plans include rear extensions or even walk-out basements. A rear bump-out can hold a larger kitchen or private office. Walk-out basements are perfect for guest suites, mudrooms, or even entertainment rooms, especially on sloped lots. These expansions still keep the integrity of the A-frame silhouette while offering flexibility for growing families or full-time living.
Custom Touches That Bring Plans to Life
While the shape defines the frame, your lifestyle defines the layout. Custom touches allow A-frame floor plans to go from generic to personal.
Multi-Purpose Lofts and Nooks
Some owners turn the loft into more than just a bedroom. Reading corners, mini offices, or meditation zones are common in these elevated spaces. Since light naturally flows up, these spaces can be peaceful escapes with mountain or forest views. Even staircases can serve dual purposes. A wide stair can act as seating or have drawers hidden underneath. Every inch counts in an A-frame, and creative design turns limitations into strengths.
Kitchen Spaces That Flow
Kitchens in A-frame homes are usually linear or L-shaped, often along the side walls with sloped ceilings. Because upper cabinets are tricky, open shelving and hanging racks become useful and stylish solutions. Larger floor plans may feature a central island, while smaller designs benefit from fold-out counters or compact appliances.The key is keeping it simple but efficientlayouts that allow movement without wasting space.
Embracing Indoor-Outdoor Living
One of the most defining parts of frame floor plans is how easily they connect to outdoor areas. Large sliding doors, extended decks, and wrap-around patios are often part of the plan. Since A-frames tend to be used in natural settings, the transition from inside to outside is seamless. Whether it’s coffee on the porch or stargazing from the hot tub, your layout should support outdoor moments just as much as indoor routines.
Read more: How to Use Drywall Anchors?
When Shape and Soul Meet
Living in an A-frame isn’t about perfection, it’s about personality. These homes attract people who want something different, something cozy, and something close to nature. The best a frame floor plans aren’t just architectural diagrams; they’re tools for storytelling. They shape the way you wake up, cook, relax, and gather with the people you love .As you consider building or buying an A-frame, focus on how the layout reflects your rhythm of life. The triangle might be fixed, but what you fill it with that’s where the magic begins.
How to Use Drywall Anchors
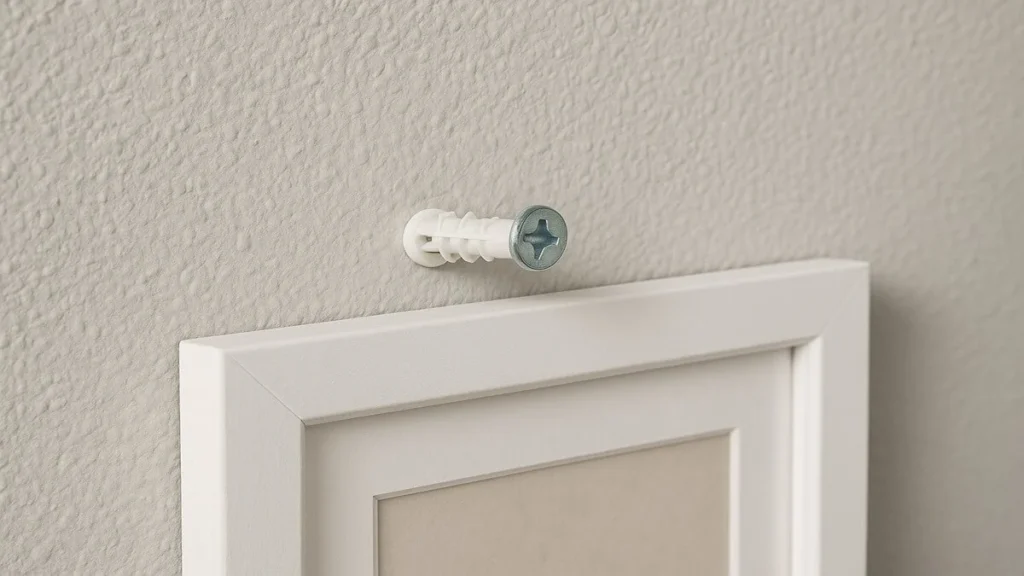
If you’ve ever tried to hang something heavy on drywall and watched it slowly pull away from the wall, you’re not alone. Drywall isn’t designed to hold much weight by itself. Screws alone often tear through the soft material over time. Therefore it’s important to learn how to use drywall anchors. These small devices give strength and grip to screws in drywall, letting you safely hang shelves, mirrors, curtain rods, or anything else that needs reliable support.
Why Drywall Anchors Are Needed
Drywall, also called wallboard or plasterboard, is soft and crumbly inside. While it is best for covering walls quickly and creating smooth surfaces, it doesn’t offer much strength. When you put a screw directly into drywall without an anchor, it has almost nothing to grip onto. As time passes, even a small amount of weight can pull the screw out and damage the wall.
The Problem With Just Screws
It might seem fine at first when you use a screw alone. But as the item hangs on the wall and shifts or vibrates, the pressure starts to wear down the drywall around the screw. Finally, the screw becomes loose or breaks through completely. This not just damages the wall but can also cause whatever you hung to fall and break.
How Anchors Fix the Issue
Anchors solve this problem by gripping the inside of the wall in a way screws alone can’t. They each expand, twist, or lock behind the drywall to create a stronger base. After installed, they hold the screw strongly and spread the weight across a larger area, keeping it stable even under stress.
Getting Ready for Installation
Before learning steps for how to use drywall anchors, it is important to select the right anchor for your project. Not all anchors are made the same, and picking the wrong one can make your wall repair harder later.
Picking the Right Anchor
There are different kinds of anchors for different needs. Plastic expansion anchors are good for light weight items. Threaded anchors screw directly into the drywall and are good for mid-weight things. Toggle bolts are metal anchors made for heavier loads. Always check the weight rating printed on the packaging and choose one that holds more than your item weighs.
Tools You’ll Need
For most installations, you’ll need a screwdriver or drill, a pencil for marking the wall, and possibly a hammer or drill bit depending on your anchor type. Some anchors need pre-drilled hole but others drill in by themselves. Inspect the instructions for your anchor before you begin.
Preparing the Wall
Start by marking the exact spot where you want to place the anchor. If you’re hanging more than one item like a shelf with two brackets—use a level to make sure your marks are straight. You should also inspect the wall for studs, pipes, or wires behind it. A simple stud finder can help you avoid damaging anything hidden.
Step-by-Step Anchor Installation
When you’re ready, follow these steps to install your anchor and screw completely. Doing this right ensures your item stays in place and your wall remains undamaged.
Inserting the Anchor
Start by either drilling a pilot hole or pressing the anchor directly into the wall, depending on its type. For push-in anchors, smoothly tap them into the wall with a hammer until they are flush. For threaded anchors, insert them into the wall and gently turn with drill until the anchor is tight and flat against the surface.
Installing the Screw
Put screw into the center of the anchor and slowly turn it clockwise. As the screw goes in, it will expand or grip the anchor from inside. This step may also cause the anchor to lock into place behind the drywall. Stop turning when the screw feels firm. Do not overtighten, in that case you might crack the drywall or damage the anchor.
Testing for Strength
After the screw is installed, give it a gentle pull to make sure it’s solid. If the anchor moves or feels loose, remove it and start over with a better-fitting anchor or in a new location. Once it feels tight, your anchor is ready to support the item you’re hanging.
Mistakes to Watch Out For
Even a simple job can go wrong without careful attention. Many anchor failures happen because of rushed work or using the wrong tools. Avoiding these common issues will help make sure your anchor holds properly.
Using the Wrong Size
A small anchor won’t hold a heavy item, and an oversized anchor might break the wall or leave too large a hole. Match the anchor’s weight rating and screw size to your project. Don’t guess—check the box before starting.
Drilling at an Angle
Always insert anchors straight into the wall. A tilted anchor or screw can shift over time and weaken the hold. If you are not drilling straight, use a guide or level to help.
Overtightening the Screw
Too much turning screw can strip the anchor or spin it loose inside the drywall. Turn screw until it feels snug. If the screw keeps spinning or doesn’t stay tight, remove the anchor and try again.
Removing and Replacing Anchors
Knowing how to use drywall anchors also means to knowing how to remove them completely. Maybe you’re moving furniture, changing decor, or fixing a bad install. Removing anchors the right way keeps wall damage minimal.
Taking Out the Screw
Unscrew the screw carefully by turning it counterclockwise. Don’t pull or yank—it should come out smoothly. Once the screw is out, decide whether to remove the anchor or push it into the wall.
Dealing With the Anchor
Some anchors can be pulled out with needle-nose pliers. Others, especially toggle bolts, should be pushed into the wall cavity behind the drywall. If you try to yank them out and they resist, you may damage the wall.
Fixing the Hole
After removal, fill the hole with lightweight spackle. Let it dry, sand it smooth, and repaint. A well-patched wall can look as good as new in less than an hour.
Learn more about: How to Install Hardwood Floors?
Hang with Confidence Every Time
Now that you know how to use drywall anchors, you don’t have to worry about falling shelves or loose wall fixtures. Anchors give drywall the strength it was never meant to have on its own. With the right anchor, careful steps, and with steady hand, you can hang everything from artwork to storage safely and confidently. It is simple skill, but one that makes every home project a little easier and a lot stronger.
How to Install Hardwood Floors

Hardwood floors bring elegance, value, and warmth into a home. The lasting look of wood underfoot not only complements most interior styles, but it also holds up for decades with proper care. If you are planning to upgrade a room or replace old flooring, learning how to install hardwood floors gives you the knowledge to do it confidently or at least understand what’s involved when hiring a professional.
Installing hardwood is more than just placing boards. It’s a step-by-step process that starts before the first plank is ever laid and continues through the final trim and polish. Whether you’re using solid hardwood or engineered wood, this guide walks you through each essential part.
Pre-Installation Matters
Even the best flooring materials can fail if the prep work is sloppy. That’s why every great floor starts with solid groundwork.
Subfloor Inspection and Repair
Your hardwood will only be as strong as the surface it rests on. Begin by inspecting the subfloor. It must be dry, flat, and free from damage. Any moisture issues, dips, or bumps should be addressed before going further. For concrete, inspect moisture levels and set up vapor barrier. With wood subfloors, make sure all boards or plywood are secured and level.
Gaps and raised joints should be filled or sanded down. High spots can create instability, but low spots might cause boards to flex and eventually crack.
Acclimating the Wood to Its New Home
A crucial yet often skipped step in understanding how to install hardwood floors is acclimating the boards to the room’s climate, because wood is a natural material, it expands and contracts based on temperature and humidity. To avoid future warping or gapping, let your flooring rest in the room for at least 72 hours. Keep the boxes open and lay them flat. The HVAC should be running as normal, so the wood adjusts to the same conditions it’ll experience after installation.
Planning the Layout
Before you start installation, spend time thinking through the layout. This includes deciding the direction of the boards most people lay them parallel to the longest wall or along the path of natural light for a better look. Mark the first few rows using a chalk line. Don’t forget to leave a ½-inch expansion gap around all walls. This allows the wood to expand naturally with changes in humidity. You’ll cover the gap later with baseboard or trim.
Laying Down the Planks
With the surface ready and layout planned, now comes the most rewarding part—installing the boards.
Select the Right Installation Method
The three main installation types are nail-down, glue-down, and floating. Solid hardwood is usually nailed or stapled into a wood subfloor. Engineered hardwood offers more flexibility. It can be glued to concrete or floated over underlayment. Nail-down provides the firmest feel underfoot and is common in traditional homes. Glue-down creates a quiet, solid floor but requires precise adhesive work. Floating is the easiest for DIYers, requiring no fasteners or glue it simply clicks into place.
The First Row is Everything
Start along your reference chalk line. Use spacers against the wall to maintain the expansion gap. Choose your straightest boards for the first row and double-check alignment before fastening. Once this row is down, each one that follows will build off its accuracy. Mistakes here will ripple across the room. Install slowly and steadily, making sure every joint is tight.
Keeping a Random Pattern
Avoid lining up the seams between boards across rows. Instead, stagger them by at least six inches to create a strong structure and natural look. Cut boards to size as needed and start new rows with off-cuts to reduce waste. Use a tapping block and mallet to secure the fit, especially for tongue-and-groove connections. Never strike the wood directly, as this could damage the edges.
Progressing Across the Room
Continue working row by row, checking spacing and fit as you go. Step back every few rows to inspect from a distance. Keep tools and materials close by to stay in rhythm. Working too quickly may cause gaps or misalignment. It’s better to take your time and ensure each row fits perfectly before moving forward.
Final Steps That Make It Shine
Once all the boards are down, there’s still important work to do before your floor is truly complete.
Trim Work and Transitions
Remove all spacers and install your baseboards or quarter-round molding to hide the expansion gap. Use finishing nails and caulk as needed for a clean edge. Take your time here—clean trim work can elevate the entire space. Where hardwood meets other flooring, such as tile or carpet, add a transition strip. These not only look nice but help prevent damage or tripping.
Clean and Evaluate the Floor
Vacuum up dust and debris from installation. Then lightly damp mop the floor using a microfiber cloth. Avoid heavy water use hardwood and moisture don’t mix. Walk across the entire floor. Listen for any squeaks or hollow spots that might indicate a loose board. Catching these early allows for easier fixes before furniture goes back in.
Applying Finish (If Needed)
If you installed unfinished hardwood, now is the time to sand and apply your finish. This seals the surface and enhances durability. Choose between oil-based and water-based polyurethane depending on your preference for shine, odor, and drying time. Allow the floor to cure fully before moving furniture or rugs back in. Rushing this can lead to smudging or damage.
Read more: How to Cut Drywall?
Every Step is a Statement
Installing hardwood isn’t just about putting down planks—it’s about building something that will last. By learning how to install hardwood floors, you gain a deeper appreciation for the craftsmanship behind each line and grain. It’s not just a surface; it’s a foundation for memories. A floor that feels cool under bare feet in the morning. One that shines in the afternoon sun. One that creaks just enough to remind you it’s real.
Understanding this process gives you control whether you’re a DIY enthusiast or simply want to oversee a contractor’s work. And with every board you secure, you’re not just building a floor; you’re shaping the feel of your space for years to come. Mastering how to install hardwood floors takes time and care, but the results are well worth it. You’ll not only save money on labor you’ll gain the kind of pride that only comes from building something beautiful with your own hands.
