How to Refinish Hardwood Floors?
Understanding each step of the process that makes a worn or scratched wood flooring to a smoother, refreshed surface again, is involved in learning how to refinish hardwood floors. Hardwood flooring can last for many years, but over time it may show signs of use, such as dull spots, scratches, or discoloration. Refinishing does not need to replacing the floor; instead of this, to restore the wood’s appearance, the top layer is polished and coated again.
Conditions That Require Refinishing
Floors that are scratched, faded, or uneven in color often show that the protective finish has worn away. Surface with heavy foot traffic can be look more damaged than the corners or edges. In some cases, water exposure or stains from furniture legs can also leave marks, that make wood look old and damaged. These signs usually indicate that the top coating, whether it’s polyurethane or another finish, has broken down and no longer protects the surface.
Refinishing can address surface-level damage, but it does not fix deep cracks or warped boards. Before starting, it is important to inspect whether the floor is solid hardwood or engineered hardwood. Solid wood can be sanded multiple times, while engineered wood has a thinner top layer that may only allow one refinishing process, depending on its thickness.
Preparing the Room for Refinishing
The process of refinishing begins with emptying the room. All furniture, rugs, and movable items must be removed to allow full access to the entire floor. If the room has baseboards or trim that meet the floor directly, they are often protected with tape or removed entirely to keep them free of sanding dust or finish.
The floor surface must be thoroughly cleaned before sanding. Dust, debris, and any sticky residue are cleared to avoid interference with the sanding equipment. If nails or staples are present, they are checked and either removed or hammered down to avoid damaging sanding belts or discs. Once the room is clean and free of obstructions, the sanding can begin.
Sanding Down the Surface Layer
Sanding is done with a drum sander or a floor buffer fitted with sanding screens. This step removes the old finish and exposes fresh wood underneath. Coarse-grit sandpaper is usually used at first to strip the floor, followed by finer grits to smooth the surface. The sanding must be consistent across the room, avoiding low spots or uneven edges. Edges and corners are sanded separately with an edge sander or a hand-held sander.
Dust created during sanding is collected using vacuum attachments, though a fine layer of dust often remains and must be cleaned before the next stage. The floor is inspected after sanding to ensure no areas of old finish remain and the surface is flat. Deep scratches or gouges are addressed at this point, either by sanding further or using filler if the damage is minor.
Cleaning Before Applying the Finish
After sanding is complete, the entire floor is vacuumed and wiped down to remove any dust or fine particles. This is a critical step, as even small particles can become trapped in the new finish, creating a rough or uneven surface. Depending on the product being used, the floor may also need to be wiped with a damp cloth or tack cloth to ensure it is fully clean.
Any gaps or cracks between floorboards are filled using wood filler, which is allowed to dry and then lightly sanded to blend with the surrounding surface. The floor must be fully dry and dust-free before the finish is applied.
Applying the Stain (If Desired)
Some refinishing projects include staining the floor to change its color. Stain is applied after the surface is sanded and cleaned. It must be spread evenly and allowed to penetrate the wood. Wiping off excess stain quickly prevents blotches or uneven tones.
Staining is an optional part of refinishing. If the natural color of the wood is preferred, the next step is simply sealing the floor with a clear finish. If stain is used, the drying time must be followed exactly before moving forward to the sealing step.
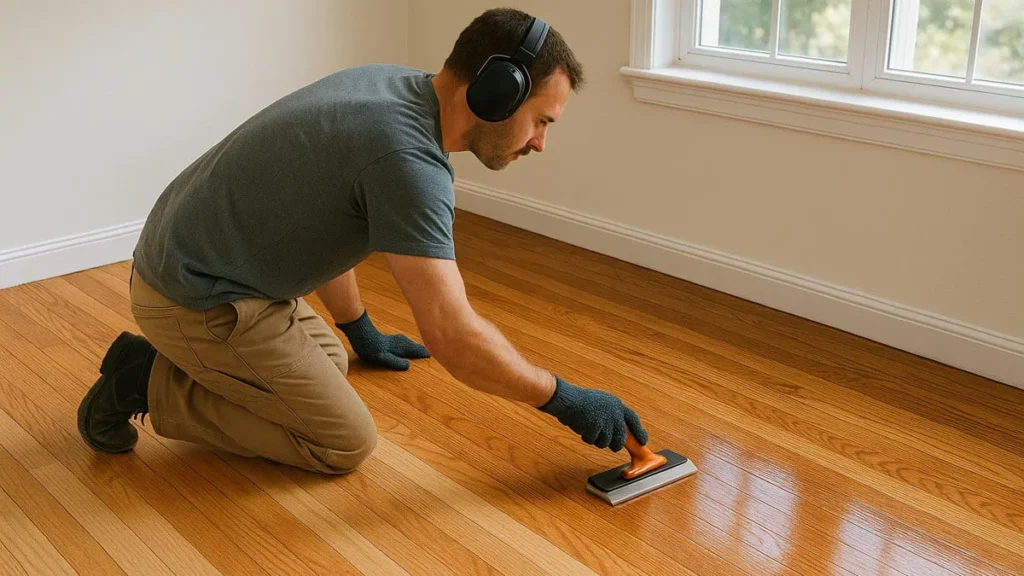
Sealing and Protecting the Floor
The final stage in how to refinish hardwood floors is sealing the wood with a protective topcoat. The most common finishes are oil-based or water-based polyurethane, though other options exist such as wax or penetrating oils. Each finish has a different look and drying time. The first coat is usually applied using a brush or roller, moving along the direction of the wood grain.
Once the first coat dries, the floor may be lightly sanded again using fine-grit sandpaper or a buffing screen to smooth out any raised grain or imperfections. After cleaning the dust, a second or third coat may be added depending on the desired level of protection.
During this time, the room must remain empty and free of foot traffic. Most finishes need several hours to dry between coats, and full curing can take days. Proper ventilation is maintained to speed up drying and to remove any lingering odor from the finishing product.
Read more: How to Install Laminate Flooring?
Re-Entry and Final Setup
After the final coat is dry, the floor must be left undisturbed for the recommended curing period. This timeframe depends on the product used but can range from 24 hours for light foot traffic to a full week before placing rugs or furniture back. Baseboards or trim that were removed are reinstalled at this point, and the room is returned to regular use.
Refinished floors are more resistant to future wear and appear refreshed. Over time, this process can be repeated as long as the wood surface remains thick enough for sanding. The frequency of refinishing depends on traffic, maintenance, and the type of finish applied during each cycle.
Knowing how to refinish hardwood floors means understanding the complete sequence of steps, from removing the old finish to sealing the new surface. The goal of the process is to restore the wood’s smooth appearance while also renewing its protective layer. Each step—cleaning, sanding, staining, and sealing—is necessary to ensure long-term performance and visual consistency. Floors that are properly refinished retain their function and appearance while extending the lifespan of the original material.
How to Install Laminate Flooring
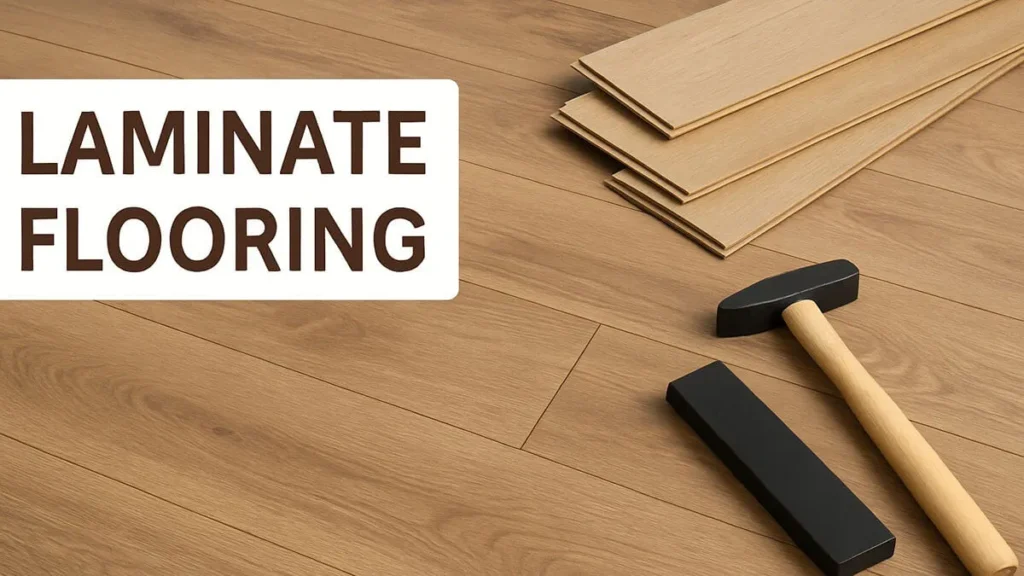
Laminate flooring is a popular choice for homes because it is durable, easy to clean, and comes in many styles. Homeowners often prefer it because it looks like wood or tile but costs less and installs more quickly. If you’re thinking about redoing your floors, learning how to install laminate flooring can help you finish the job without hiring a professional. With the right tools, time, and planning, this is a project most people can handle on their own.
Getting Ready for Installation
Before you start installing anything, the room needs to be clean and clear. Remove all furniture, rugs, and baseboards. If you’re replacing old flooring, it must come out unless the laminate is made for going over it. Most floors work best on a flat, hard surface like plywood or concrete.
Moisture is another factor to consider. If you’re working in a room where water is common—such as a bathroom or basement—make sure there’s a moisture barrier. This plastic sheet goes between the floor and the laminate, protecting the boards from warping. Some laminate planks come with underlayment attached, while others need it added separately.
Once the space is clean and dry, let the laminate flooring sit in the room for a day or two. This gives it time to adjust to the room’s temperature and humidity, which helps prevent gaps or buckling after installation.
Planning Your Layout
Planning where and how the boards will be placed saves time later. Start by measuring the room’s length and width. Divide the total width by the width of one plank to see how many full boards will fit across. This tells you if the last row will need trimming.
You want the first and last rows to be roughly the same width so the floor looks balanced. If the last row will be very narrow, cut the first row a little thinner so the final row comes out wider. Always plan the layout to avoid very small slivers of flooring along walls.
Also, plan your installation so that the boards run in the same direction as the longest wall or the incoming light. This makes the room look more natural and less chopped up.
Starting the First Row
When you’re ready to begin, choose a wall to start against. Most people begin along the longest straight wall. Place spacers between the boards and the wall to leave a small gap. This gap is important because laminate flooring expands and contracts with temperature and humidity. Without room to move, the floor could buckle.
Lay the first board with the groove side facing the wall. Add the next board by snapping the tongue into the groove at an angle, then pressing it flat to lock it in place. Continue this process until the row is finished. If the last board doesn’t fit exactly, measure the gap, cut the plank, and place it in.
Building the Next Rows
The next row should start with a different length board to avoid lining up joints. This not only looks better but also makes the floor stronger. Most people stagger joints by at least 12 inches.
Insert the tongue of each plank into the groove of the one in the row before it. Angle it slightly and then press down to snap it into place. Some boards may need a light tap to lock tightly. Use a tapping block and hammer—not the hammer alone—to protect the edges of the board.
Keep repeating this process row by row. Take your time to make sure each joint is tight and smooth. If a gap appears, check that the board is fully clicked into place and not blocked by dust or a crooked angle.
Cutting Around Obstacles
Many rooms aren’t just square. You’ll probably need to cut boards to fit around door frames, vents, or cabinets. For tricky cuts, trace the shape onto a plank and use a jigsaw or handsaw to cut it out. Always measure twice to avoid wasting pieces.
For doorways, it helps to undercut the trim so the laminate can slide underneath it. This gives a cleaner look and avoids the need for complicated cuts. Use a small hand saw or oscillating tool to trim the bottom of the frame just enough to fit the flooring under it.
Finishing the Last Row
The final row is often the most difficult, especially if it needs to be trimmed lengthwise. Measure the width of the gap between the last full row and the wall, subtract the expansion space, and cut your planks to size. Carefully snap them into place just like the earlier rows.
If there’s not enough space to angle the plank in and push down, try using a pull bar tool. This allows you to hook the end of the board and pull it tightly into position without needing a lot of room.
Installing Baseboards and Transition Pieces
Once the flooring is fully in place, remove the spacers along the walls. The small gaps left by the spacers will now be hidden by the baseboards or quarter round molding. Nail or glue the trim to the wall, not the floor, so the laminate still has room to move.
If your laminate flooring joins another type of floor in a hallway or doorway, use a transition strip. These pieces bridge the gap and create a smooth, finished edge. Different types of strips work for carpet, tile, or other laminate surfaces.
Cleaning Up After the Job
After installation, clean the floor with a vacuum or soft broom to remove any dust or debris. Never soak laminate with water; instead, use a damp mop if needed. Avoid using strong cleaners that could damage the surface or dull the finish.
Throw away or recycle leftover materials properly. Extra planks should be saved in case you need repairs later. They can be stored flat in a dry area. Having matching boards on hand helps if damage ever occurs, especially if the style becomes unavailable.
You may also want to know: What Is LVP Flooring?
Enjoying the Finished Floor
Once the trim is back in place and the surface is clean, the room is ready to use. Most laminate floors are ready for light foot traffic immediately. Just be careful with dragging heavy furniture over it. Use felt pads or furniture sliders to protect the new surface.
Learning how to install laminate flooring is a useful skill for any homeowner. It saves money, increases home value, and gives you control over the look of your space. With careful planning, basic tools, and some patience, you can achieve a professional result without hiring a crew.
What Is LVP Flooring

What Is LVP Flooring? LVP flooring stands for Luxury Vinyl Plank flooring. It is a hard surface flooring material made to look like wood or stone while being constructed from layers of synthetic materials. The product is designed to provide a balance between appearance and function. LVP flooring is commonly used in residential and commercial spaces because of its water resistance, ease of maintenance, and versatile design.
Composition and Structure of LVP
Luxury Vinyl Plank flooring is built from multiple layers. The top layer is a clear wear layer that serves as the surface shield, helping protect against daily wear and surface damage. Beneath that layer is the design layer. This is where the printed image of wood grain, stone, or other textures appears. The design layer is what gives the plank its visual identity.
Next comes the core layer, which provides the flooring with structure and firmness. Others use a rigid core, which is known as either SPC (stone plastic composite) or WPC (wood plastic composite), but some LVP products have a flexible core. Each core type has a different density and durability profile. At the base, there is usually a backing layer that provides grip and absorbs sound.These layers are merge into a single plank, that is designed to be clicked or glued into place during installation.
Available Dimensions and Surface Finishes
Vinyl plank flooring has different sizes. based on the product, widths and lengths can be different, and the thickness approximately ranges from 2 mm to 8 mm or more. The thickness can effect the product’s comfort underfoot and sound reduction abilities.
Surface finishes also be differ. Some LVP flooring comes with a smooth plain finish, but some lvp flooring are embossed to mimic real wood grain or stone surface. The finish affects both appearance and slip resistance. The wear layer can also vary in thickness, which plays a role in how long the surface resists marks, scratches, and surface changes caused by foot traffic or moving furniture.
Uses of LVP Flooring
Areas where moisture and spills are possibe the Luxury Vinyl Plank is generally installed. It is used in kitchens, laundry rooms, bathrooms, and basements. traditional hardwood flooring might be at risk of water damage at these areas. LVP’s design resists moisture from above and below, depending on the installation method and product construction.
It is also installed in living rooms, dining rooms, hallways, and offices where frequent foot traffic occurs. In commercial spaces, it is used in retail stores, medical offices, and lobbies because of its resistance to stains and the ease of cleaning. The lvp flooring can be stable in different temperatures and conditions due to its layered structure.
Installation Types and Methods
There are several installation systems for LVP flooring. One method involves floating planks, which lock together with a click-and-lock mechanism. This system is used for faster installations and it does not even require glue or nails. The planks are not attached directly they sit on top of a subfloor or underlayment.
Another type uses adhesive backing. These planks are peeled and stuck directly to the subfloor. When noise reduction is important or for smaller areas, this method is used. Glue-down installation is third option. Before placing the planks this method uses sticky spread over the subfloor. It is commonly used in commercial settings where permanent bonding is needed.
The subfloor conditions and room type determine which installation method is suitable. Some LVP products are labeled as “loose lay,” meaning they can be placed without glue or click systems if the room dimensions and plank weight allow for it.
Conditions for Proper Installation
Before placing LVP flooring, certain site conditions must be met. The subfloor must be clean, dry, and level. Debris, moisture, or uneven surfaces can affect how the planks lock or adhere. Moisture barriers are sometimes required in areas with concrete subfloors or high humidity levels.
Before installing the LVP flooring, acclimation will be recommended. The planks are placed in the room for at least 48 hours, to be installed. This step helps them adjust to the temperature and moistness of the space. It minimizes the risk of expansion or contraction after installation is complete.
After the installation, Before allowing furniture or foot traffic, LVP should be left without any distrubance for the recommended time. This period can be different on the basis of the type of installation used and the manufacturer’s instructions.
Performance Characteristics
LVP flooring is engineered to be durable. Its wear layer helps it resist surface scratches, dents, and stains. The rigid core variants are especially stable and are less likely to show pressure marks from heavy furniture. The waterproof nature of most LVP products allows them to handle spills without immediate damage. But, the completion can be still dependon the conditions of subfloor and quality of installation.
The material is generally comfortable underfoot and produces less noise than other hard flooring options. Some products include padding on the backing layer to improve sound control and cushioning. Heat resistance can also be different, but LVP can only be affected by extreme temperatures. causing fading or expansion, because of direct sunlight over long time, window coverings may be recommended for certain rooms.
Cleaning and Maintenance Guidelines
Routine maintenance of LVP flooring includes sweeping or vacuuming to remove dirt and dust. Soft bristle brooms or vacuums designed for hard floors are best. For deeper cleaning, a damp mop and pH-neutral floor cleaner may be used. It is not recommended to use steam cleaners or abrasive tools on LVP.
Spills should be wiped up quickly to keep the surface clean. Furniture should have protective pads to avoid pressure marks. Area rugs can be used in high-traffic spots, but rugs with rubber or latex backings should be avoided unless the flooring is compatible. These backings can sometimes cause discoloration over time.LVP flooring does not require waxing or sealing. The wear layer is designed to function without added treatment. If a plank becomes damaged, many styles allow individual pieces to be removed and replaced without disturbing the rest of the floor.
Environmental and Indoor Considerations
Some LVP products meet the indoor air quality standards. Indicating low emissions of volatile organic compounds (VOCs), Manufacturers can label them with certifications. These certifications can be different by area, but they are commonly observed product packaging or included in technical documents.
Disposal and recycling options also vary. Some vinyl planks are recyclable depending on the core materials and regional facilities. If removal is needed during remodeling, check the local guidelines for how vinyl products should be handled.
Read more: How Much Concrete Do I Need?
Summary of Material Attributes
What is LVP flooring? It is a layered flooring material designed to resemble natural wood or stone while offering moisture resistance and durable performance. With multiple installation options, a wide range of finishes, and uses in both homes and commercial spaces, it functions as a strong alternative to traditional flooring materials. Each component of LVP serves a role in its structure, making it suitable for areas where water exposure, high foot traffic, and ease of maintenance are priorities.
How Much Concrete Do I Need
To plan a concrete project starts with a simple but important question that how much concrete do I need? Getting the right amount can help you to avoiding wasted material, added costs, or unexpected delays by working on a driveway, patio, or a small footing. Without an accurate estimate, you risk buying too much and overspending or buying too little and pausing the job mid-way.
Figuring Out What You’re Pouring
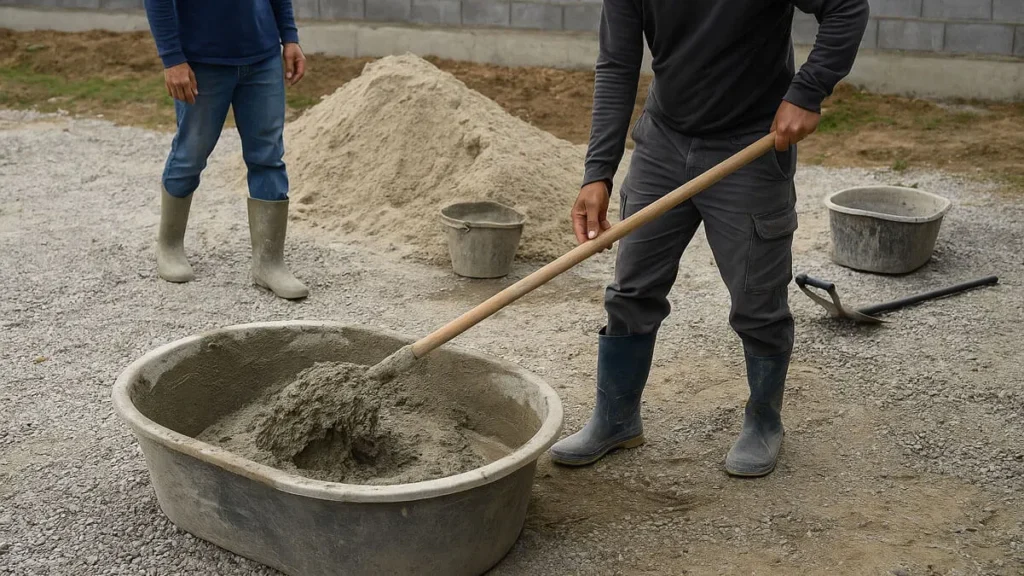
Each project has its own shape, size, and purpose. Some pours are flat and wide, like sidewalks or slabs. Others might be small but deep, like post holes or footings. Knowing what you’re building will guide you toward the right measurements. Concrete is measured in cubic yards. To find that, you need to calculate the area’s volume in feet, then convert it.
Take the time to measure the length, width, and thickness of the space you plan to fill. These three numbers multiplied together give you the total in cubic feet. Since one cubic yard equals twenty-seven cubic feet, dividing your number by twenty-seven gives you the volume you need in cubic yards.
Measuring Uneven Ground or Odd Shapes
Some projects are simple rectangles, but others might have curves, slopes, or changes in height. When dealing with these, break the area into smaller, more manageable parts. Measure each one separately, then add them together for the full amount.
If the surface is uneven or angled, take measurements from several points to find the average thickness. For example, if one side is three inches deep and the other is five inches deep, your average depth is four inches. Using that average will give you a more balanced and accurate estimate.
Dealing With Depth and Load Requirements
Depth matters when it comes to concrete. A walkway used only by foot traffic doesn’t need to be as thick as a driveway supporting heavy cars. Four inches is typical for patios and sidewalks, while driveways often require five or six inches. Slabs holding equipment or sheds might need even more.
Be sure to confirm the thickness that suits your project’s purpose. If the concrete is too thin, it may crack or break. Too thick, and you might spend more money than needed. Matching the depth to the load ensures strength and durability while keeping costs under control.
Converting Numbers Into Concrete
Once you have your volume in cubic feet, divide it by twenty-seven to convert it into cubic yards. For example, a slab that’s 10 feet long, 10 feet wide, and 4 inches thick equals 33.3 cubic feet. Divide that by twenty-seven, and you’ll need a bit more than 1.2 cubic yards of concrete.
Most suppliers sell concrete in full or half-yard amounts, so rounding up slightly ensures you have enough. Keep in mind that it’s better to have a small amount left over than to run short when you’re halfway through a pour.
Ordering With Extra in Mind
Even careful estimates can fall short if the forms shift or the ground absorbs more than expected. To avoid this, add a little extra to your order—usually around five to ten percent more than your calculated amount. This helps cover small changes, unexpected gaps, or surface settling.
If you’re working on a tight budget or have limited mixing space, calculate how many 80-pound bags you’d need instead. Each 80-pound bag covers about 0.6 cubic feet. Divide your total cubic feet by 0.6 to find the number of bags. This approach works well for small areas or when mixing by hand.
Deciding Between Bagged and Delivered Concrete
Small pours, such as garden steps or single fence posts, can often be done with bagged concrete. It’s affordable, easy to store, and can be mixed as needed. For large slabs, driveways, or foundations, ordering concrete by the truck is more practical. Ready-mix trucks deliver fresh, consistent batches that are poured quickly.
Delivery often requires a minimum order, so check with your local supplier. If your project is close to the minimum or just over it, you may save time and labor by going with the truck. Just make sure the site is ready when the truck arrives—once the mix is poured, you have limited time before it begins to set.
Factoring in Site Conditions
Soil, temperature, and layout can affect how concrete behaves. Sandy or soft soil might require a gravel base to support the pour. High heat or dry air can cause the surface to dry too quickly, which might weaken the finish. Sloped areas may need forms built deeper on one side to keep the pour level.
These site conditions might change how much concrete you need. For example, deeper forms on one end may add volume. Always double-check measurements after preparing the area. A slight change in depth or width can add or reduce several cubic feet, which matters when ordering concrete.
Staying on Track During the Pour
Once the concrete arrives, work begins quickly. Having extra hands on-site and tools ready helps you use the material before it sets. Pouring evenly and using the right tools to smooth and level the surface avoids low spots or thin sections.
Keeping track of how much is poured in each section helps monitor progress and spot problems early. If a section takes more than expected, check your form depth and base layer for issues. Adjustments during the pour may require small changes in how much you use in the remaining sections.
Avoiding Waste and Reducing Mistakes
Waste can happen when you overestimate, mix too much, or fail to plan the pour correctly. Careful measurements, along with proper planning and preparation, reduce this risk. Ordering only what you need, plus a small extra amount, balances the job without excess cost.
If extra concrete remains after the job is done, it can be poured into small molds to make stepping stones or left to cure in a bucket and discarded later. Never wash fresh concrete into drains or soil—it must be handled properly to avoid damage or pollution.
Read more: How Long Does Concrete Take to Dry?
Wrapping Up With a Solid Finish
Once your project is complete, let the concrete cure properly. Keep it moist for at least a few days to reduce cracking. Avoid heavy weight or foot traffic until it hardens fully. A good concrete finish lasts for years and supports whatever load it was designed for.
Asking how much concrete do I need is more than just a number—it’s about planning, measuring, and understanding every part of the project. Getting it right from the start means fewer delays, stronger results, and a clean, solid finish every time.
How Long Does Concrete Take to Dry
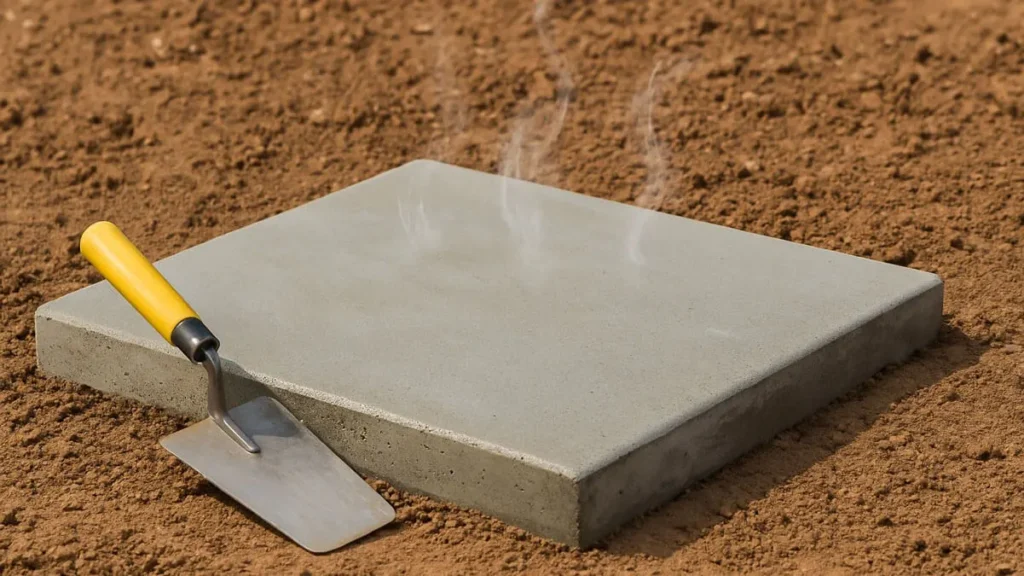
Instant concrete drying is not possible, and for anyone who is working on a building or home project, it is important to know how long it takes to fully set. No matter if it’s a small slab, a driveway, or a large foundation, knowing how long does concrete take to dry helps you to plan each step carefully. Drying time affects when you can walk on it, build on it, or apply finishes. Rushing the process can lead to cracks, weakness, or costly do-overs. That’s why it’s important to know what’s really happening while concrete cures.
The Difference Between Drying and Curing
When someone says concrete is “dry,” it often means the surface feels firm or hard. But concrete doesn’t just dry—it cures. Curing is a chemical process called hydration. This happens when cement in the mix reacts with water and forms crystals that give concrete its strength. Even if the top feels dry, the inside could still be wet and weak.
Curing continues for many days after pouring. It doesn’t stop as soon as the concrete feels solid under your feet. In fact, even after a week, the concrete might still be gaining strength. That’s why it’s important to wait the proper amount of time before adding heavy loads, structures, or finishing materials.
The First 24 to 48 Hours
Right after pouring, concrete begins to set. Within the first 24 hours, the surface starts to harden. During this time, it’s important to protect the area from rain, strong wind, or extreme heat. Even footprints or tool marks can ruin the finish. Most contractors avoid walking on the surface during this stage.
By the 48-hour mark, the top layer of concrete is usually strong enough to support light foot traffic. This does not mean the concrete is fully dry, but it can handle minor weight if necessary. However, it’s still important to be careful. Heavy items like furniture or equipment should stay off until more time has passed.
Reaching Partial Strength by One Week
After about seven days, concrete reaches around 70% of its full strength. At this point, some light vehicles can drive on a slab, and you may begin minor construction on top of it. Still, any deep anchoring, drilling, or full use should be avoided. The concrete is strong, but it has not fully cured.
If the weather is cool or damp, the process may take longer. Concrete cures slower in low temperatures or shaded areas. It’s also affected by wind and sun. Hot weather can cause the surface to dry too quickly, leading to cracks unless it is kept moist.
Full Cure Time at 28 Days
Most concrete reaches full strength at 28 days. This is the standard rule in construction and engineering. By this point, the curing process has slowed down, but the material has achieved its intended durability. If the job involves heavy machinery, foundation building, or structural loads, waiting the full 28 days is critical.
During this month-long curing period, the concrete continues to bond and develop strength from the inside out. The surface may appear fully dry much earlier, but the inner layers are still adjusting. That’s why experts recommend waiting the full time before sealing the surface or beginning other finish work.
Things That Affect Drying and Curing Time
Concrete drying time depends on many factors. The weather is one of the biggest. In warm, dry weather, concrete may harden faster on the surface. But this doesn’t mean it’s fully cured. Moisture can still be trapped inside.
The mix itself also plays a role. If there’s more water in the mix, the concrete may take longer to dry. Some projects use quick-drying cement, but even those need several days to cure properly. Additives and chemical treatments may speed up surface drying, but they don’t replace natural curing time.
Project size and thickness matter too. A thin slab may cure faster than a thick foundation, especially if it’s exposed to air on all sides. Deeper pours hold more moisture and take longer to set all the way through.
Keeping Concrete Moist During Curing
One of the most important parts of curing is keeping the concrete moist. If the water in the mix dries out too quickly, the chemical reaction stops early. This weakens the final product. To prevent this, workers often cover concrete with plastic sheets, wet burlap, or apply a curing compound that traps moisture.
Spraying the surface lightly with water during the first week can also help. This is especially important during hot or windy weather, when evaporation speeds up. By maintaining moisture, you ensure that the curing process continues as it should and the final strength of the concrete is reached.
When to Seal or Paint the Surface
Sealing concrete protects it from moisture, stains, and wear. But sealing too soon can trap water inside and cause problems later. Before sealing, the concrete must be fully dry. For most surfaces, this means waiting at least 28 days after pouring.
Painting concrete also requires a fully dry surface. If you apply paint or stain before the concrete is cured, it may peel, bubble, or fade quickly. Always follow product directions and wait the full curing time before applying any finish.
To explore more click for Concrete Estimating Services.
Testing for Dryness
If you’re unsure whether the concrete is dry, you can do a simple test. Tape a square of plastic film to the surface and leave it for 24 hours. If moisture collects under the plastic, the concrete is still drying. Wait a few more days and test again before sealing or building.
There are also moisture meters available, but they can be costly. For most home projects, the plastic test gives a good idea of the moisture level without needing special tools.
Planning Your Project Timeline
Knowing how long does concrete take to dry allows you to schedule your work properly. Don’t plan heavy use of the area the next day or rush to finish everything at once. Allow each stage enough time to set fully before moving forward. Doing this keeps the job on track and reduces the chance of failure.
Create a simple timeline based on your concrete type and size. Include waiting periods for curing, finishing, and sealing. If the weather turns bad, be ready to pause and give the concrete more time to cure. A little patience goes a long way in protecting your work.
Read more: How to Hire Labor for a Construction Site?
Getting the Best Result
Concrete is a strong and reliable material, but it depends on time and care. It does not dry in a day, and rushing the process leads to cracks, chips, and wasted money. By understanding the curing stages and watching the weather, you can make sure your concrete performs well for years to come.
Whether you’re working on a home project or managing a construction job, knowing how long does concrete take to dry is one of the most important parts of the process. Wait the right amount of time, protect the surface, and don’t skip the small steps. The result will be a surface that lasts and performs just as it should.
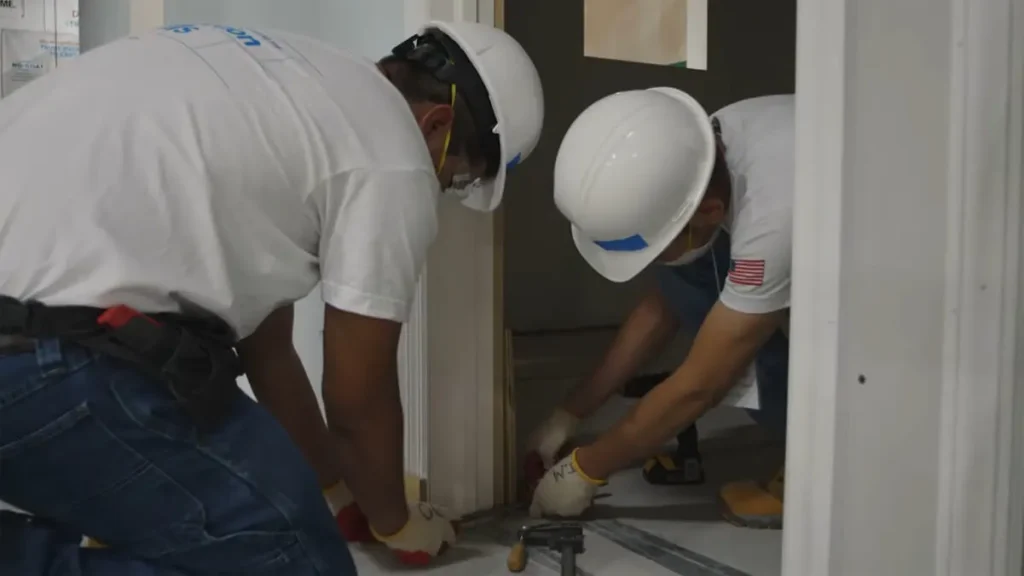
How to Hire Labor for a Construction Site

Construction projects cannot move forward without the right labor. Whether you are working on a small renovation or a major building project, it is important to understand how to hire labor for a construction site. The right team keeps things on track, avoids delays, and ensures that every task is done safely and correctly. Building a dependable workforce takes planning, clear communication, and a focus on quality from the very beginning.
Understanding the Labor Needs for Your Project
Before hiring anyone, it is necessary to understand what type of labor your project requires. Every construction site involves different tasks. Some workers will need specific skills such as carpentry, electrical work, or plumbing. Others may only need to carry materials or clean up the site. When you identify each task clearly, you can begin looking for the right people to complete those jobs. Hiring without this step can lead to confusion, wasted time, or poor-quality work.
Hiring labor also depends on how long the project will take. Some workers may only be needed for a few days, while others may stay for weeks or even months. Having a clear schedule in mind helps you explain the work expectations to future hires. It also helps you figure out whether full-time or part-time labor is more appropriate.
Writing a Clear Job Description
A well-written job description is one of the first and most important steps in how to hire labor for a construction site. It helps attract workers who understand what is expected of them. In this description, you should explain the tasks, the level of experience needed, the working hours, and the type of environment they will be working in. If safety gear or certain tools are required, this should also be included.
The job description should use plain language and stay focused on what matters most. If the job is physically demanding or outdoors in all weather, make sure this is clear from the start. This prevents misunderstandings later and helps ensure that the people who apply are truly prepared to do the work.
Searching for Labor Using Reliable Sources
Finding labor involves more than just posting an ad online. Many contractors use a mix of different sources to find qualified workers. Websites that focus on construction jobs can bring in a wide range of applicants. Local community boards, trade schools, and vocational programs are also great places to connect with people looking for work in this field.
In some cases, working with a labor staffing agency may save time. These agencies often have pre-screened workers who are available on short notice. No matter where you look, the key is to use sources that match the type of labor your project needs.
Interviewing and Screening Applicants
Once applications start coming in, you will need to decide which workers might be the best fit. Interviewing each person gives you the chance to ask about their experience, the kind of work they have done in the past, and whether they are comfortable with the tasks on your site. Some workers may have certifications or training, while others may rely more on hands-on experience.
You should also ask about reliability. Construction work often starts early and requires consistent attendance. A worker who has the right skills but does not show up on time can slow down the entire project. Asking simple questions about past jobs and responsibilities helps reveal whether an applicant is dependable and serious about the work.
Verifying Background and Experience
When thinking about how to hire labor for a construction site, checking references is a step that should never be skipped. Talking to past employers helps you confirm that a worker’s experience is real and gives you a better idea of how they perform on the job. Ask if the worker completed tasks as expected, followed safety rules, and got along with the rest of the crew.
For skilled labor positions, it may also be a good idea to ask for copies of licenses or certifications. This helps make sure the person meets any legal or industry standards required for the job. In some situations, a background check might be necessary, especially if the job involves operating expensive equipment or working in secure areas.
Completing Legal Requirements and Paperwork
After selecting your workers, you need to take care of legal paperwork before they begin. This may include tax forms, identification verification, and work eligibility documents. Most areas also require workers to be covered by insurance. If you are not using a staffing agency, you will need to make sure your business has the right coverage.
In addition to insurance, some job sites may require proof of safety training. Make sure you know what is required in your location. Keeping track of these details protects both you and your workers and helps avoid delays or fines.
Giving Workers a Proper Introduction to the Job
New workers should not be expected to start immediately without guidance. Giving each person a simple tour of the site helps them understand how things are organized. You should also review safety rules, explain who to report to, and let them know what is expected during the workday.
Even experienced laborers benefit from a quick orientation. Each job site is different, and clear instructions make it easier for new workers to get started quickly. Starting with strong communication leads to better performance and fewer mistakes.
Monitoring Performance and Work Quality
After hiring and training your labor team, it is important to keep track of how they are doing. This includes watching how well tasks are completed and whether the workers follow safety rules. A system for tracking hours worked and daily tasks helps with both scheduling and payroll. It also gives you a clear picture of which workers may be a good fit for future jobs.
Providing feedback and correcting issues early helps workers improve. It also shows that you are paying attention to the job and that quality matters. If someone continues to underperform or causes delays, replacing them quickly is sometimes necessary to keep the project on track.
Read more: How to Start a Business as a General Contractor?
Treating Workers Fairly and Building a Strong Team
One of the most effective parts of knowing how to hire labor for a construction site is remembering that people work better when they feel respected. Paying workers fairly, giving them breaks, and offering a safe environment builds trust. Workers who are treated well are more likely to return for future jobs and to speak positively about your business.
Good relationships with your laborers also lead to smoother communication and faster results. As your team grows, you will start to build a group of trusted workers you can call on again and again. This kind of loyalty takes time, but it begins with treating workers as an important part of the project.
How to Start a Business as a General Contractor

If you have experience in construction then starting your own business can be interesting. When you know how to start a business as a general contractor it makes easy to run your own projects, work with clients directly, and build something lasting. This work requires a good understanding in both the construction and the business side of things. You can become a successful contractor in business, if you plan well, follow the right steps, and stay organized.
What a General Contractor Does
Before learning how to start a business as a general contractor, you need to understand the work clearly. A general contractor is responsible for overseeing the starting to finishing of the construction projects. The contractor has to hire subcontractors like electricians, plumbers, and roofers, he has to manage the project timeline, ordering materials, and he has to make sure that everything follows local building codes.
In simple terms, the general contractor is the boss of the working place to handle all the things. You will be the person on whom the clients will trust to make sure their project will done right, on time, and within budget. So, you’ll need strong skills in project management, communication, and problem-solving.
Get the Required Experience and Skills
You should have experience in construction to be successful. Many general contractors start as carpenters, electricians, or plumbers. After this experience you will be able to understand how construction works, how to read blueprints, and how to spot problems before they become serious.
You also have to work under a licensed general contractor for a while. This gives you a view of real-world that how to run a project is like. Managing a full project is completely different task that even if you’ve worked in the field.
Knowing how to start a business as a general contractor means you also has to learn some business skills. You should be need to understand budgeting, billing, scheduling, and marketing. you can take short business courses online or at your local community college if you still don’t have these skills.
Choose a Business Structure and Register Your Business
The first official step is to choose your business structure. Mostly the general contractors register as a sole proprietorship, LLC (Limited Liability Company), or corporation, but each has its pros and cons.
- The easiest step is to set up sole proprietorship, but it doesn’t protect your personal assets.
- LLC is simple and it offers the legal protection therefore, it is the most popular choice.
- Corporation offers even more protection, but it’s more complex and costly to maintain.
After you choose the structure, you have to register your business name with your state and for tax and payroll purposes you will also need to get a tax ID number (EIN) from the IRS.
Get Licensed and Insured
Every state has their different rules about licensing, but in most states require the general contractors to pass an exam. These exams are taken to test your knowledge of construction law, safety codes, and business management. To show the proof of experience you may also need to submit fingerprints for a background check.
After you get your license, it’s time to get insurance. At the very least, you’ll need:
- General liability insurance – covers property damage and injuries
- Workers’ compensation – required if you have employees
- Surety bonds – often required by the state or local government
Getting insured is a key part of knowing how to start a business as a general contractor. Without it, you can’t legally work on most projects.
Set Up Your Office and Tools
You do not need a big office for this, but you will need a place where you can handle paperwork, or meet with your clients, and store your equipments. This could be a small home office or a rented workspace.
You will also need some tools and some technologies to run your projects:
- Project management software to track timelines and budgets
- Accounting software to handle invoices, payroll, and taxes
- A reliable vehicle for transporting tools and visiting job sites
- Basic office supplies like a printer, scanner, and filing cabinet
- Investing in good tools helps you stay organized and look professional.
Build a Strong Network
Your network is the most valuable asset in this industry. For plumbing, electrical, HVAC, painting, and more, you’ll need trustly subcontractors. tradespeople on whom you can trust start building relationships early on with. You’ll also want to connections with the suppliers, building inspectors, and even other contractors that who can refer work to you.
Word-of-mouth is powerful in construction. If you do a good job, clients and other contractors will recommend you. That’s why keeping good relationships is just as important as doing quality work.
Market Your Business
This is time to get your first client when your business is legally set up, licensed, and insured. Start with these simple marketing steps:
- Create a website that shows your services, contact info, and past work
- Set up a Google Business Profile so people can find you locally
- Print business cards and flyers to leave at supply stores or hand to clients
- Ask past clients for reviews and testimonials to build trust
Expensive of marketing does not have to be. Free options like social media and online directories also can bring you new leads.
Price Your Services Smartly
When bidding on projects, it’s important to charge enough to cover your costs and still make a profit. But pricing too high can push clients away. Start by calculating all your costs — materials, labor, insurance, equipment, and overhead — then add a fair profit margin.
It’s also helpful to research what other general contractors in your area are charging. This gives you a better idea of how competitive your pricing is. Knowing how to start a business as a general contractor means understanding that good pricing keeps your business alive.
Read more: Construction Estimate Template.
Stay Compliant and Keep Learning
Once your business is running, you’ll need to stay compliant with local laws and safety rules. Keep your licenses and insurance up to date. Always follow building codes and get the required permits for each job.
Also, don’t stop learning. The construction world changes fast — new tools, green building techniques, and safety practices come up all the time. Taking classes or getting certified in areas like project management or energy efficiency can give your business an edge.
Construction Estimate Template
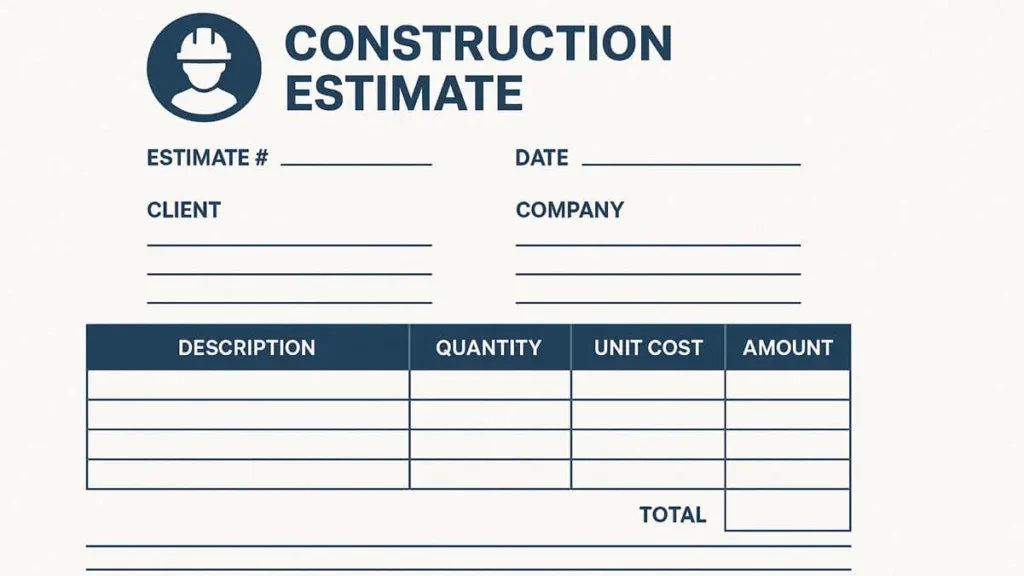
When the topic of budget planning comes forward, it is a well-known fact that estimating companies are available, providing top-notch services that lead to accurate costs. But, how is the accuracy and well-organized cost projections achieved?
One of the tools used the most to reach accurate and assembled results is the construction estimate template. The mentioned tool may not seem as important as others, but this is the way to keep the project, residential and commercial, within the view of the budget and the management planning.
In this short blog, we will deliver information about the templates, which include what they mean, the different types, what needs to be mentioned, the advantages of construction templates, and a lot more.
The Meaning of Estimate Templates for Construction Projects
Everyone is familiar with the concept of a construction estimate- how much a residential or commercial project will cost. However, when the word template is stuck in front of it, it can raise a question of its meaning. The concept of construction estimate templates is easy to understand. It is a ready-made form with a layout designed to insert the information of the construction project. Without a template, you have to ensure that nothing is missed by reviewing the details constantly, but with ready-made templates, all you have to do is read the heading and input all the details. The construction templates for calculation come in paper form and digital forms, such as an EXCEL file. This tool does everything quickly, reducing the time taken to perform estimates and making budget planning an uncomplicated task.
The List Of Different Construction Analysis Templates
The templates come in a variety. They are designed in varying designs to fit for the purpose and type of the different construction projects. The list goes as follows: select your pick and set an organized budget.
- Commercial Construction Estimation Template: A detailed template designed for complicated commercial projects. The estimations will be done for office buildings, big retail centers, manufacturing companies, and projects on a large scale.
- Residential Construction Estimation Template: A residential construction template includes the detailed sections for houses or residential structures and their style of construction,i.e., renovations or extensions.
- Quantity Estimation Template: A breakdown of the material and labor will be used in this template to define the quantity of materials and labor needed for the residential or commercial project.
- Detailed Cost Estimation Template: The word detail emphasizes that every single item is included in the template, from material list to taxes and permits.
- Unit Price Template: This template estimates based on unit price cost, including the total per item, unit measurement, and other types of unit price.
- Preliminary Price Template: With this template, the basic and start-up details are estimated, such as the construction type, the project size, the location, and the predicted materials.
What Needs to be Written InA Construction Estimate Template?
Most of the templates used for construction cost estimation need to include the following items. When using templates, the following items must be covered. Here are the factors and a brief description.
1) Construction Project Data: The project type, the assignment’s scope, the contractor’s name, the customer’s name, when the project will begin, and when it is predicted to be completed.
2) Work Report: Write a detailed information paragraph of the project, which does not leave any factor out. Include and explain the dimensions of the project, what needs to be done, how much work needs to be done, and how many sections there are in the single task.
3) All the Materials and their quantity: List all the materials required in an organized way. Each material should be included with a breakdown of its quantity, unit cost, and total price.
4) Workforce: In the template, write about the workforce being used for the project. That means the number of the workforce, their professional level, hourly rates, and the estimated hours the labor is required.
5) Subcontractor Estimation: Hiring subcontractors is common in construction. So, do not forget to add the subcontractor fee for an accurate estimation and budget.
6) Permit Estimation: Include all the permits important to the location and the specific type of building.
7) Equipment Estimation: The rent or purchase of heavy machinery, safety equipment, and tools should be contained.
8) Contingency Cost: Most miss this out, but when making a template, add the estimated contingency cost because a construction project is full of unexpected shocks.
9) End with Total: Once you have added all the relevant details in an informative manner, add the total price estimation.
Where Can I Access a Construction Estimate Template?
The templates for construction projects can easily be accessed via various sources. EXCEL and Google Sheets are two places where free and professionally made templates can be found. Furthermore, there are free websites available, such as Template.net, which is another source for estimating templates. The choices are all over the internet. One way to find the best templates, check whether they are easy-to-navigate and have organized sections for work information and project details.
Read more: The Skills to Meet the Construction Estimator Job Requirements.
The Digitized World of Estimation Templates
The building project estimation has taken a more modern and quick route in recent years by doing the calculations digitally. Even the templates that were once used to be made on paper have shifted to being computerized now. That has made it easier because now you can edit a mistake or miscalculation instead of starting from the start. Additionally, the templates can be shared with clients and subcontractors in real time, ensuring that the team stays updated. The templates are automated and have drop-down options, saving time and making it easy for a new or inexperienced person to use.
A template for construction projects eases the burden by setting the workflow in a smooth run. With different kinds to pick, knowing what needs to be inserted, and digital advantage, use the templates for the benefit of the project and estimate accurate cost projections.
The Skills to Meet the Construction Estimator Job Requirements
Have you looked at the building, wondering how they decided the resources, size, and the complete details of the structure to start building it? The contractor or builder themselves are not involved in that procedure. The task of rolling out the cost for the construction project is left in the hands of a construction estimator.
A construction project has a team assigned with various tasks, but the success of those tasks and the construction itself depends on how well the estimator performs. If you are interested in the work of a construction estimator and want to make it a full-time job, the chances are it will become the best career option. Therefore, it is vital for you to know the skills demanded to meet the construction estimator job requirements.
The Job of a Construction Estimator and Its Value
The main thing needed from a construction estimator is to accurately figure out the complete price of a building project. The total expense includes calculating the estimates of material expenses, labor fees, equipment expenses, waste factors, time management, contingency expenses, and other expenses the project calls for. They need to ensure the project’s estimate and total cost meet the set budget, use good quality material, and the project has a profit margin.
This job holds a lot of significance because one error in calculation can lead to a costly mistake in the construction. A construction estimator delivers an opening to the builders by providing them with a financial direction. The estimations that the estimator calculates are done with deep research and the help of new pricing in the local market to save money, waste, control uncertainties, and follow a timetable. Hence, making the position the most consequential aspect of the construction project.
The Requirements of the Job
A construction estimator’s job is demanding. Likewise, the requirements also require a great deal from candidates applying for it. If you check the following conditions, or most of them, applying for the job is the next step.
- When applying to a company, the first requirement will be the educational background. The candidates must have a college/university degree in civil engineering, architecture, building science, and construction management.
- You should know all about what is included in an estimation of a construction building- residential, commercial, and industrial. Be updated with the local market, current pricing, and the quality of materials. Furthermore, the candidate needs to have knowledge about the construction process and what type of materials are used.
- As the job revolves around numbers and calculations, the candidate must have mathematical skills. The estimator should know how to work with different formulas, how to measure accurately, and research everything to make precise cost estimations.
- Construction estimation in current periods is done on software. The estimation job requires the estimator to have the skills of using software for estimations, project management, budget planning, and more.
- An estimator’s task is not just creating estimations for a cost-effective budget, but making accurate estimations. Without accuracy in the numbers, the job has no meaning. Therefore, the candidate must have a good attention span that focuses on each cost estimation, ensuring they are valid for the project.
There are other skills that are included in the construction estimator job requirement, and the estimator should be an expert in such areas are teamwork, organization, time management, and communication.
- Teamwork is also the key to accurate estimations because a construction estimator works with different teams involved in the project to get their opinion and data.
- Strong communication skills are a requirement so the estimator can explain how the calculation is done and speak professionally to the stakeholders, explaining the cost breakdown.
- The job demands organization. There are several aspects to undertake at once, and even the cost estimation report needs to be neat, understandable, and organized.
- The last talent the job needs you to have is time management skills. You need to know how to manage the time you are given to research and calculate estimations, ensuring that the cost report is completed on the deadline.
Do Construction Estimators Work for Someone?
A construction estimator does not do cost analyses of a project and proceeds to present it to the client; they are always working for someone. If you want to make this job a career, then you will be working for general contractors, subcontractors, engineers, architects, developers, and sometimes even for the government for industrial projects.
Is a Construction Estimator An Office Job?
Construction estimator work primarily from their offices, but there are a few firms that permit them to operate from home, as all the information about the project is provided to them. However, the estimators do need to go to the location occasionally, if it is necessary, to get more information and understand the project better.
Can I Apply Without A Degree?
For those who lack a college degree but are still passionate about the estimation job can apply without a degree! If you have mathematics skills and knowledge about the field, you can get the role as a junior and from there, after gaining more learning regarding the work, you can be promoted to a higher position.
Are Any Certifications Required to Show?
It is not included in the job requirement to show certifications. The certifications can still help a great deal in getting a job in large companies, which include having the Certified Professional Estimator (CPE) and Associate Constructor (AC) certifications. Remember, they are not a requirement, and most companies do not ask for them.
Read more: Construction Estimating Software for Small Business.
Final Words
In conclusion, the construction estimation job requirements are a lot to meet, but there are great benefits of making such a field a career. The construction world keeps growing, boosted by demands, making it a fine job for a more profitable future. Educational background, knowledge of the field, mathematical skills, software usage, attention to detail, communication, teamwork, organization, and time management are the requirements you must meet to land a job as a construction estimator.
Construction Estimating Software for Small Business

Being the owner of a construction company is not a straightforward assignment to carry out. Running a small construction business is another story. You do not have a team big enough to be divided into their respective task, making you work with limited help. A small business has to manage diverse tasks, which range from managing the location to the most important one- construction cost estimation.
Respecting time is crucial in the world of the construction business to remain on top and win bids before your competitors by presenting them with accurate estimations, plus to manage the project schedule and budget. Construction estimating software for small businesses has been developed with the purpose of lessening the pressure by supplying quick cost estimates.
As a small business, if it’s your first time using software to estimate, and you do not know what it does, here is an overview. A construction estimating software calculates the total cost of a project- direct and indirect costs, waste factor, contingency cost, taxes, additional construction designs, and all the stages of the project. Get to know more about the estimating software for small businesses and how to take advantage of it.
The Software Available for Small Businesses
- ProEst
- Buildertrend
- STACK
- Houzz Pro
The four mentioned are the first-grade software that every small to start-up business needs to employ for estimation. The features that can be found are cloud-based access, client communication, project management, analysis of designs and measurements, schedule designer and tracker, and an advanced estimation procedure. All the software is paid, but free trials are available to use and consider which one you prefer as the construction estimating software for your small business. However, these are only examples; doing some more research will show results for a long list of estimation software to assist small businesses to change to larger companies by aiding them with accurate estimation calculation. Every software creates a foundation for your business, making it comfortable to land in the local market and start presenting the quotes.
How to Tell If The Estimating Tool Can Be Trusted
Estimating tools for your small company can be found on the internet, but choosing a trustworthy one is vital. There are a few features that every construction estimating software for small businesses has, and the tool has these qualities- it can be relied on.
1) The inclusion of current data on construction pricing is necessary, which includes having pricing available for material and labor for all types of projects. Plus, there should be an option for custom pricing, where you, as the customer, set the cost according to the work.
2) Templates need to be a feature of the software. They should be pre-built to save time. In these templates, you input all the information regarding the project accurately.
3) It should allow you to access the software from all the devices, making it effortless to access the estimating method from the job site or anywhere, guaranteeing access is constantly available. If the software allows you to work from a phone or tablet, it makes the work flexible and the software solution dependable.
The Starting Point
The way to start using the software for estimating the projects of your small company is to start by using the free trials the tool has to offer. From the free demos available, you can understand the interface of the software and how many elements are obtainable that make it a tool to adhere to for forthcoming assignments. With a few times of free trial periods accessible, the team can increase their skills and gain new insights to use the software for construction cost estimation.
There are additional features to focus on. The second crucial factor is to know what type of estimation your project needs- should it be detailed or enough to estimate the overall cost? Additionally, make templates and add every detail about the project, even make space for custom demands. Setting up templates saves time and smoothens the strategy.
The Reason Why It Is Required for Small Businesses to Use Software
With software estimation tools, small companies set a name for themselves in the industry. It shows potential customers that you are capable and serious about doing complex to simple work, making the business gain the reputation of a professionals. Furthermore, the software neatly does the work, creating an understandable cost breakdown of all the cost estimations. That makes it easier to divide the stages of the project and allocate resources to each stage.
A small construction business means you need to show your bidding to as many clients as possible in a quick form, and manual estimation is not the ideal choice. Estimating software has built-in calculation features, creating an estimated quote report in minutes to present to the clients and get the project started. Manual calculation has a high risk of miscalculations, which is not a good review of a small estimation business. The technologies used for estimation have an automated calculation feature installed that eliminates errors and ensures that accuracy in pricing is maintained.
Using construction estimating software for small businesses brings significant change is the professionalism of the company and its reputation. The competition in the construction estimation and takeoff market grows enormously; estimating software is the solution to stay in the local market and promote the company’s name.
Read more: How AI Construction Estimation is Taking Over the Field?
Final Words
In conclusion, building projects successfully is possible when the company is well-known. Promote the name of the company by using advanced and swift estimating software for accurate cost calculations. The difference between manual and technology estimations will be seen when time is saved, there are no mistakes or errors, it becomes easy to update prices, and you are winning more bids due to presenting the estimation quotes at the right time. Start by making yourself familiar with free trials, and gradually start utilizing premium features for outstanding analysis outcomes. Start the business by making the smartest move by using construction estimation software.
